

|
|
|
 April 17th, 2007, 13:53
|
#1 |
|
Administrator
|
TM-VSR upgrade guide 56k=death
To start off if you break your gun by doing any of the following I will not be held responsible. This is just a list and set of pictures of things I have done to my vsr.
Stock Removal 1.On the underside of the stock near the mag well you will see two allen key screws. Also make sure to remove the mag before removing the stock. 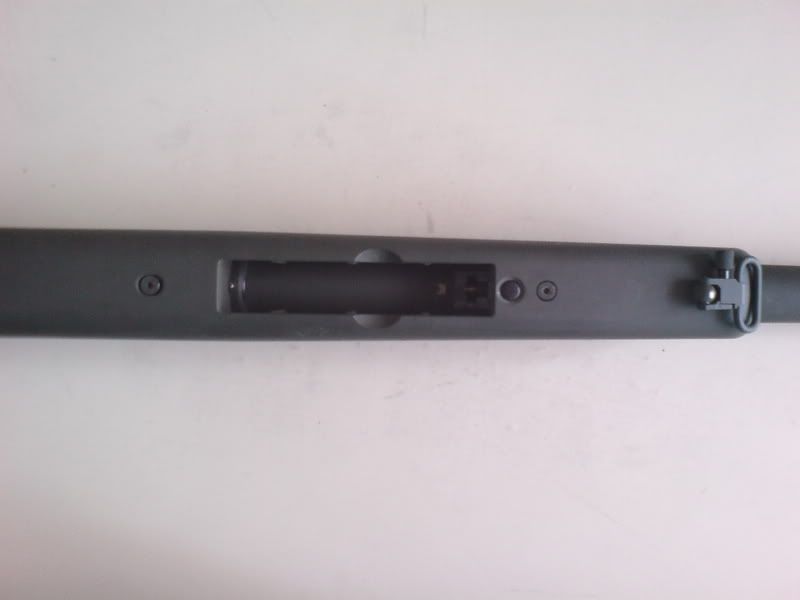 2.Now you will notice the longer screw goes towards the back of the mag well. This is the section that would be closest to you when shouldering the gun. The easiest way to tell is you can see the threads for the short screw. 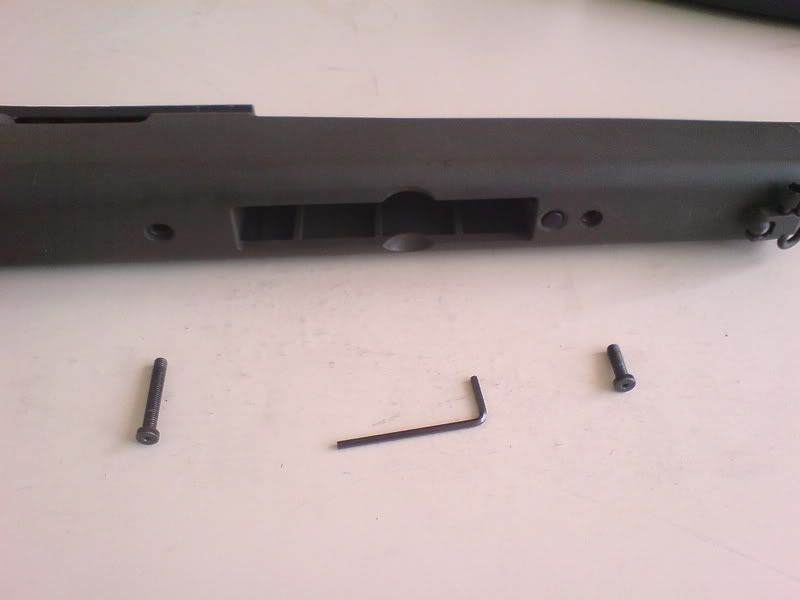 3.Now lift the muzzle end of the rifle upwards and then pull forwards. This wil remove the barrel trigger assembly from the stock. 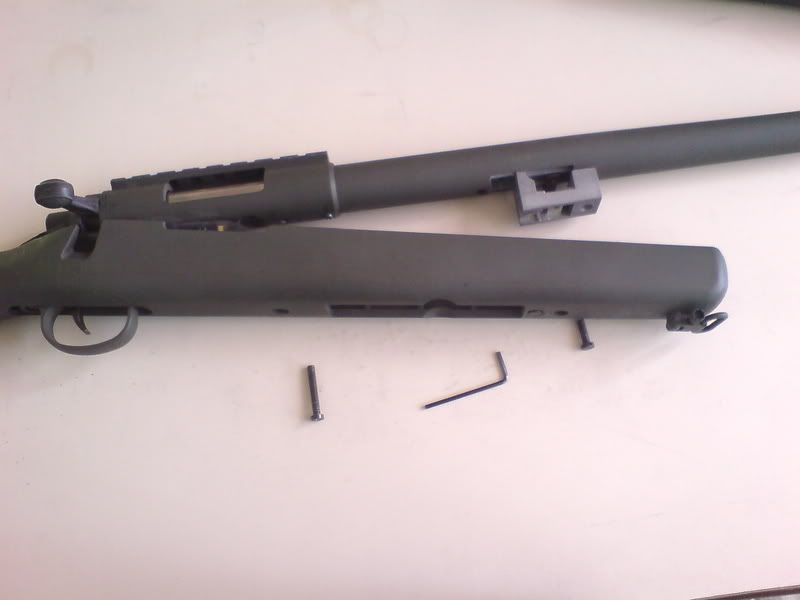 4. Make sure to not let this piece fall out. Put a piece of tape over it or something. 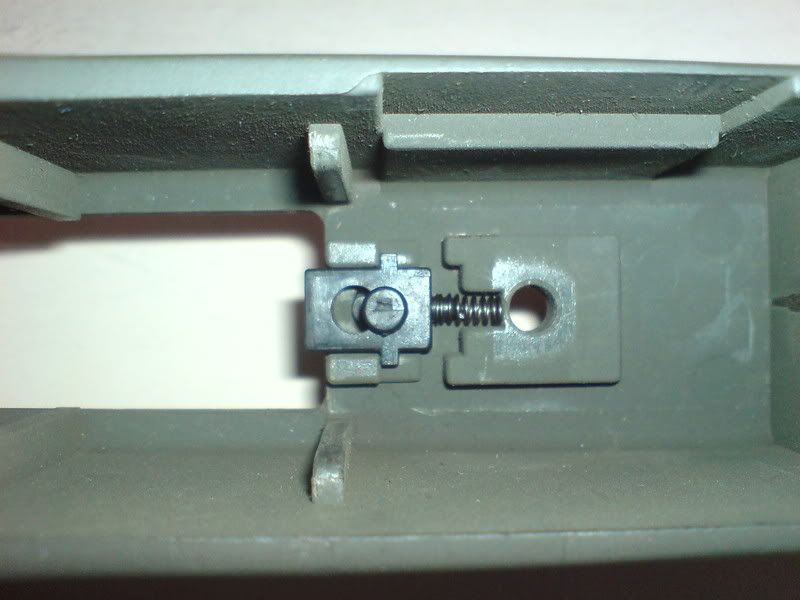 You are now done removing the stock. Trigger group removal 1.First you need to remove the screw at either end of the trigger system. 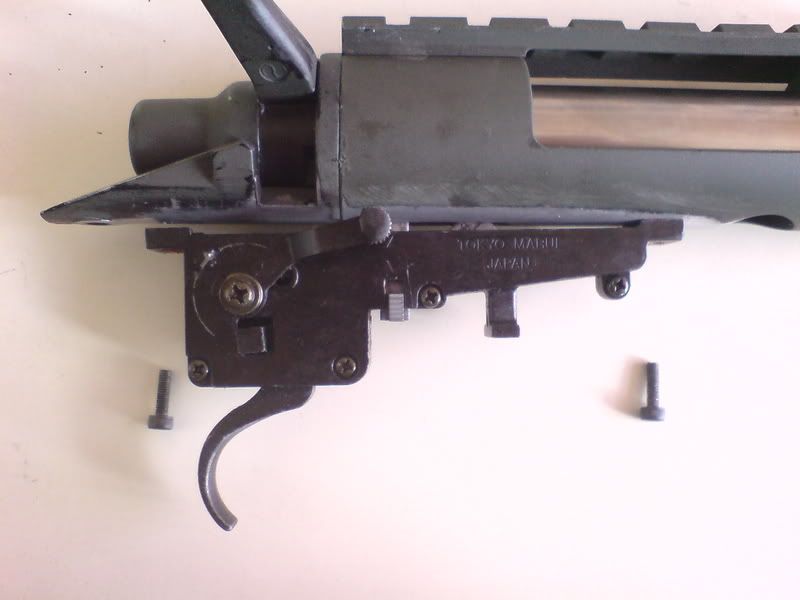 2.Now pull the large pin out that has two arrows on the side of the trigger system. This pin may be in there good so use some muscle. 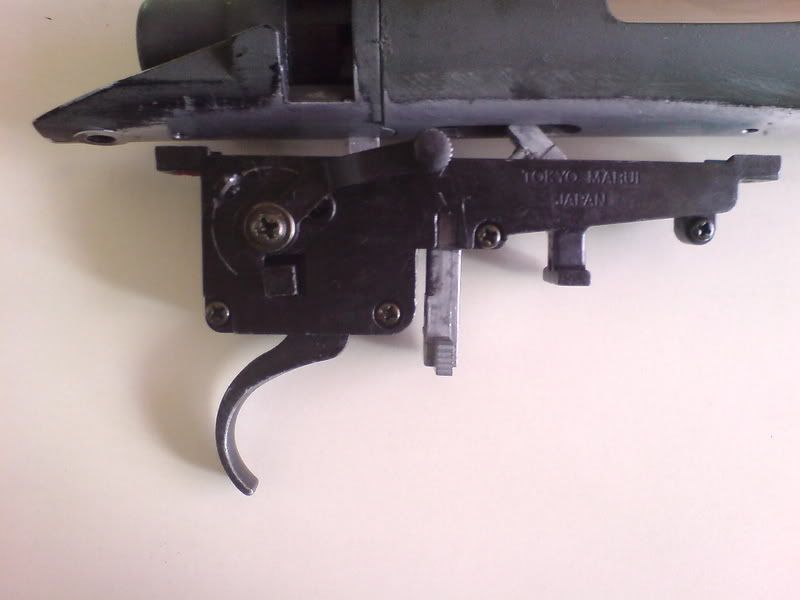 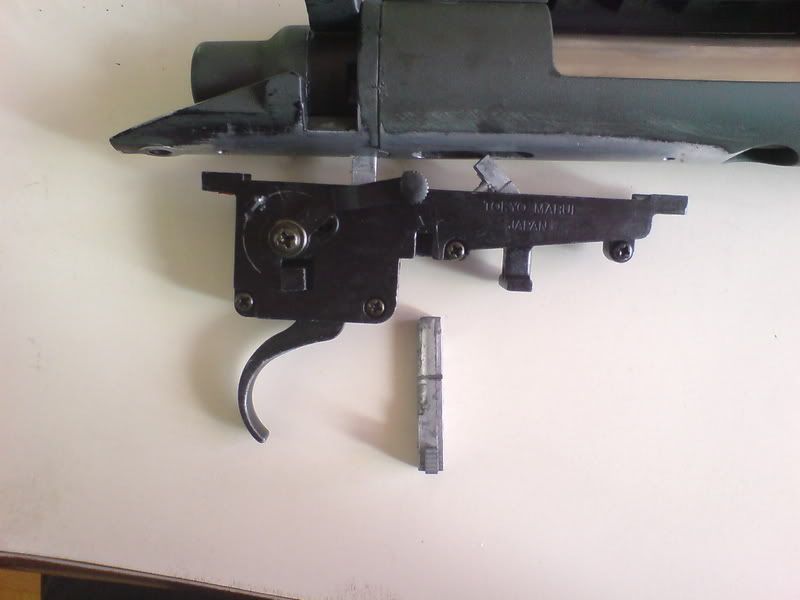 3.Pull the cylinder and cocking handle and the entire cylinder should remove. Your done that now. Last edited by bean; January 4th, 2008 at 13:01.. |

|

|
|
April 17th, 2007, 13:53
|
#2 |
|
Administrator
|
Cylinder take down and upgrade.
1. You will need a drill press if you want to use the stock cylinder. If you do not have one I recommend buying the cylinder head pro and Teflon cylinder. There is a small brass pin attached through the cylinder into the cylinder head. Find the correct sized drill bit and slowly drill this out. When you notice a change in resistance stop. This means the pin is completely gone. Do this at your own risk I know my way around tools well enough to do this. 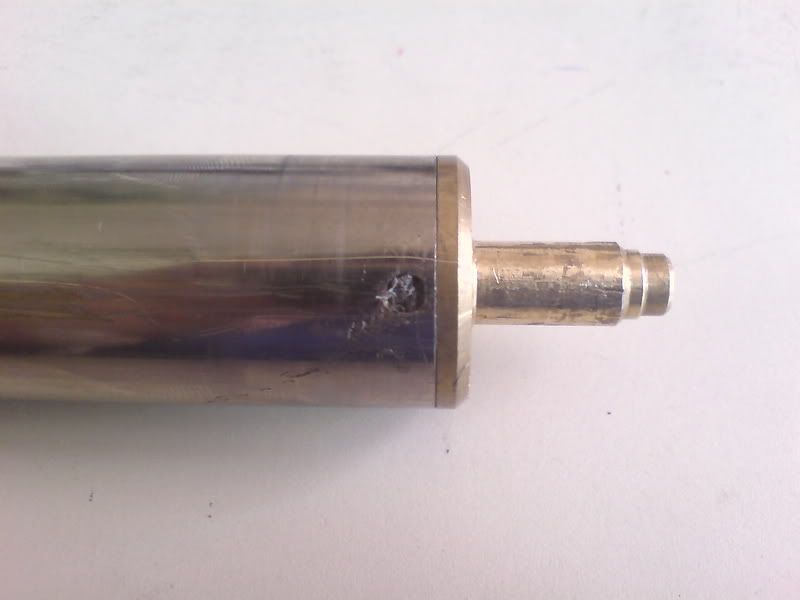 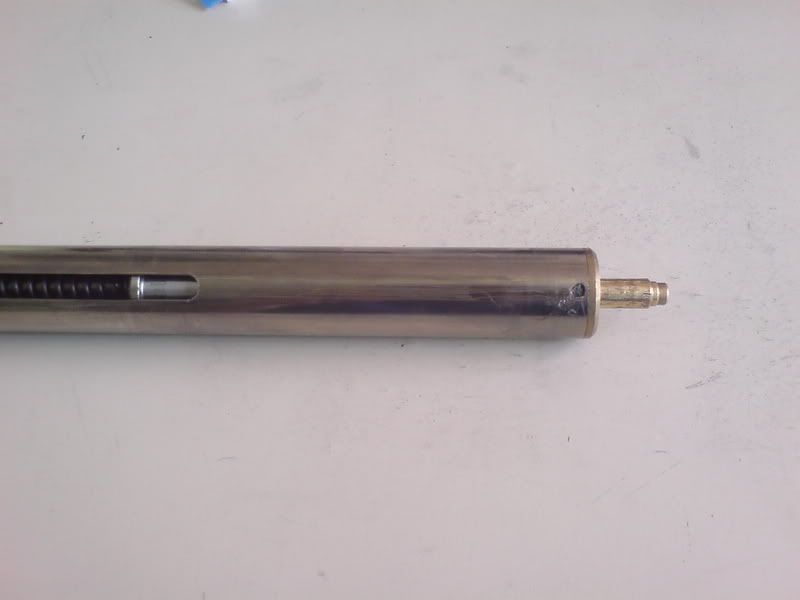 2. Now that the pin is removed you need to remove the cylinder head. If you wrap it in tape and carefully use a set of pliers this will remove it. It can also scratch it but the scratches as long as not sharp have no effect. Or you can do what the picture shows and use an allen key. It turns off like the normal righty tighty lefty loosy. 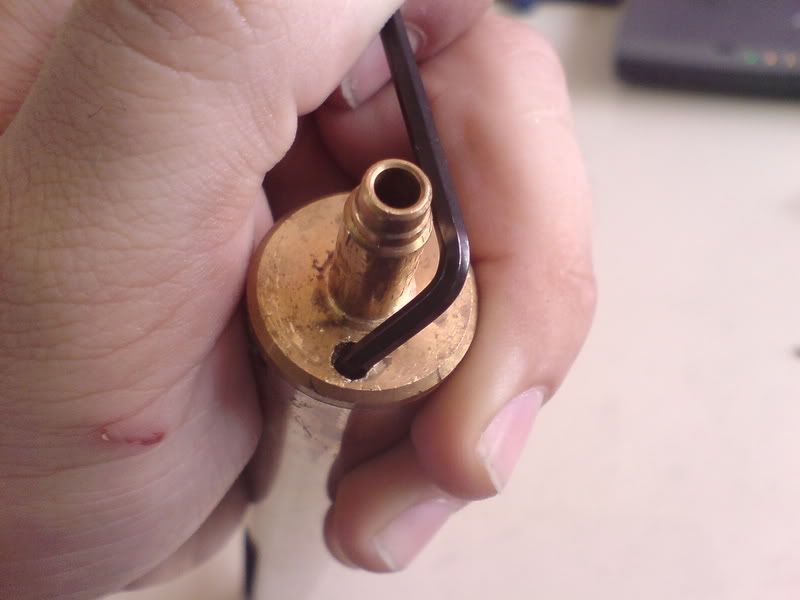 3.Now that this is done a whole pile of stuff will spew out. NOTE: I have the real shock version. This means that my piston has metal weights attached to make the gun shake a bit. If these weights are removed it will boost your stock guns fps. (the orange one is the one that comes with the zero trigger) 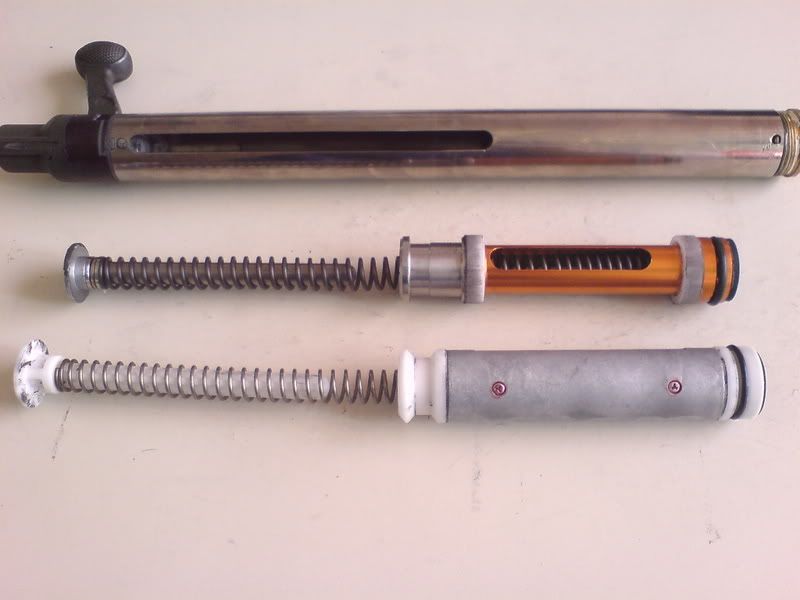 4. This just illustrates the normal piston and sear set up before upgrades. 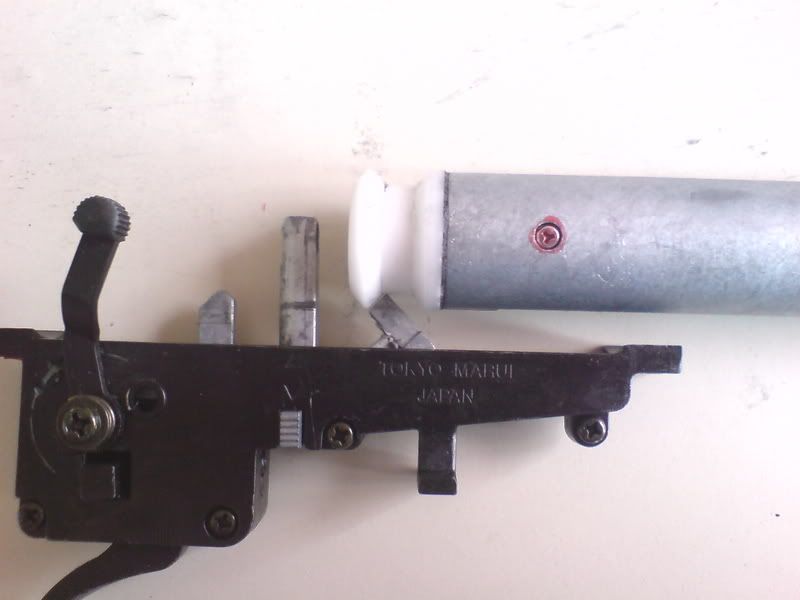 5. This shows the zero trigger and all of its glory. It has a much better sear setup with steel sears that will last long for almost all upgrades. In other words buy it and forget about buying sear upgrades. You will be much happier and far less stressed. 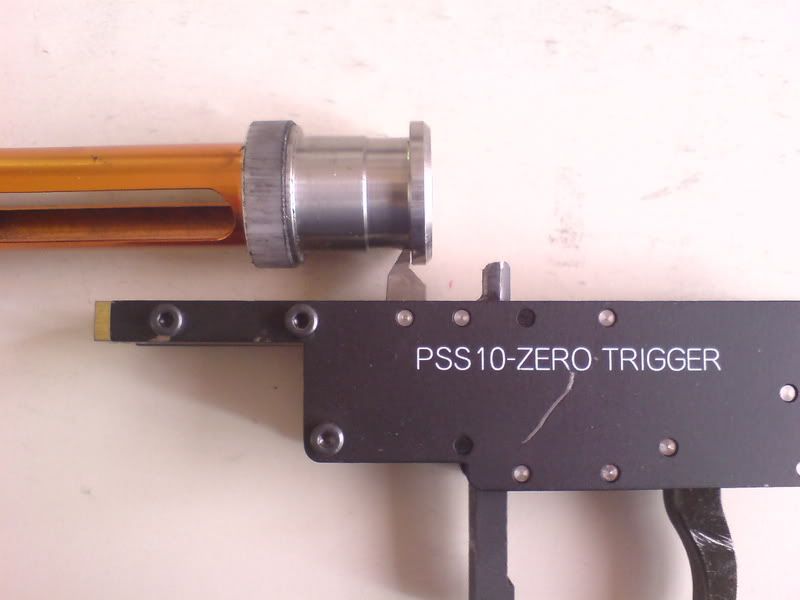 6.The difference between the stock plastic spring guide and the upgraded metal bearing spring guide. 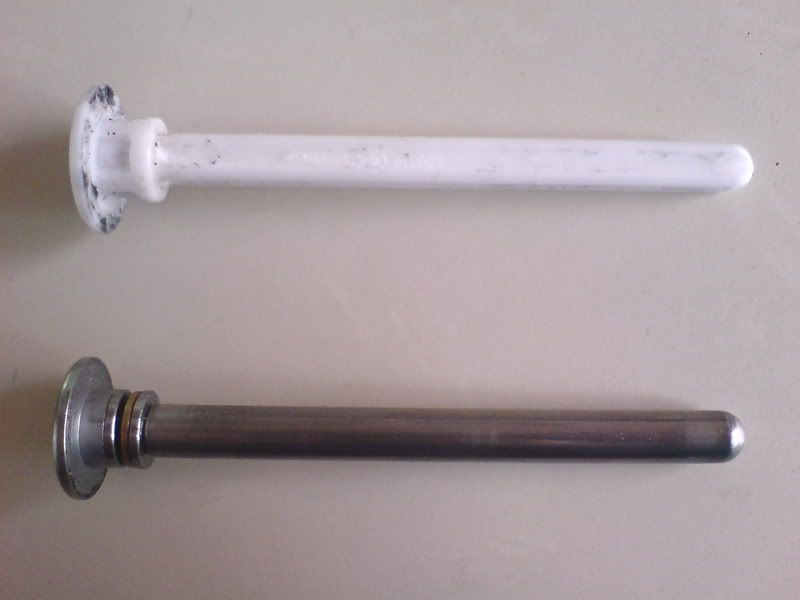 7.Now this is one of the annoying parts to the spring guide. It does not come thread locked and unscrews. So when you go to cock the rifle the cylinder hits the head of the spring guide not allowing the sear to engage. Loctite or Teflon tape the shit out of this piece. 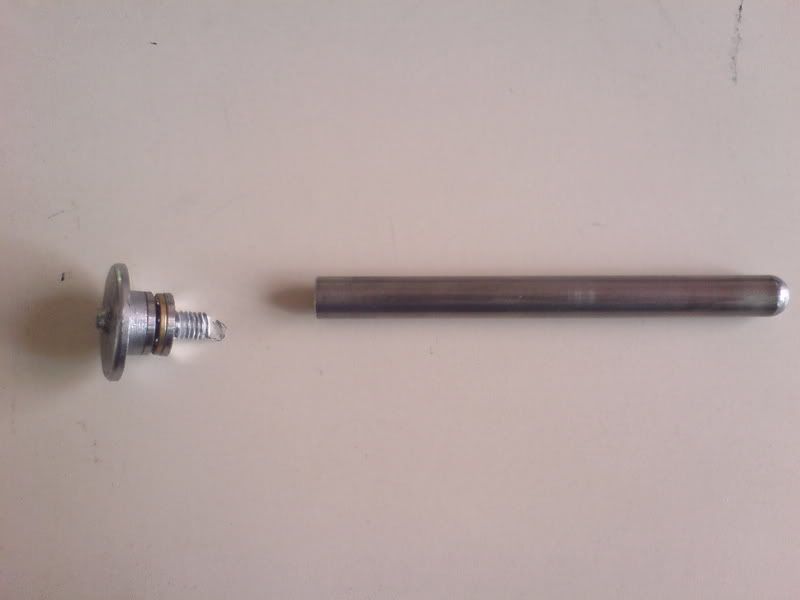 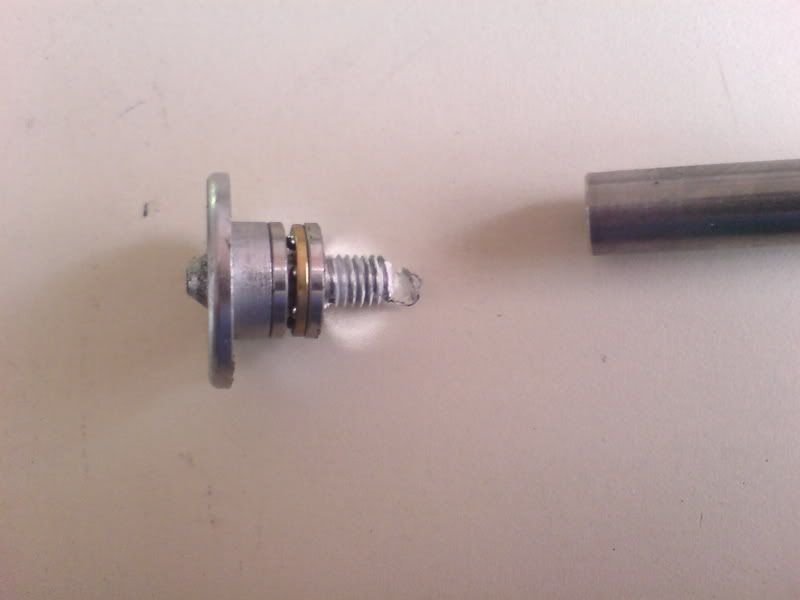 8.On to the new upgraded piston. This piece is very nice. However it comes with its problems also. The piston has a smallish oring on it. When it shoots forward air is let through the piston head pushing the oring out and making a seal. However at higher velocity's air rushes past the oring and gives the user a fps drop. To solve this remove the oring and put the stock on on it from the tm piston. It is slightly larger in diameter. The piston also comes with a white shaft called the silent shaft. Don't use this piece it will cause your fps to vary greatly. It plugs the cylinder head when the piston is forward creating a pocket of air to slow it down making the gun quieter. Instead install the metal grub screw the gun comes with or cut the shaft down. Teflon tape the grub screw so it does not hit the spring guide. 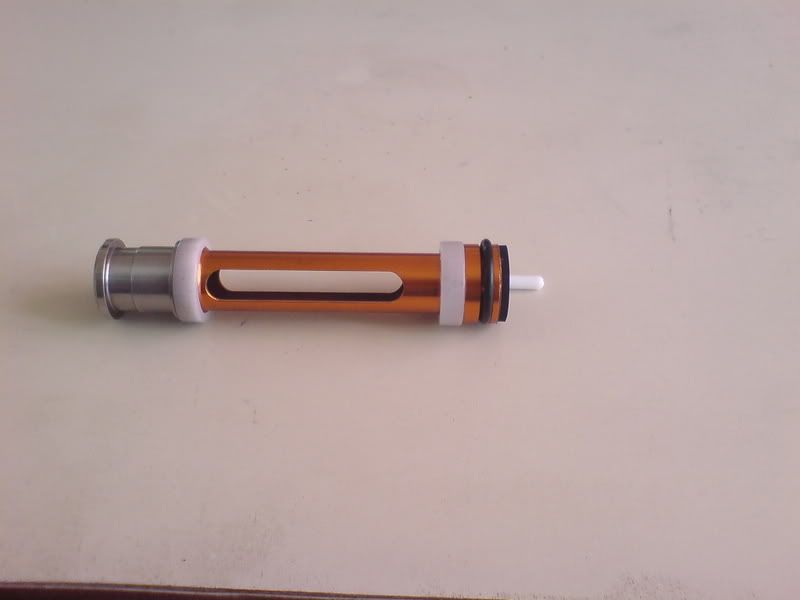 9.Shows the grub screw in place of the shaft. 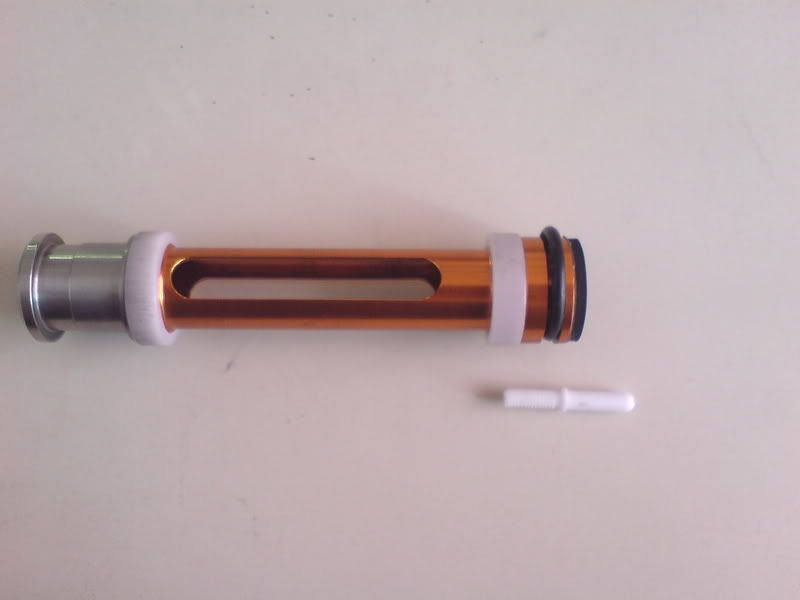 10.Dampers aren't needed but removes some of the wear and tear on the piston and cylinder head. It gives a slight variation in fps however but I consider it a evil I can put up with. They stick onto the cylinder head not much more to be said about that.  11.Cram all of the new internals back in. If you have a upgraded spring you will notice the spring is longer then the cylinder. Don't panic this is normal. Its so that when the spring settles it is still strong enough. Just give everything a push and start turning. It helps to have another person with you on this one. Teflon tape the threads of the cylinder head. 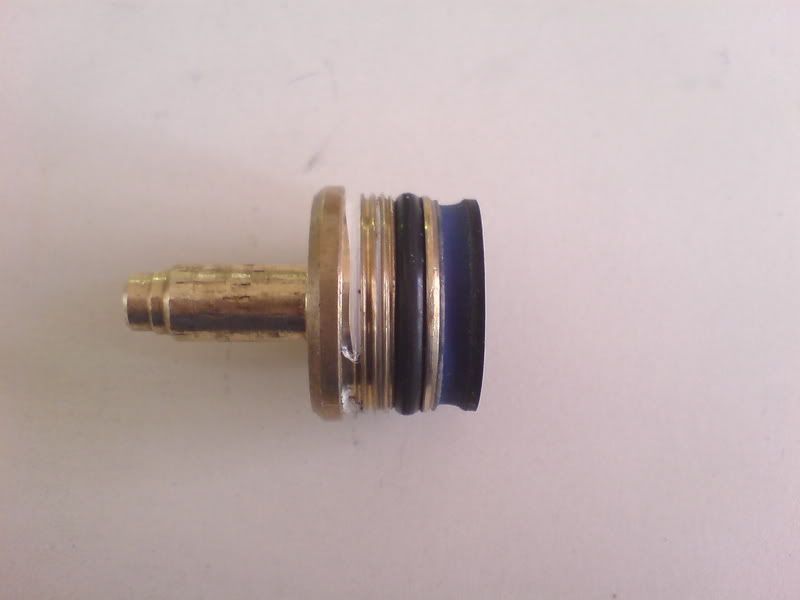 12.These are the same spring one has settled the other is new. I no longer have a picture of this but when you install a new spring it will seem oddly long. Don't worry in time it will shrink down. Now that that is done now for the new trigger. Last edited by bean; January 4th, 2008 at 13:17.. |
|
|
|
|
April 17th, 2007, 13:54
|
#3 |
|
Administrator
|
Trigger
1. The zero trigger is one of the best upgrades you can get. However it comes at a price. It does not have a safety. It also requires a tiny bit of modification to the trigger guard. Cut as shown on the back of the package. It should look similar to this. Keep setting it on the rifle with the trigger loosely sitting on it to check for fitment. 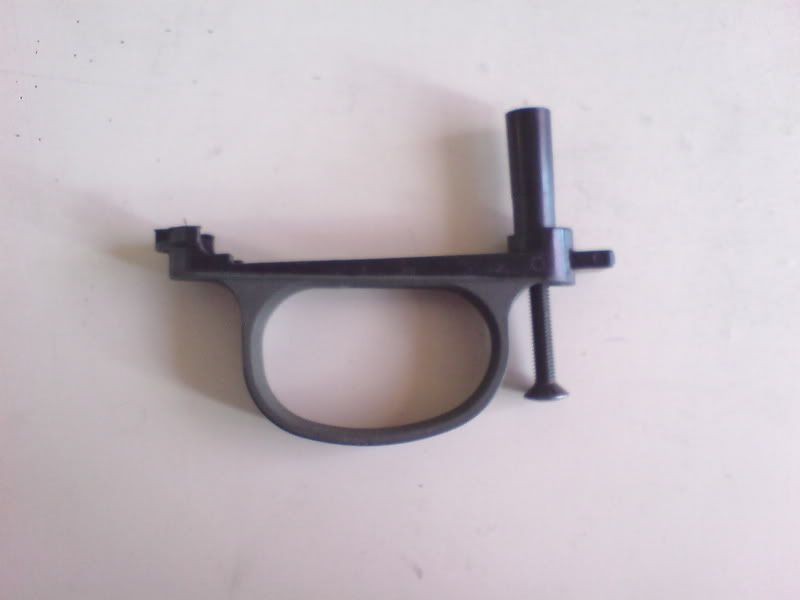 2. Do not do this unless you are having lots of problems and they aren't solved by my problem solving advice to come later. I had to file down my receiver to ensure good sear catching on the piston. If you own a copy of the tm rifle you might have to do this more so then with the normal tm. I know what I was doing before attempting this and what to look for.  3.To install the new trigger you must remove the small brass block at the back of the zero trigger. Screw this to the gun first then attach the trigger to it. 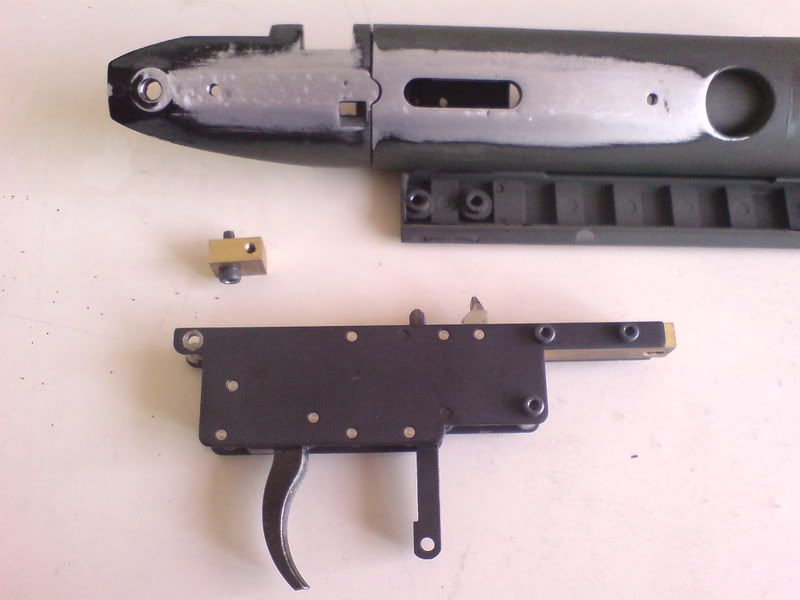 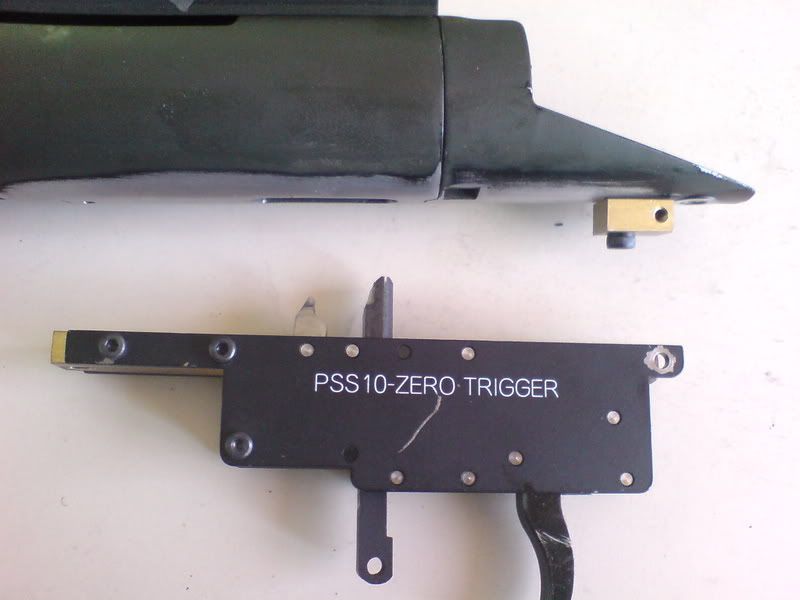 4.Screw the rest of the screws in. Now you must pull down on the the rod that has a hole in it within the trigger system this will make it drop down so the bolt can be slid in. Slide the bolt in and push that pin back up. Attach the trigger guard should look something like this. 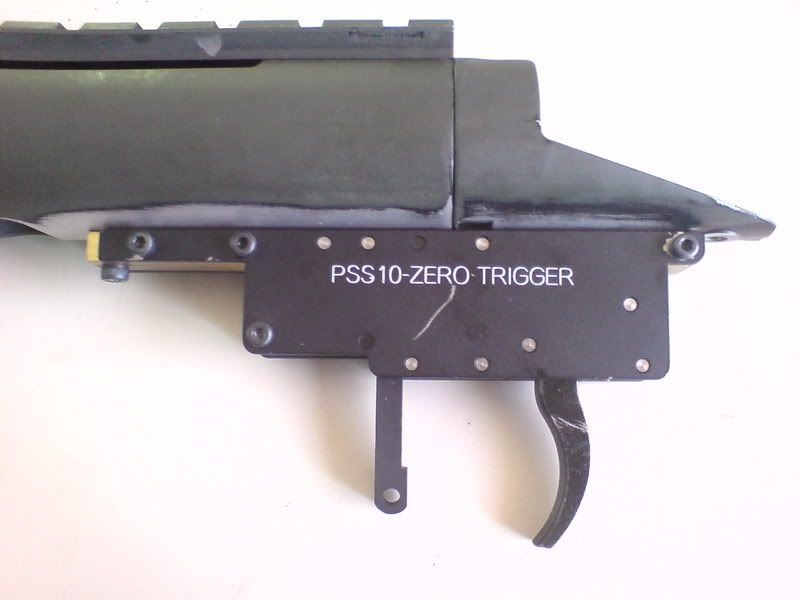 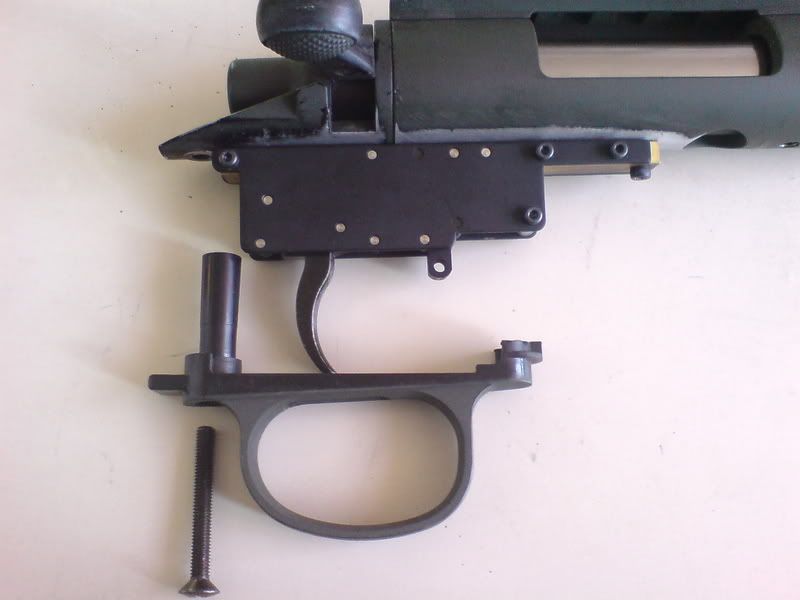 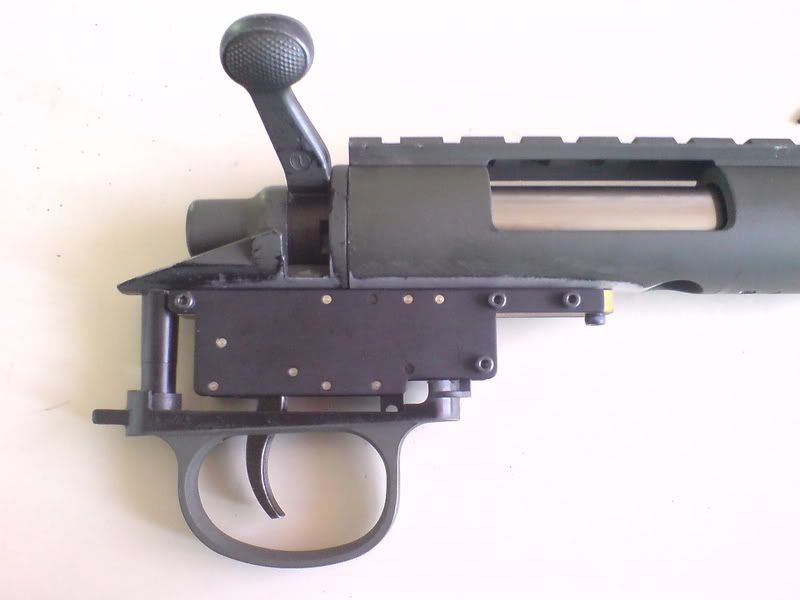 Now just follow the reverse of my steps with the stock and your good to go. or continue on for barrel hopup and silencer. Last edited by bean; January 4th, 2008 at 13:21.. |
|
|
|
|
April 17th, 2007, 13:54
|
#4 |
|
Administrator
|
Hopup Unit and Barrel
1.Once the barrel and receiver group have been removed from the stock you will need to remove two screws. Possibly only one depending on how your top is set up. You need to remove the allen key screw that is at the very front of the sight rail. Then you have to remove the phillips (the cross screwdriver) screw from the underside. 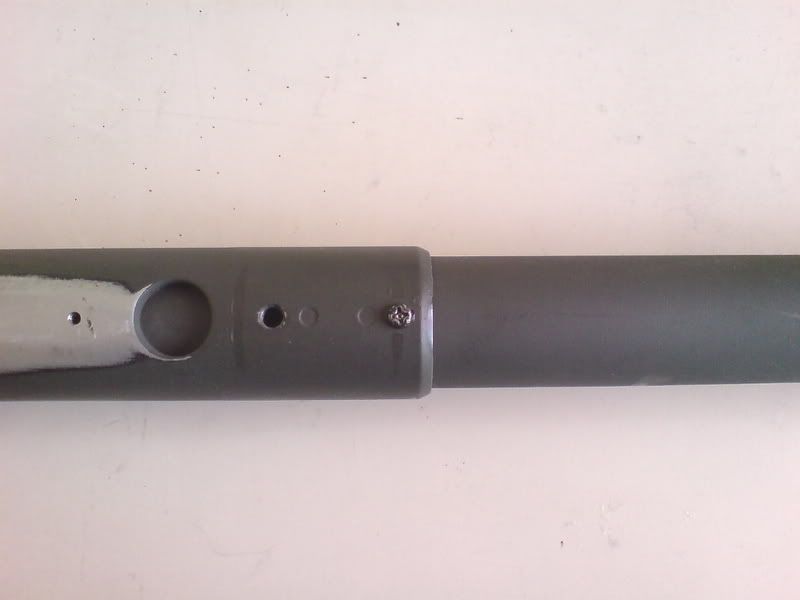 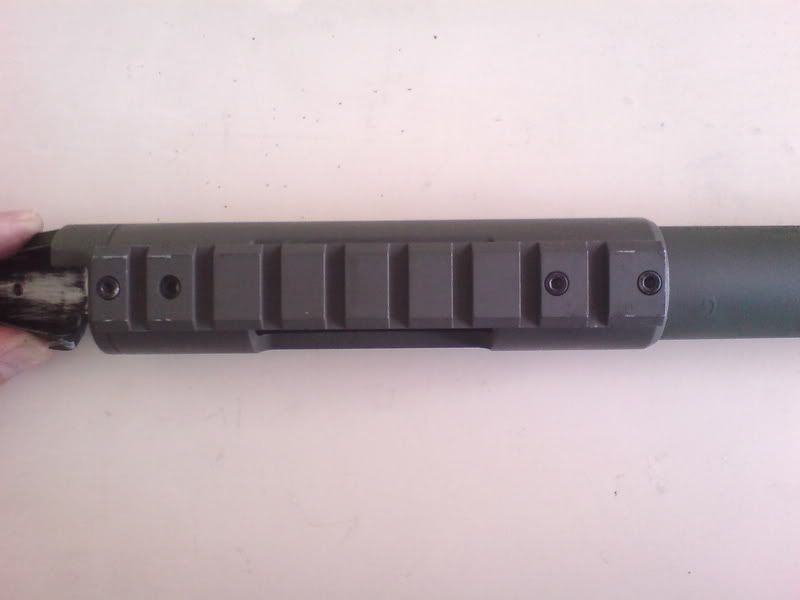 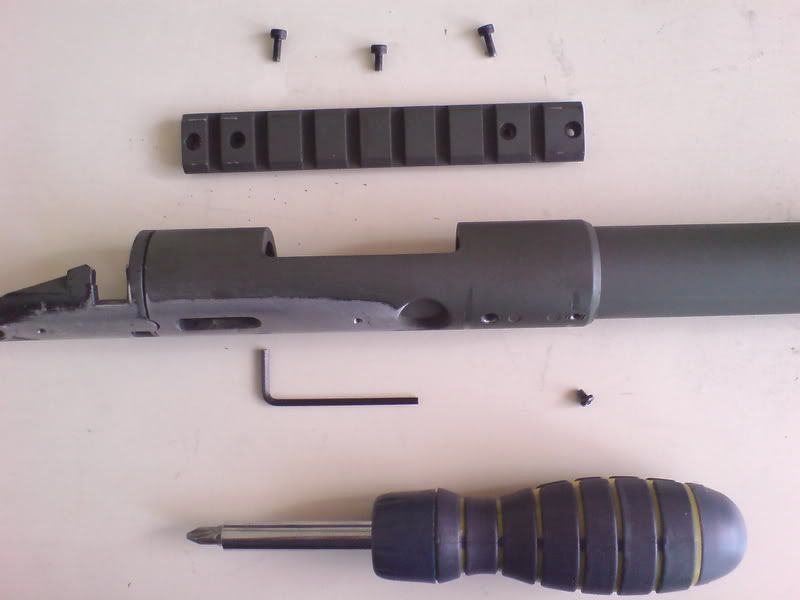 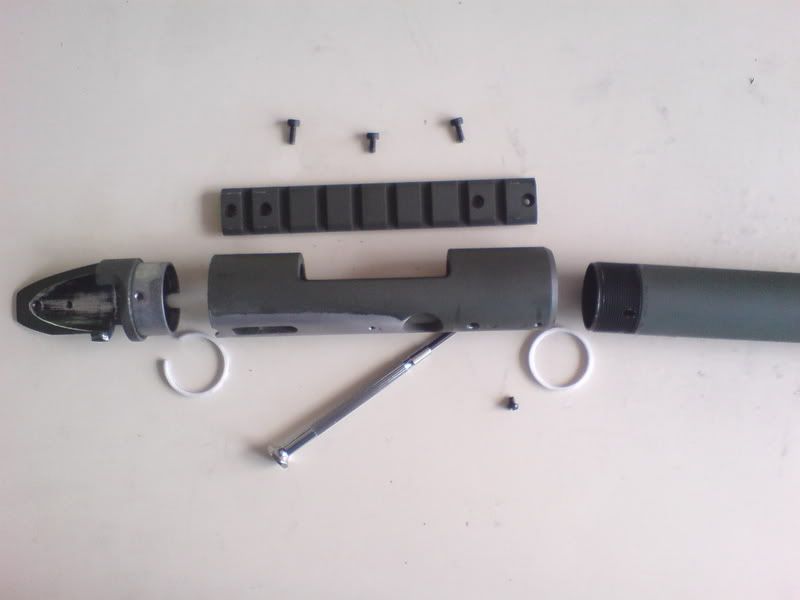 2.Remove the outer barrel by turning it. Once this is done you will be holding the outer barrel hopup and barrel as one group. 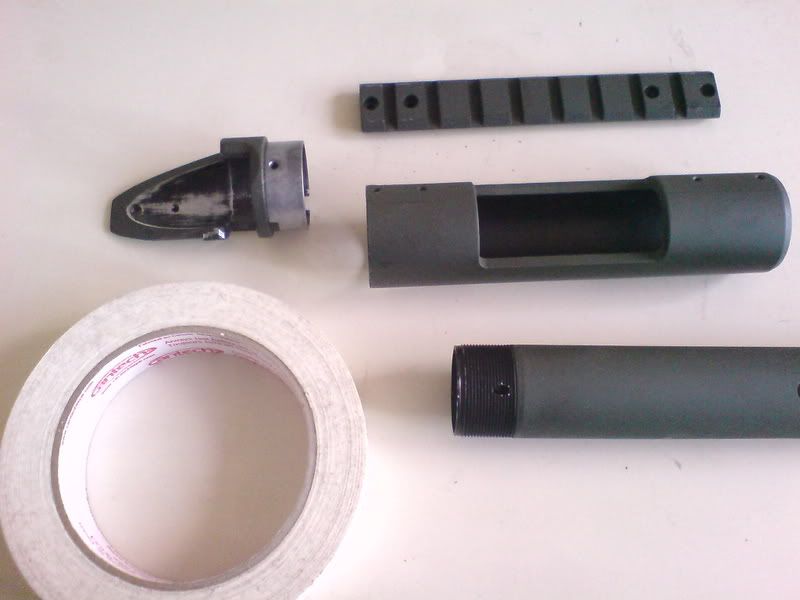 3.To remove the hopup and barrel group you will need to unscrew the large metal bracket that protrudes from the hole int he outer barrel. It has two screws to remove.  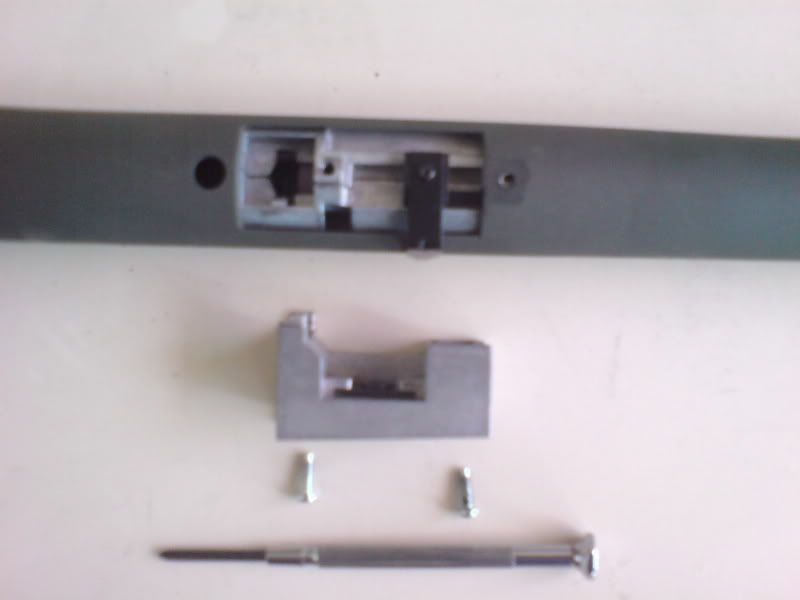 4.Once this is done you need to unscrew the hopup adjusting arm. 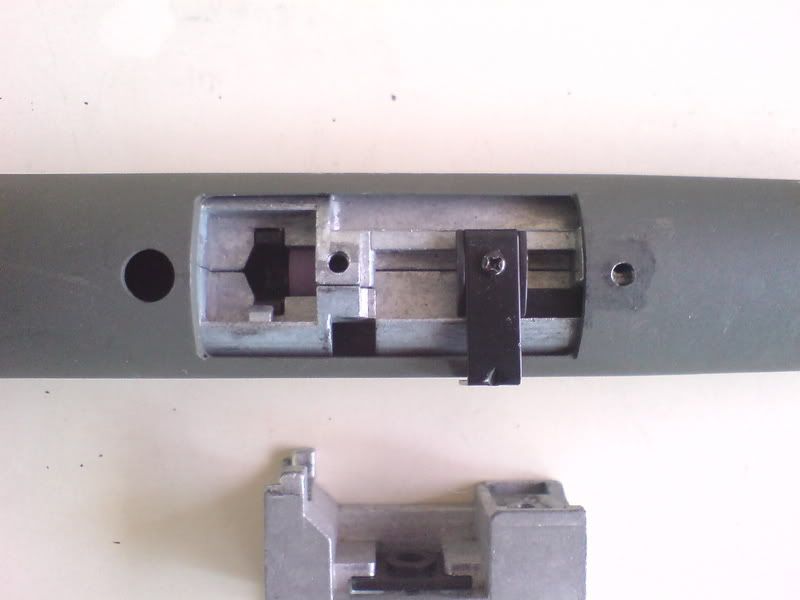 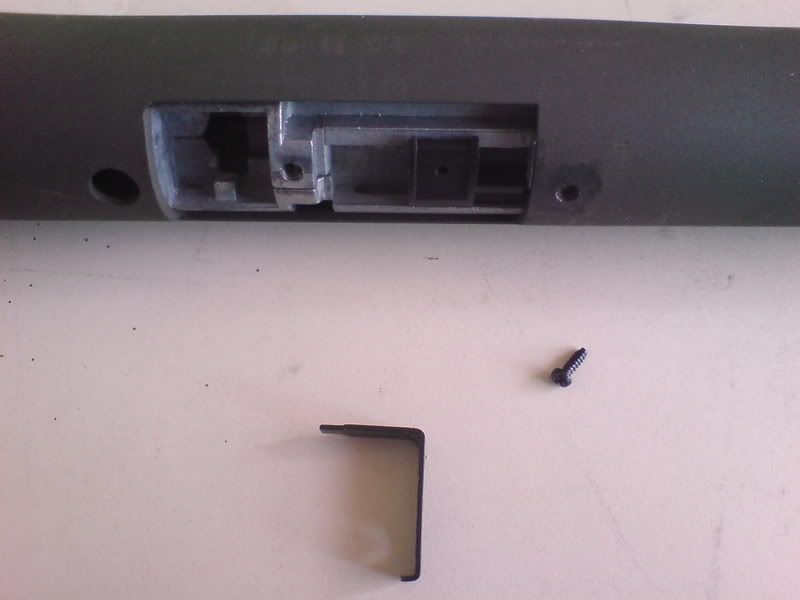 5.Now you should be able to slide the inner barrel and hopup unit out with your fingers. (if the hopup unit is stuck when pushing it out you can use a screw driver to aid in its removal. Put a bit of electrical tape on the end of a screw driver to act as padding. Then insert this in the barrel end where the round comes out. Lightly tap the screw driver until the barrel and hopup come out.) 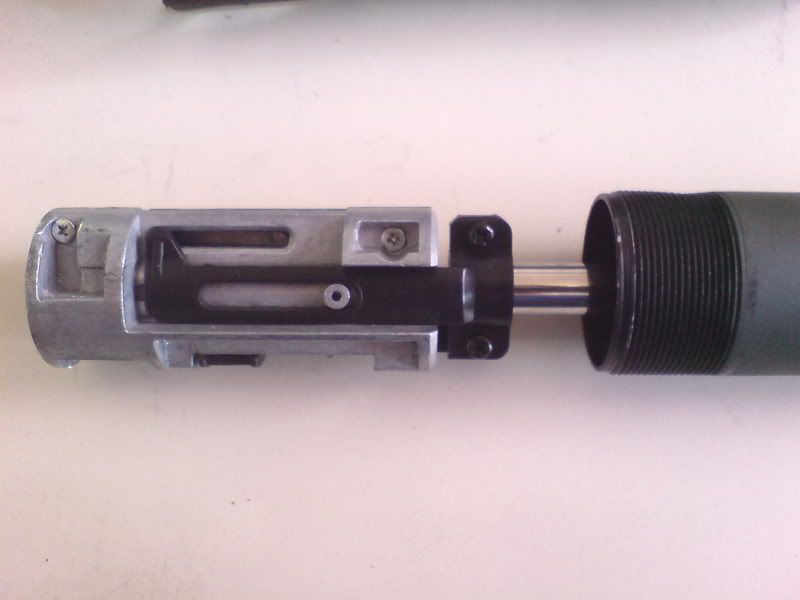 6.Now remove the various screws on the hopup unit. Take special notice of where they went and what order things go together. If you feel you may have trouble with this try and keep the screws in the holes of the parts. Lay them out in the order you take them apart and then reverse this step. Taking pictures with a digital camera also works. 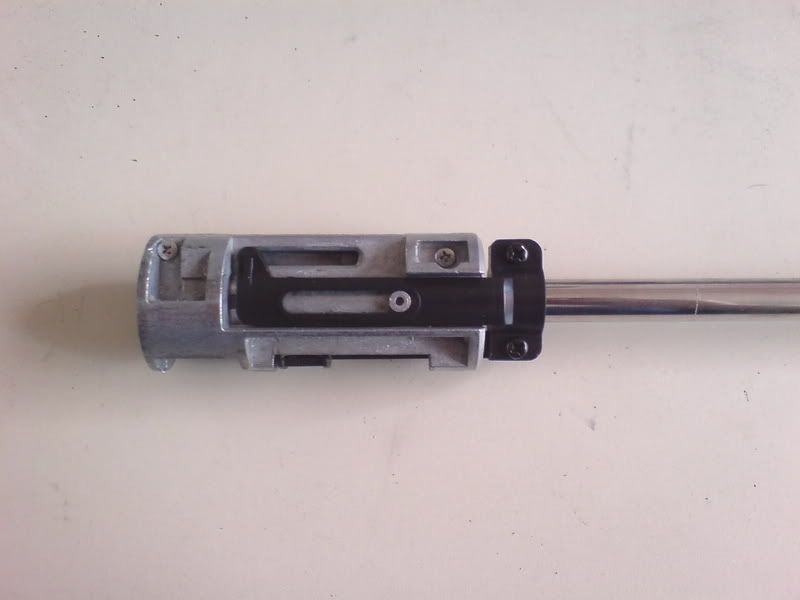 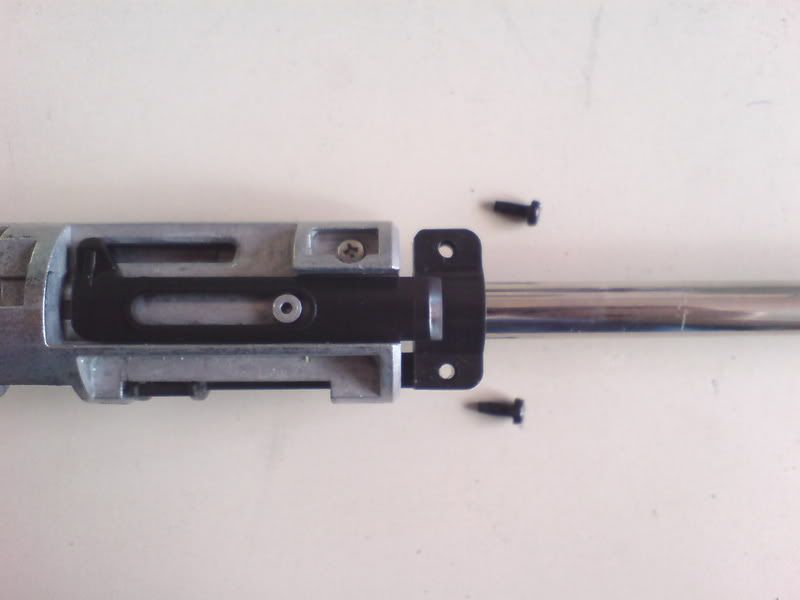 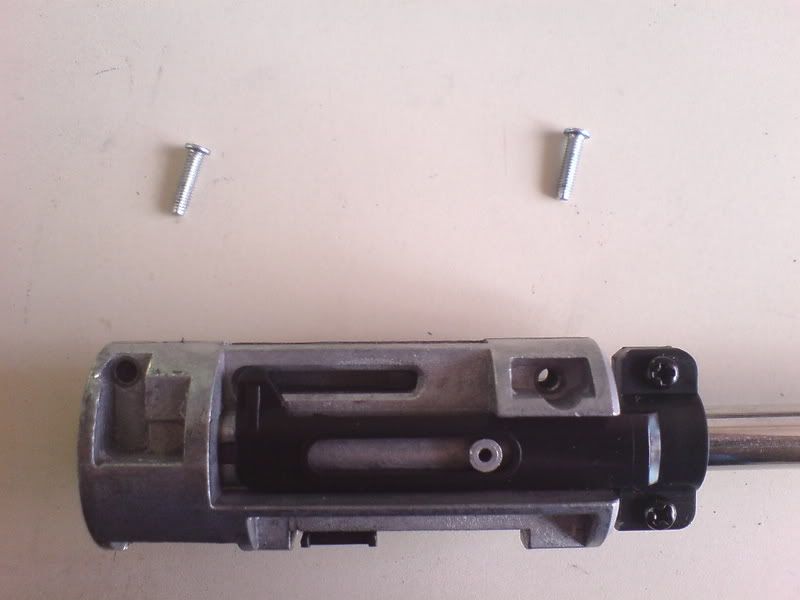 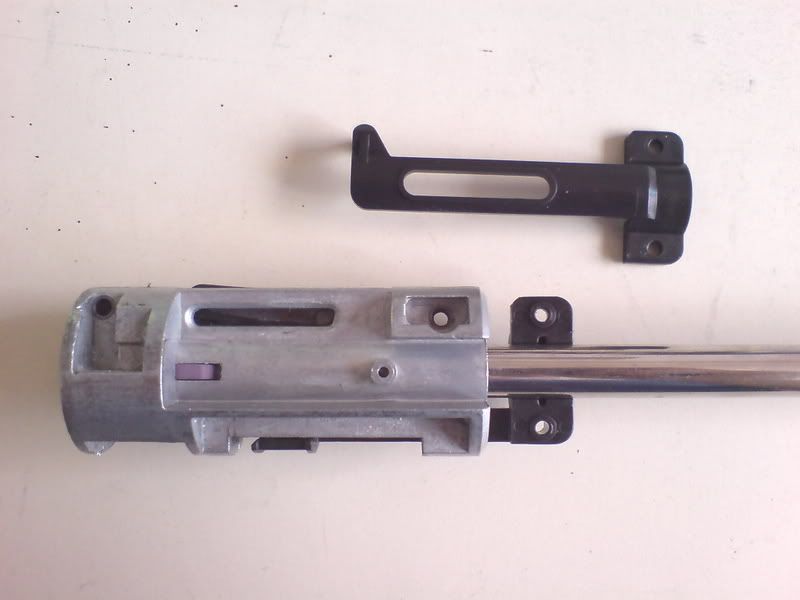 7. now you are at the meat of the hopup unit. You should see a black plastic arm, a tiny little black cylinder on the end of said arm, a hopup bucking part of the loading arm that helps retain bb's, and the little bit of the barrel protruding in. 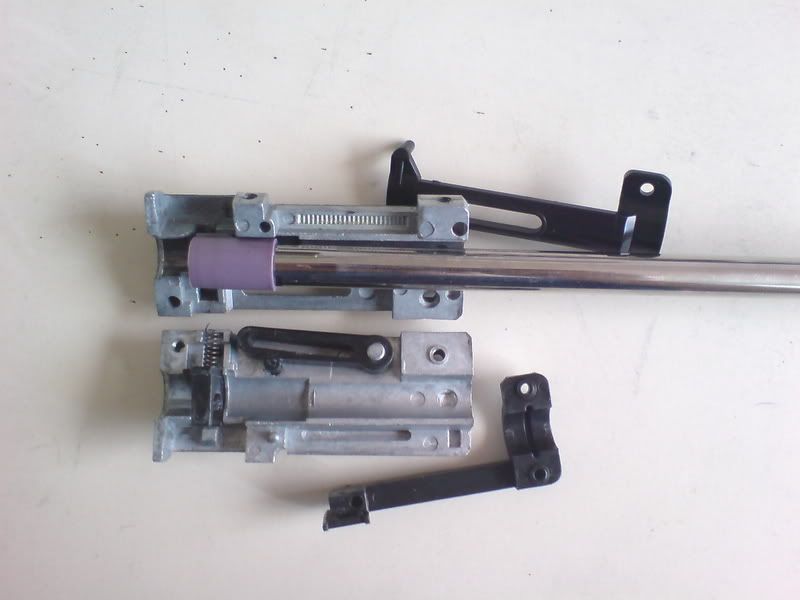 8.There are several different hopup buckings on the market coming in various hardness settings. The vsr has one of the best hopups of any airsoft gun I have used. However I installed a nineball one before sending it to berkut and he says it works well. 9.When installing the bucking make sure to line up everything correctly. You should be able to get the little rubber fin in the rectangular hole on the hopup body very easy. 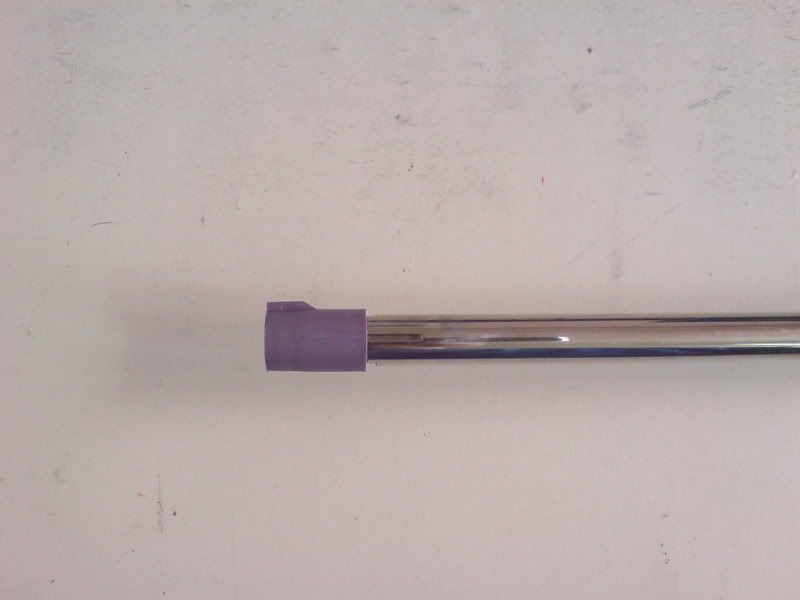 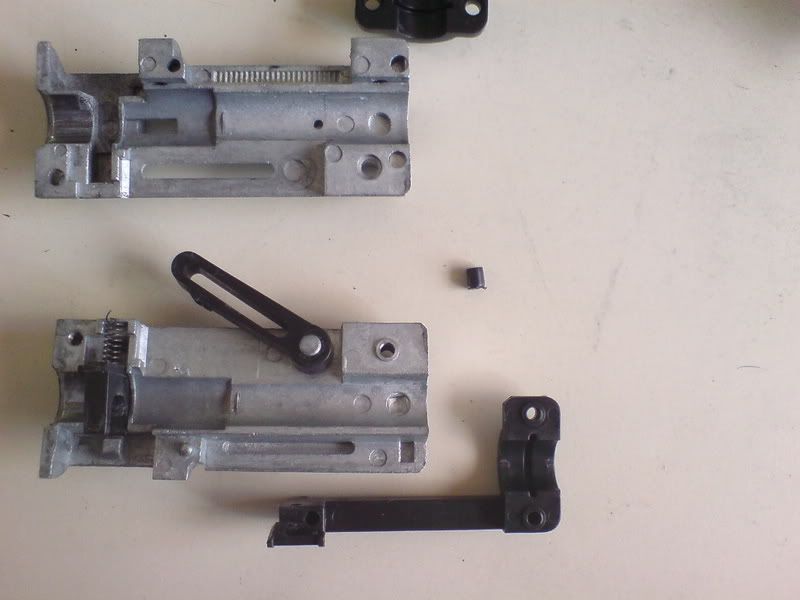 10.Slide the hopup on the new barrel and reinsert paying special attention to not loose the little plastic cylinder. More on that later. 11.Screw everything together and smile. Silencer 1. When ordering a silencer adapter save yourself the trouble and get a clockwise silencer adapter. It helps when trying to screw things on. 2. The muzzle end of the outer barrel is threaded so that it is a right turn to unscrew. If it does not come out easily use a vice grip after making sure to not scratch or over tighten the vice grip. Sticking needle nose pliers in the hole and turning them can also work. 3.Attach the new silencer adapter turning left to tighten. Make sure to remove any orings on the adapter if you plan to use an extended barrel. If not you will not be able to extend the barrel into the silncer. Same thing goes in case your silencer has the same problem. Make sure to get the adapter for your specific gun. Last edited by bean; January 4th, 2008 at 13:32.. |
|
|
|
|
April 17th, 2007, 13:54
|
#5 |
|
Administrator
|
Parts list
for the future Last edited by bean; April 17th, 2007 at 14:25.. |
|
|
|
|
April 17th, 2007, 13:54
|
#6 |
|
Administrator
|
Problem solving.
Low fps for a setup that should be much higher 1.Check your cylinder for compression. Cock the gun and place your finger over the cylinder head. Fire the gun. The cylinder should not move unless you remove your finger. 2.If it does move this could mean a bad seal from your cylinder head. Remove your cylinder head and place teflon tape on the threads and screw back in. If you have the cylinder head pro do the same for the adjustable nozzle. Then repeat the test. 3.If its not compression it could be the internals. If you leave the gun cocked for a long period of time it can ruin the spring. However this shouldn't cause a huge problem. More often then not this is attributed to the high pressure piston from the zero trigger set. 4.If you still have your original piston the gun came with remove the oring from that one. Place it on the zero trigger one instead. The way the piston works is that air goes int he tiny holes int he piston head and push the oring out. However if you have to powerful of a spring this will cause air leaks around the oring. You just need a thicker oring. Worst comes to worst measure the oring and order a thicker one online. 5.Silent shaft the little white shaft that protrudes from the piston is a piece of garbage. Promptly cut it down or place the grub screw wrapped in teflon tape in place of it. It creates a pocket of air at the front of the cylinder when fired and by doing this makes the gun quieter. In the process though it dramatically drops speed of the round. 6. The pesky hopup that comes with the gun does not seal very well. Wrapping the inner barrel with teflon tape and then cutting around the hopup orifice to remove the stuff in the hole will create a better seal and boost fps. You can also get a new hopup bucking. The rifle will not stay cocked or will not cock at all 1. If you installed the metal spring guide do this immediately. Unscrew the two halves of the spring guide and place teflon tape or threadlock in the screw groves. This will hopefully fix the problem. What was happening is that the base is being turned and coming unscrewed from the top. When the piston is pulled back in an attempt to cock the gun it hits the top of the spring guide and is unable to catch on the sear. 2.if you have to many spring tensioners installed the same problem as above will happen. Remove a couple and test. 3.If you are not using a zero trigger and this happens upgrade to the zero trigger and save yourself the heart ache. You likely wore down a sear and by the time you finish replacing everything you might as well have got it. 4.All of the above has been done however there has been no change. You may be having a problem with the sears engaging the piston. This will happen a lot in the hfc usr-11 the vsr clone. The receiver is made to large and the zero trigger sears wont catch on the piston. To fix this you may need to file down the receiver to allow the sears to catch. If you have no clue what you are doing do not attempt this under any circumstance. Give it to someone more experienced to look at. Remove the trigger guard and the rest of the rifle other then the receiver the trigger group and the cylinder. Try to cock the portion you have while looking in at where the sears are. You should notice that the sears are just moving up but not pushing down far enough engage. When you are filing do it bit by bit and keep testing. I lost the little black cylinder from within the hopup unit 1.do not panic 2.take out a bic pen and remove the inc portion. If it is one of the old ones it should have a nice little plastic ink reservoir that looks much like the one within the vsr. Cut out the desired length and replace it in the gun. Last edited by bean; May 20th, 2007 at 13:48.. |
|
|
|
|
May 20th, 2007, 13:48
|
#7 |
|
Administrator
|
Updated looking for feedback and any other problems I should adress
|
|
|
|
|
May 21st, 2007, 01:46
|
#8 |
|
AKA Daniel Ochoa
|
Sounds good! I'm definitely going to use this guide when I get my VSR-10 pro sniper. Please keep it up.
|
|
|
|
|
June 10th, 2007, 19:59
|
#9 |
|
Administrator
|
Up and at them
I still need other problems to suggest and feedback EDIT I should also say if you need help add me to msn bean__111(at)hotmail.com Last edited by bean; June 10th, 2007 at 20:03.. |
|
|
|
|
August 28th, 2007, 01:11
|
#10 |
|
Administrator
|
For those who need it. Im also looking for info on pdi parts since I swore them off. Im sure someone has had a good experience with them.
|
|
|
|
|
November 27th, 2007, 17:39
|
#11 |

|
Hey bean,
Yeah I went all PDI parts and its working out well so far I'll add nice long post ASAP, with parts and some pics. I lost that stupid little spring for the mag catch. I hoping that a pic pen will work for that too. Can you think of any more little mods that could help the BA rifle?? I'll post soon. Oh can you tell how u attached pics like that in the post? greeny |
|
|
|
|
November 27th, 2007, 17:44
|
#12 |
|
Administrator
|
hosted them on my server and used the img tags. Bic pen should work its an annoying little spring. There are new hopup buckings which I hear are superior to the nineball one. As for little tips it just depends on little things you need to fix.
|
|
|
|
|
November 30th, 2007, 19:53
|
#13 |
|
|
PDI parts used in my G-spec
So I get my VSR10-Spec from 007 airsoft. Works great but I WANT it better.
After researching and more reading I picked PDI for my upgraded parts. This is my list of parts in my G-spec. 1) Precision Cylinder Set PDI 2) VSR-10 V-Trigger With Piston Head PDI 3)200% PDI Spring 4)PDI Barrel Spacers x2 5)Stock Hop-up chamber 6)First PSS10 6.03mm Inner Barrel for VSR-10 Series (555mm) (V1024) 7)Deep Fire VSR-10 G Stainless Steel Outer Barrel 700mm for Marui VSR-10 G-Spec. The Piston that came with the tigger system is installed. It works So well with that piston head sear. I also removed the inner barrel and purchased a new outer barrel and inner barrel. The stock hop-up chamber is yes one the best out there from what I can tell. However its a real bitch to get back together. Also don't forget to grease up your cylinder... This VSR10 rifle is shooting 445 fps with .28g as per Nov 25/07 at the wasaga game. There you go Bean the PDI list you wanted.  Enjoy All greeny |
|
|
|
|
December 26th, 2007, 19:20
|
#14 | |
|
NAAZ's #1 fan!
|
All the pics are gone & im looking for help with my vsr clone.
Anywhere i can find them?
__________________
Quote:
|
|
|
|
|
|
December 26th, 2007, 19:27
|
#15 |
|
Administrator
|
I will attempt to find time to get them back up sometime this weekend sorry. In the mean time what can I help you with.
|
|
|
|
  |
|
||||||
| Bookmarks |
|
|
 |
|


