

|
|
|
 November 30th, 2014, 18:08
|
#1 |
|
|
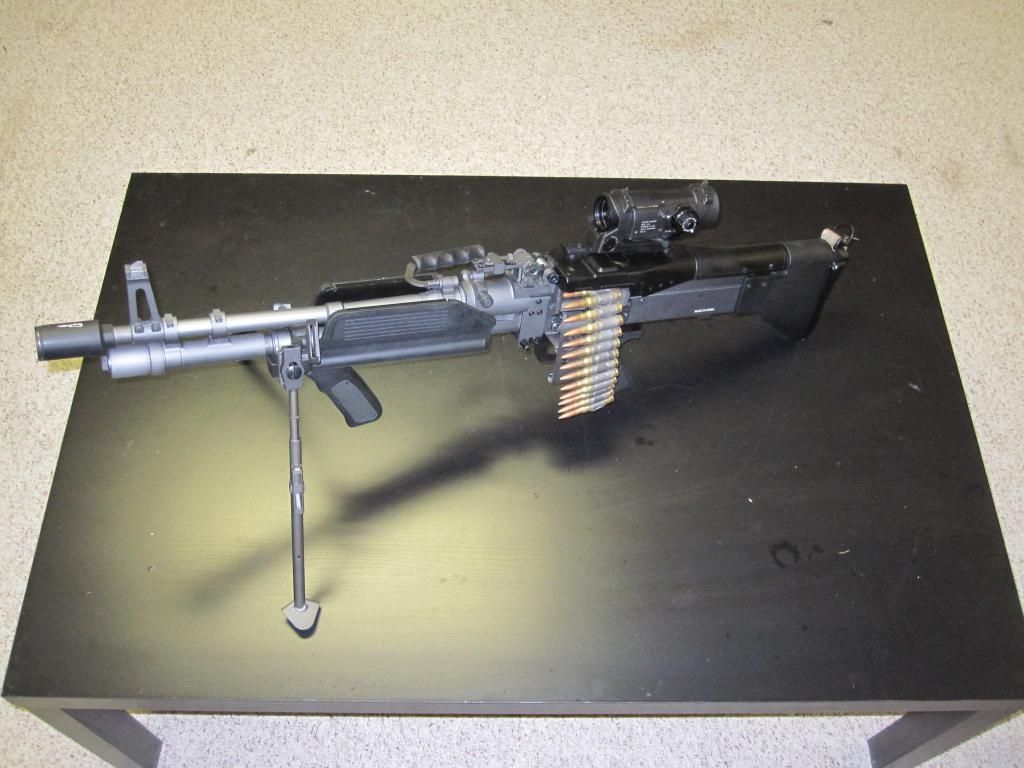
A&K MK43 Mod 0 - Initial Impressions and Upgrade Thread
Hello gents, being as there is not a ton of info I've found on this guns internals I've decided to post this thread.
Recently had one ordered, arrived Thursday, Nov 27. Very solid gun, but mine had no duck bill flash hider or bullet belt - disappointing. Shoots beautifully though! Chronoed at 428-430 FPS constantly with zero hop. Slightly disappointment in how 'dead' it feels. My other AEG's offer some feedback via a small amount of recoil. This M60 is likely too sturdy and dissipates the forces internally. it's made primarily of metal. INTERNALS: Opened it up yesterday, and I'm surprised it was shooting that hot given the internals are pretty much crap except the gearbox shell, gears, and cylinder. The piston, piston head, cylinder head, and nozzle are all poorly made plastic with really small o-rings. The piston was showing signs of wear after less than 200 rounds, and should likely be replaced along with the piston and cylinder head right out of the box for longevity. The spring guide seems good and looks to be a V2/V3 type attached to a spring guide extension for the quick change system - also had a thrust bearing. Gearbox/air seal grease/lube was more or less non existent. The spring is about 75-80% of a normal spring length. Will replace with a new spring once air seal is optimal. The bearings seem good, but needed to be re-seated as they were not inserted fully into the gearbox shell. The majority of the internals were replaced with: -Matrix one piece CNC cylinder and cylinder head. -Magic Box Double O-Ring Aluminum Bearing Piston Head -Mad Bull PX Piston W/ Steel Rack -King Arms Tappet Plate (Broke, used original instead due to slight differences) Shimmed, sanded out the guide rails in the gearbox to remove burrs and lubed/greased all parts. chronod at 365-366 FPS consistantly. I have yet to fully check it but it seems the nozzle is the culprit. It has up/down and left/right play. I would imagine the original cylinder head had a larger bore than the Matrix one, or the parts were just poorly designed. Ordered a Angel Custom Teflon Coated Enhanced Nozzle for A&K M60 Airsoft AEG. This should help with air loss. I also ordered a Modify SCAR series nozzle w/ o ring as this can be cut down to fit the MK43 if the Angel nozzle is designed for a larger bore cylinder head. Parts on order, to be incorporated: -MODIFY VERSION 3 Rotary SPRING GUIDE W/ BEARING -Angel Custom Teflon Coated Enhanced Nozzle for A&K M60 Airsoft AEG. -16AWG wire -BBA Motor Connector Set (Type A) -GATE MERF 3.2 AEG Mosfet Control Unit -Mad Bull 1inch Barrel Extension 14mmCCW (For new compensator) -Lonex Titan A1 Revolution Short Motor -Modify Air Seal Nozzle - SCAR Series -Mad Bull Noveske KX3 Sound Adjustable Flash Hider Black The rheostat to adjust ROF will be removed as it uses an ~5.5" heat sync - lots of wasted energy. The gun will be fully re-wired with 16AWG wire and a mosfet added. BOX MAG: It takes some practice to get on/off but is solid enough design. Feeds very very well, we'll see how it holds up. A replacement is pretty cheap from E Hobby Asia as well. More to come! Last edited by Magwell; November 30th, 2014 at 18:18.. |

|

|
|
January 11th, 2015, 23:32
|
#2 |
|
|
Update:
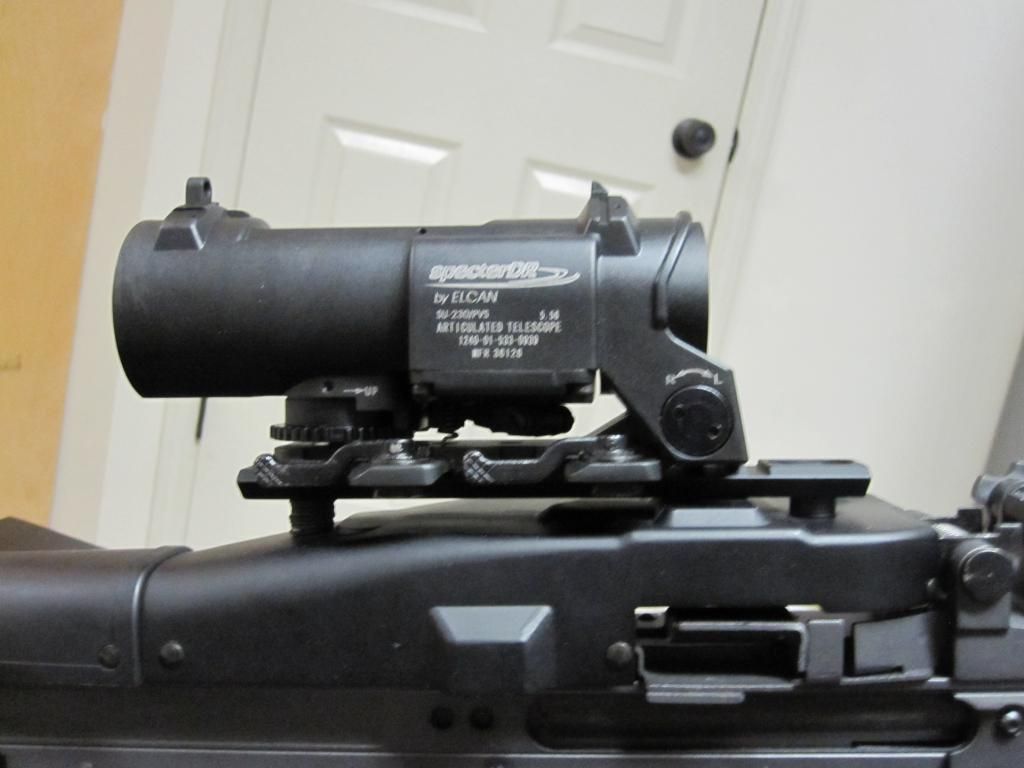
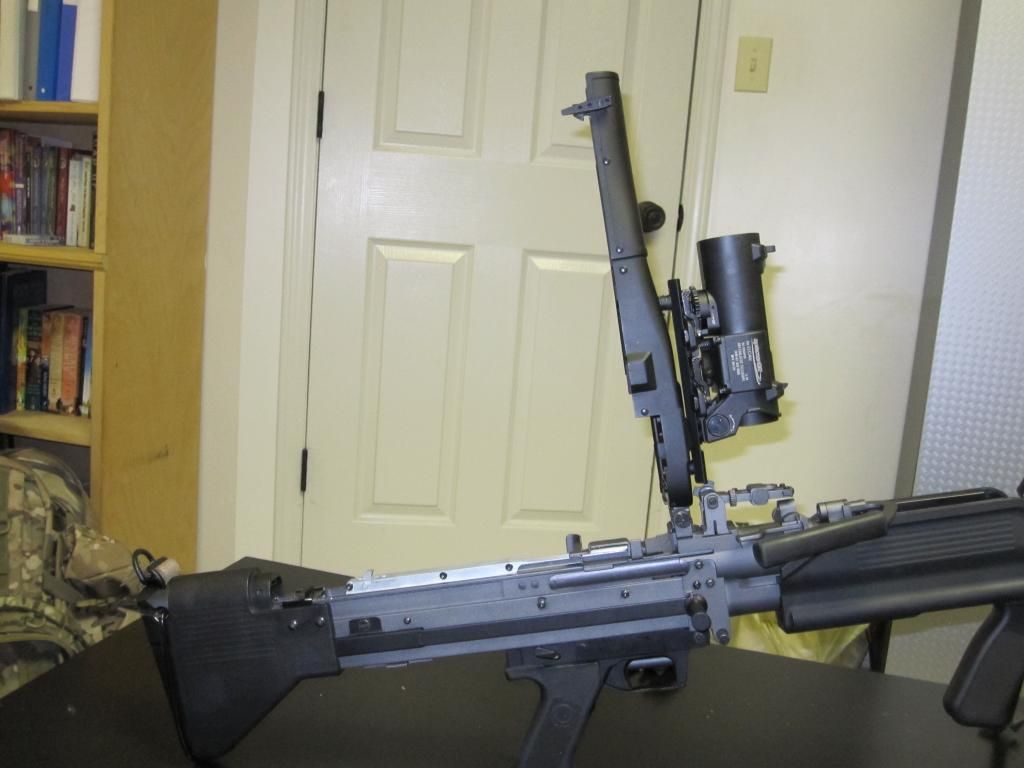
Well here she is in her current configuration, I measured and drilled into the feed tray cover to bolt in a rail for the Elcan, it's aligned nearly perfectly with the barrel but I still need to zero it, hence the offset in the third pic: 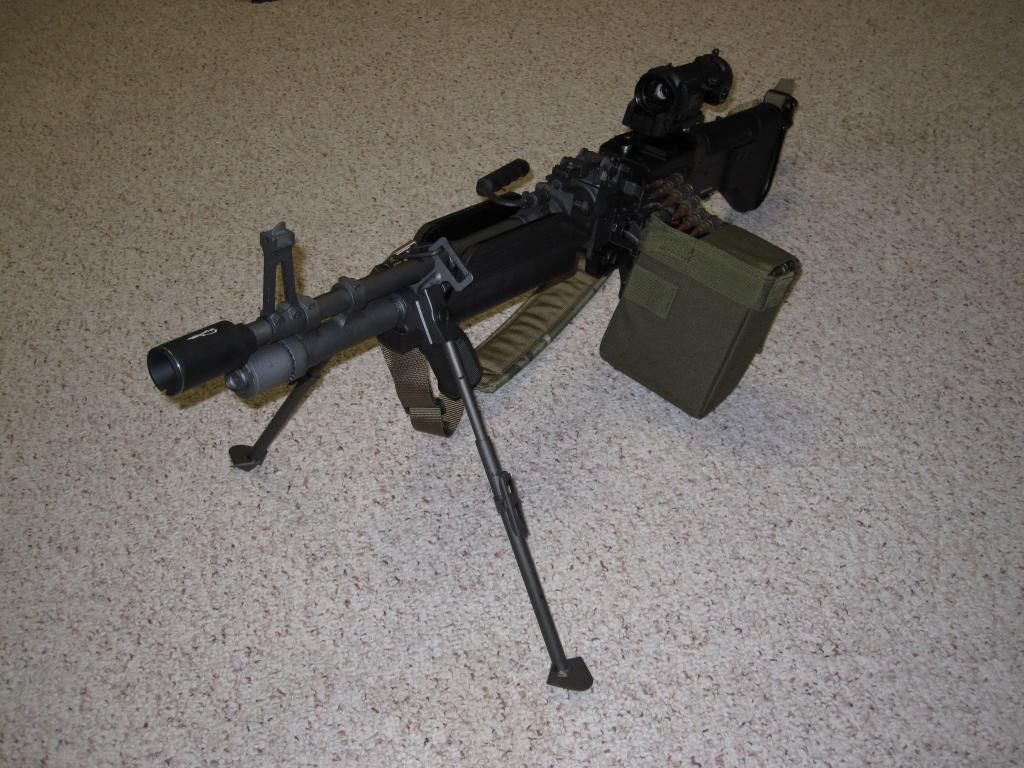 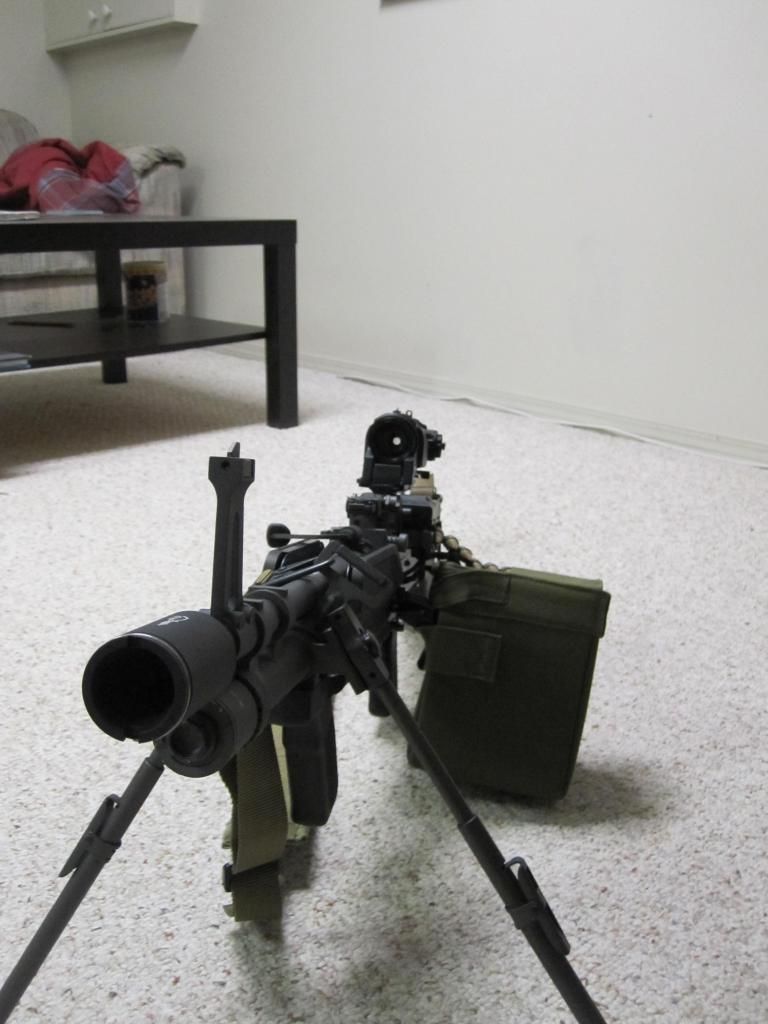 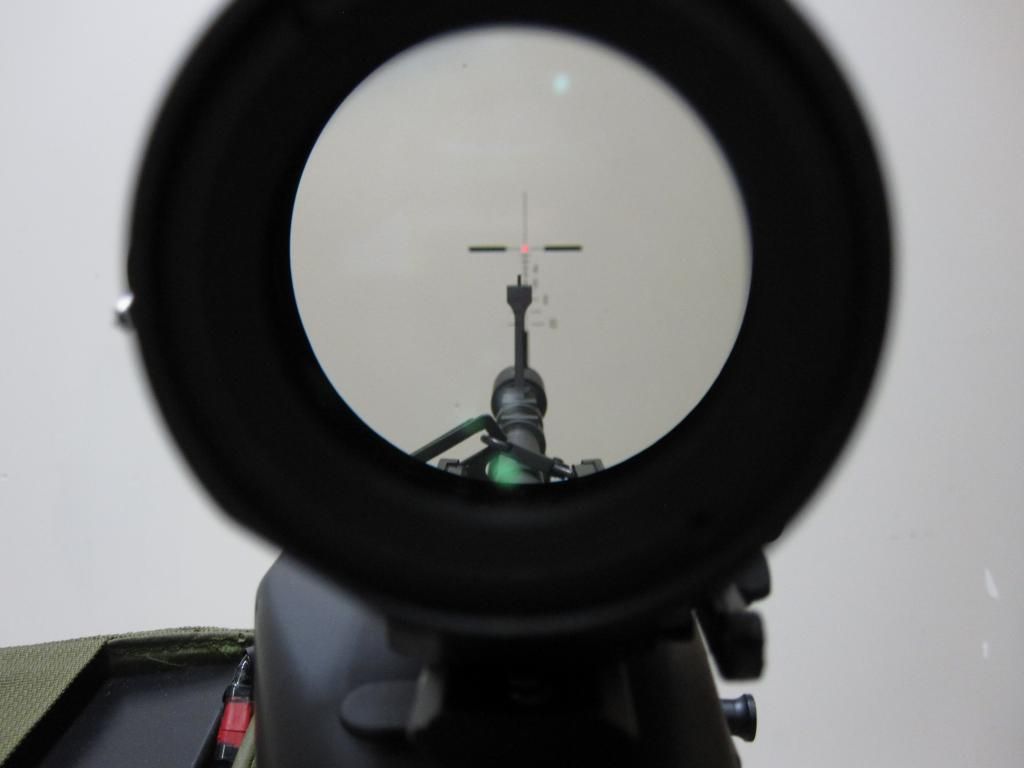 I did a complete disassembly and re assembly. Due to: 1. Re-wiring job required the majority of the M60 to be taken apart 2. To apply lock-tight to the Airsoft gun as it didn't have any from the factory. By doing this I have eliminated all the unwanted movement in the AEG including the barrel movement, it's solid as a rock! 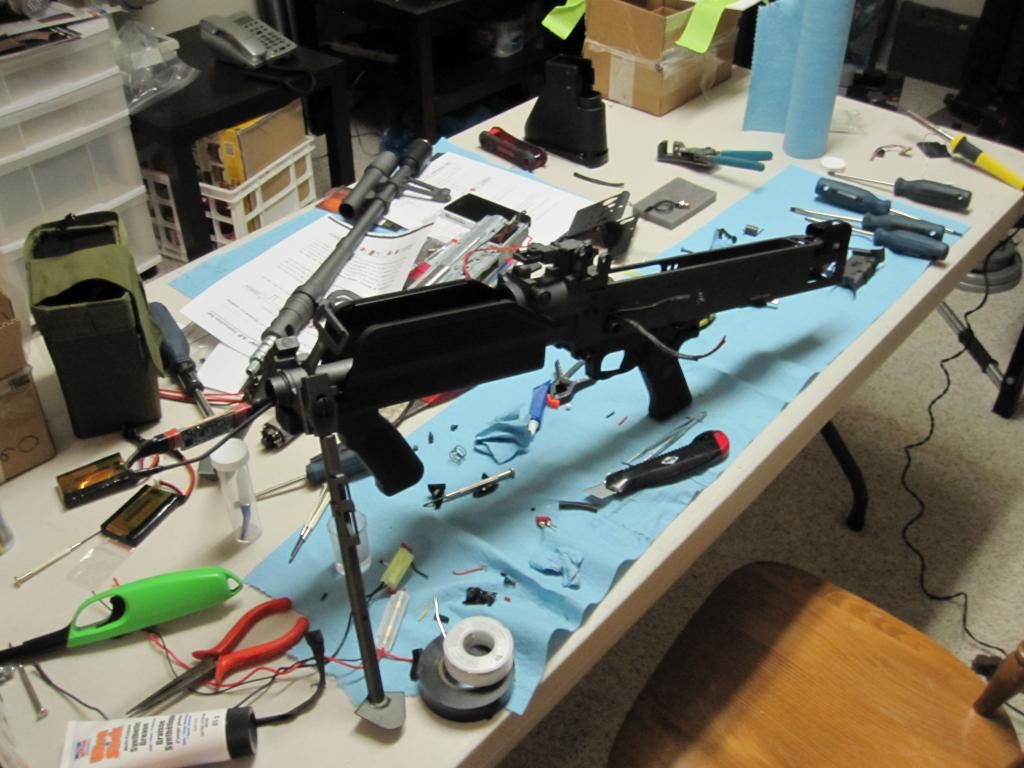 So let's start off simple, what needs to be adjusted? 1. Set screw for the rear iron sign should be backed off, locktight applied, and tightened: 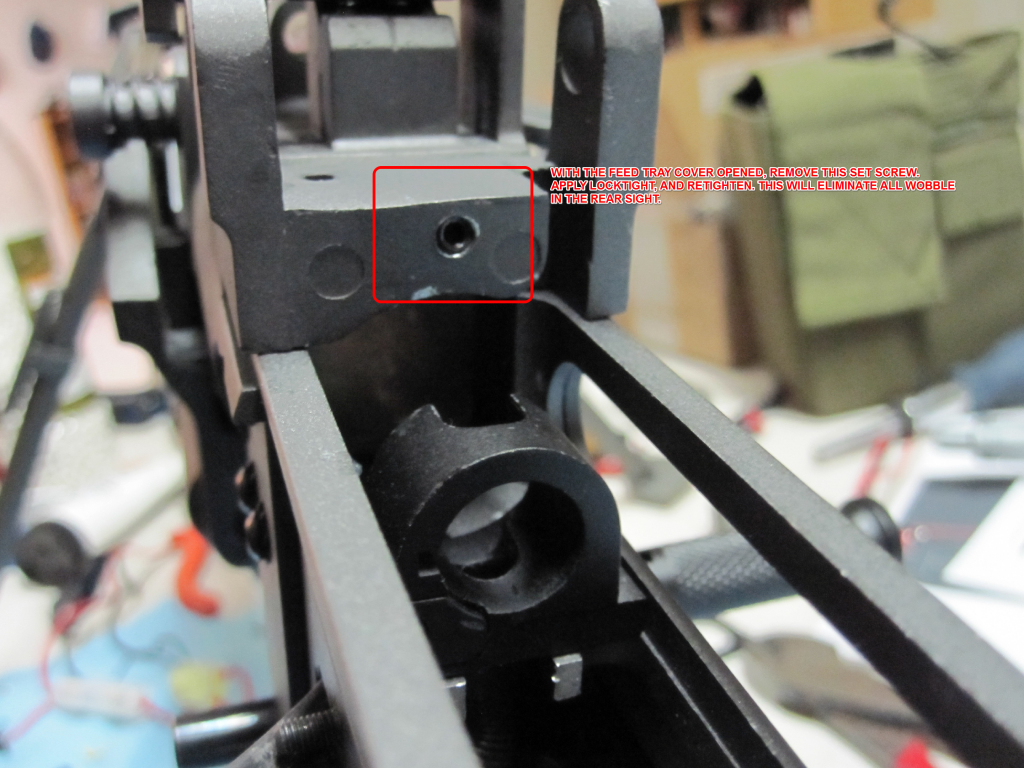 2. Remove the quick release barrel, set aside. Remove the bipod by unscrewing (counterclockwise) the nut on the end. 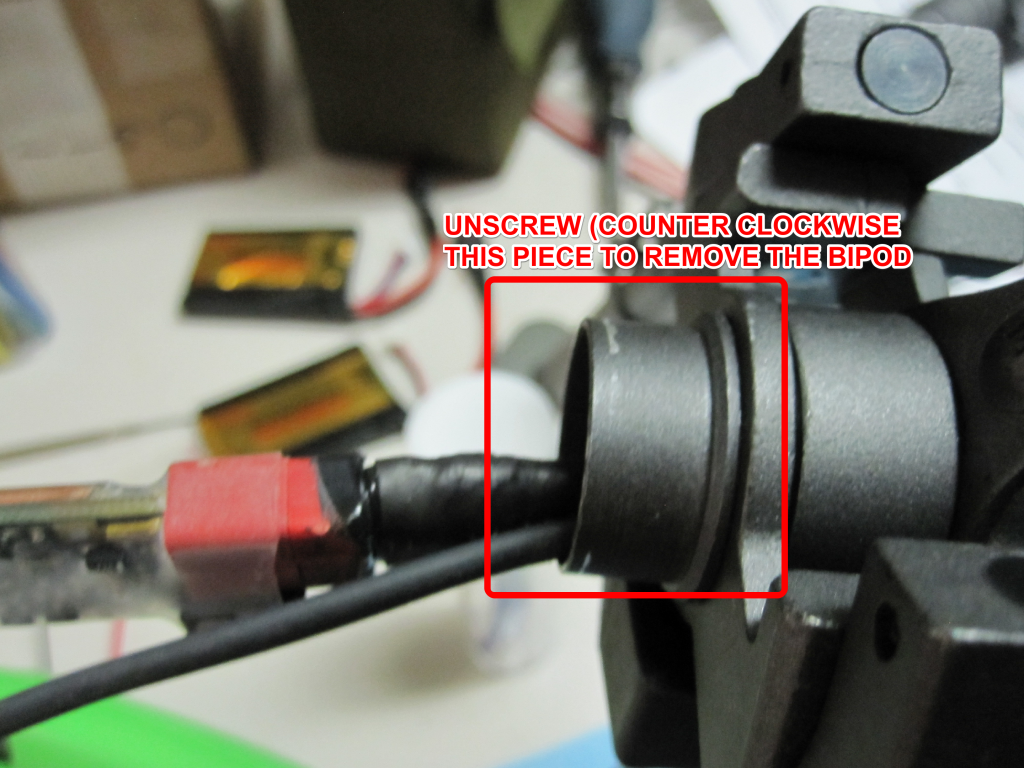 Then unscrew the entire pipe attaching it to the receiver. Apply locktight, and tighten it up good. This connection would rotate when the bipod moved. Once back on, reinstall the bipod, apply locktight and tighten the retaining nut. Leave some space so the bipod can move freely left/right as it rotates on the barrel. 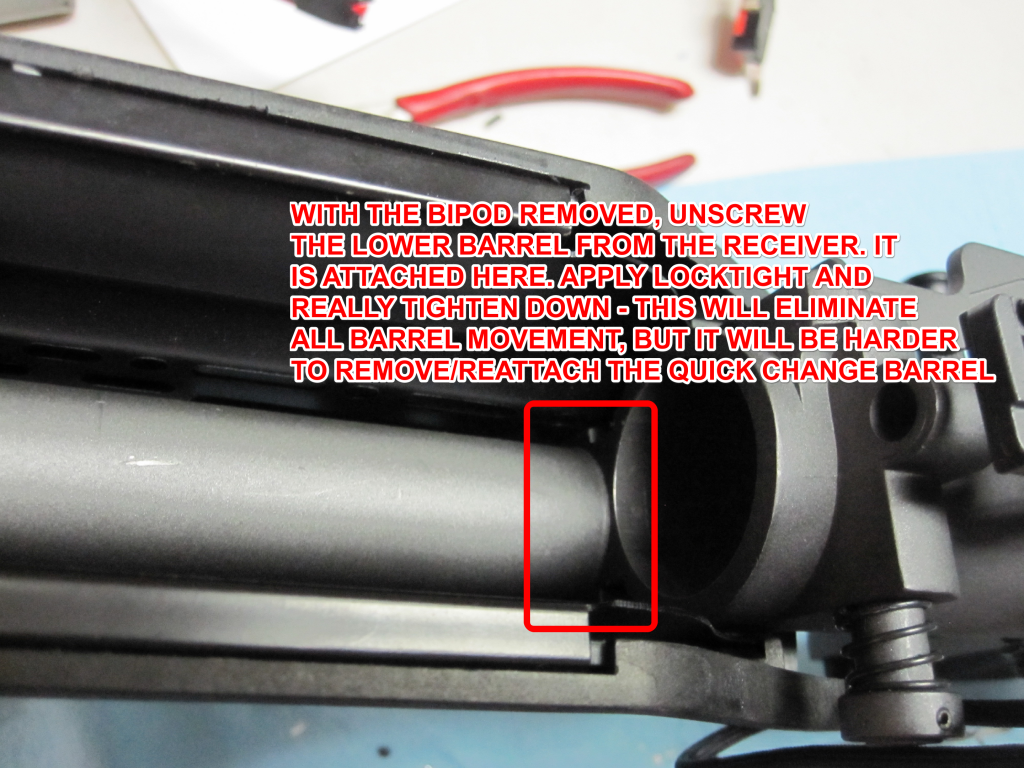 3. I had some bad wobble in the trigger group. To correct, I removed it and bent the retaining tab in the receiver up to apply more pressure. There is a pin you depress on the front left of the trigger group, then it will slide out similar to body pins on an M4.  Internals: Here is the gearbox, the one pictured has a new piston, cylinder, cylinder head, and has been cleaned out/shimmed. 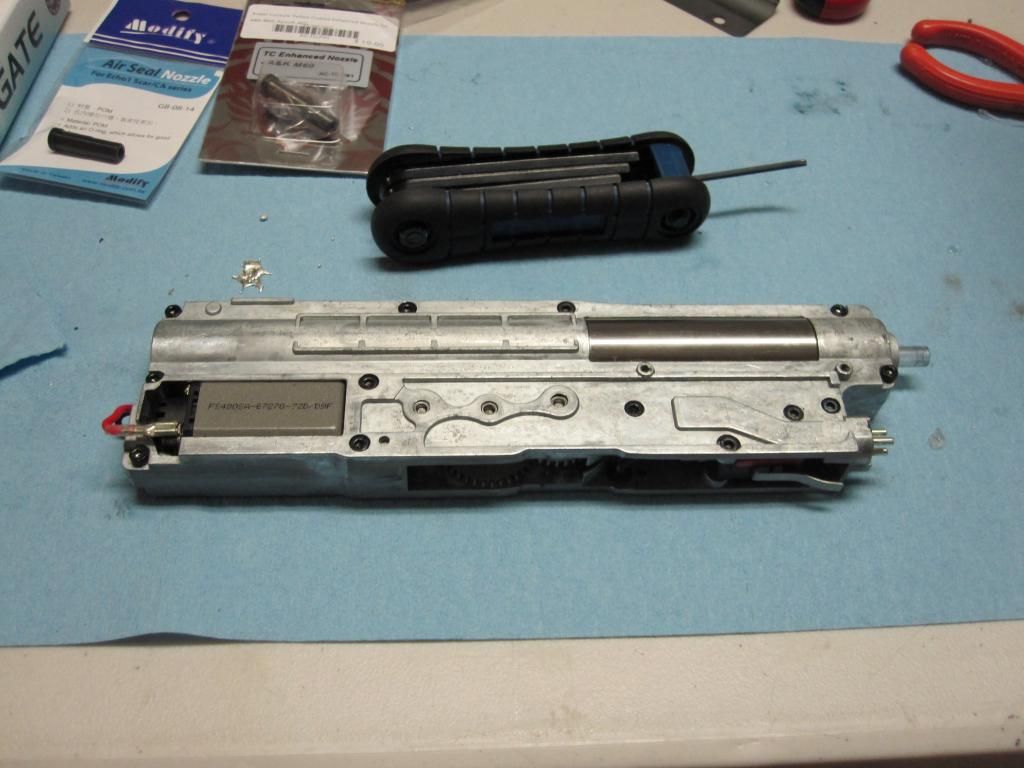 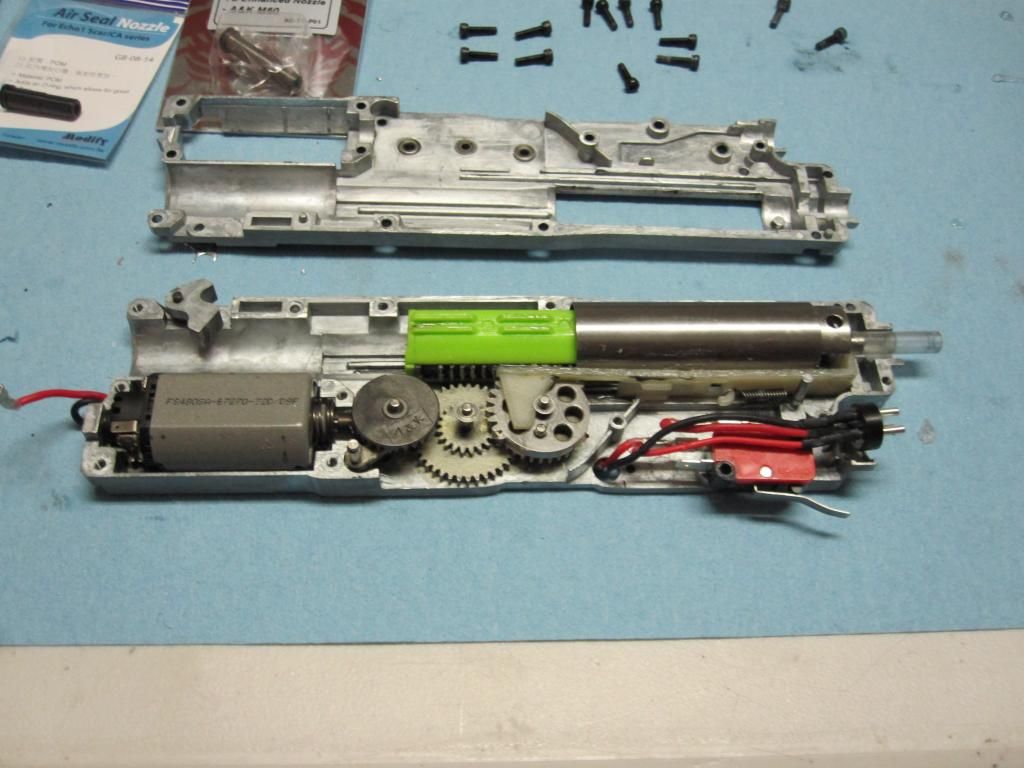 Quick change spring guide: 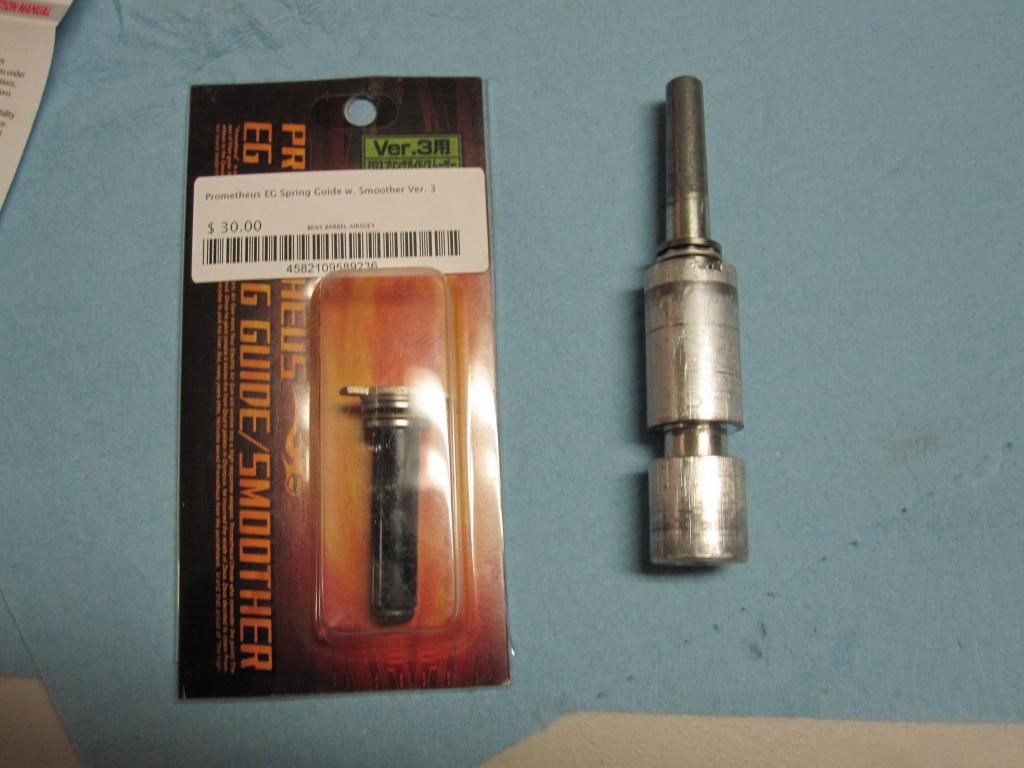 I removed the old wiring which had a lot of un necessary runs, just a waste of wire and electricity. The rheostat burned up a lot of juice and even when you put the bit in that cancelled it, all your current is running through 2' of more wire than it needs to... So here is the mosfet and new wiring, mosfet is accessed by removing the barrel. 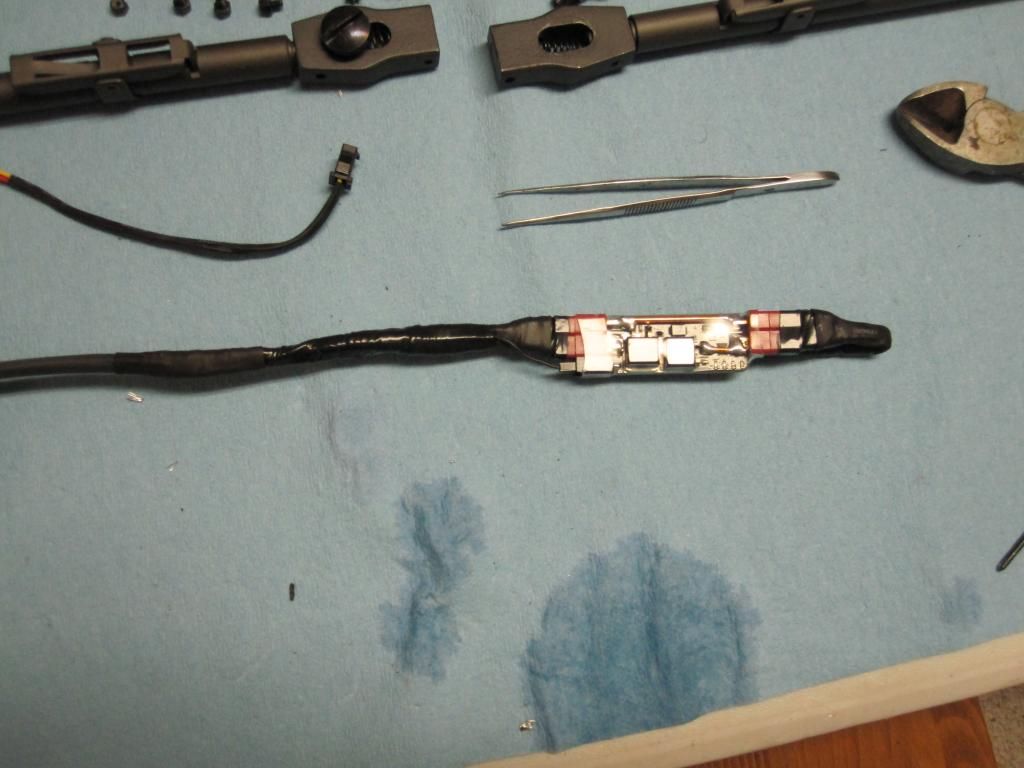 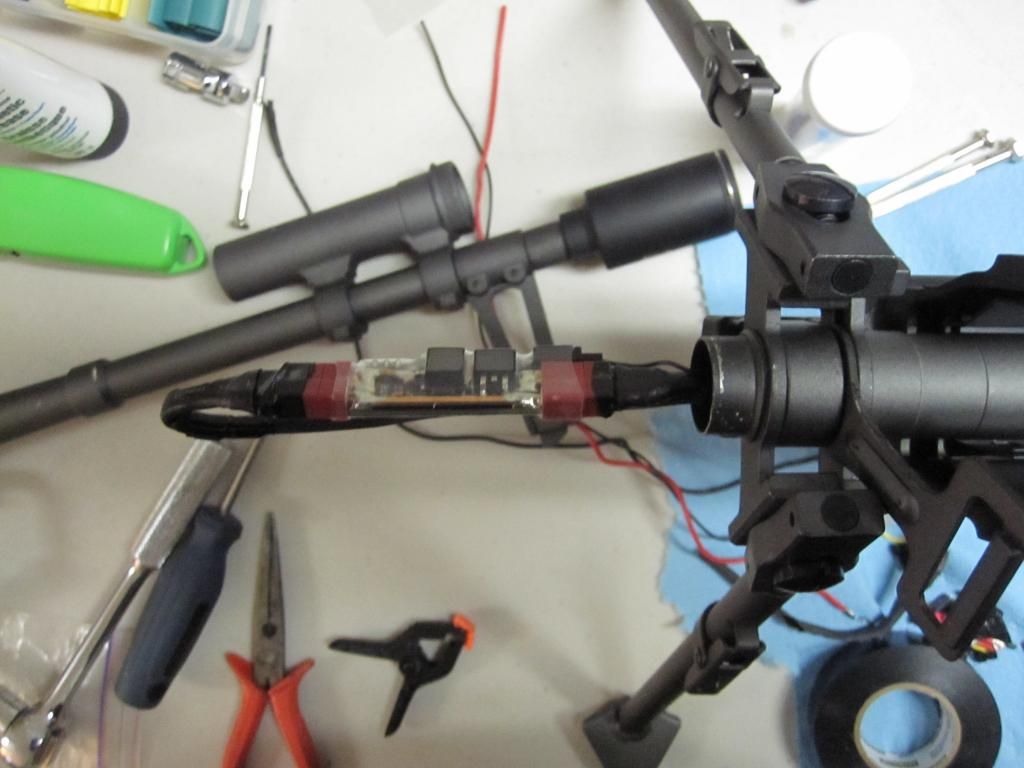 I have yet to add the new nozzle but it was running beautifully after all this, still need to chrono on the new battery though but it hit 406 FPS @ 16rps on a 9.6v
__________________
 Last edited by Magwell; January 11th, 2015 at 23:48.. |
|
|
|
|
January 14th, 2015, 01:59
|
#3 |
|
Hi! I posted some questions a couple of months back about this gun, and I didn't get much answers. If you don't mind, I've got some questions.
How did you drill the rail on top? If you have the time, I've never seen a tutorial on this, but I've seen this mod done frequently. What did you do with the hop up issues? Did you just do the pen mod, or are you going to mod it to fit regular nubs? I've also heard that you can replace the whole unit with a classic army hop up, but I'm not sure if that can fit regular nubs. Thanks! |
|
|
|
|
|
January 17th, 2015, 18:51
|
#4 | ||
|
|
Quote:
Quote:
__________________
|
||
|
|
|
|
January 17th, 2015, 19:06
|
#5 |
|
|
Time for an update... Got a lot done today. But first, M60 porn lol.
 The new nozzle (Modify nozzle for VFC SCAR-H w/ integral o-ring) is about 1/4" too long, so I sanded it down with a file, then sanded a 45 degree angle to the ends. Finished it off with some 1500 grit sandpaper to smooth out all the edges from the burrs. 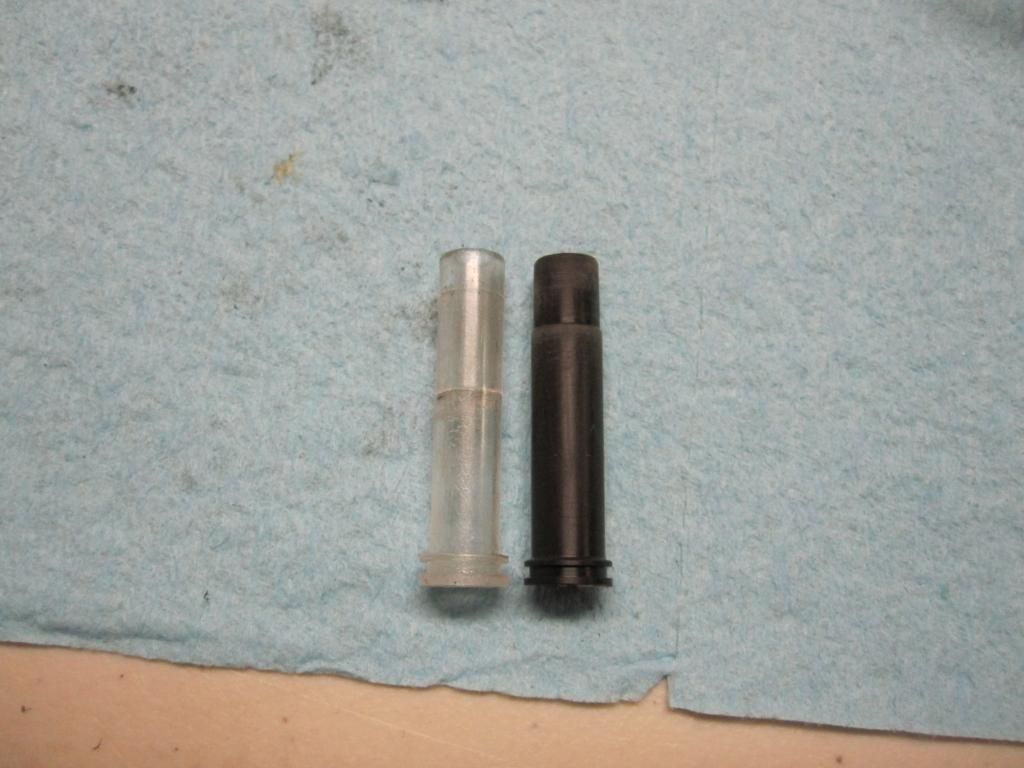 And here is the gearbox with all the new parts, before new grease. The new nozzle fully solved my air seal issues as you will see... 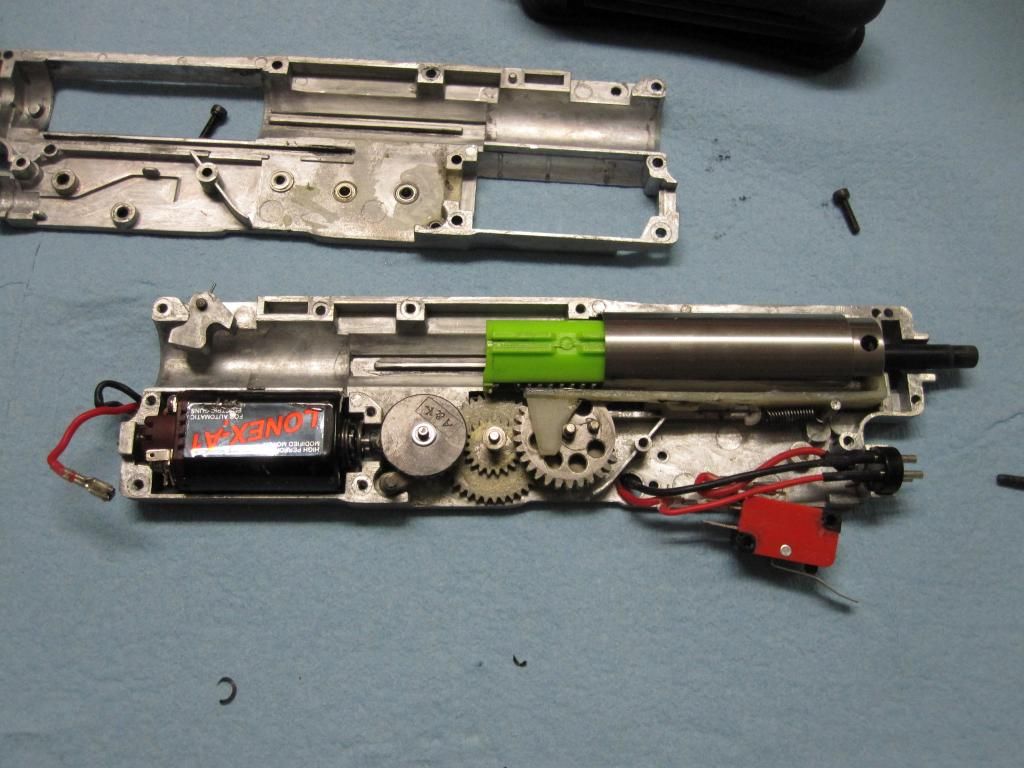 I immidiately tested with the original spring, but with a new piston/piston head, one piece cylinder/cylinder head, nozzle, motor, and wiring. 0.2g Elite Force BB's were used with a 9.9V LiFe battery. The results speak for themselves, at 18 rps (hit 19.4 max) and 466 FPS max recorded, lowest was 454, hitting 460 FPS about 80% of the time... This is ~30 FPS higher than the gun recorded originally with A&K parts. However I have about as perfect an air seal as I can expect to have with an airsoft gun and parts that will wear better and last longer. Which is important when you'll burn between 5000 and 10 000 rounds or more a game. 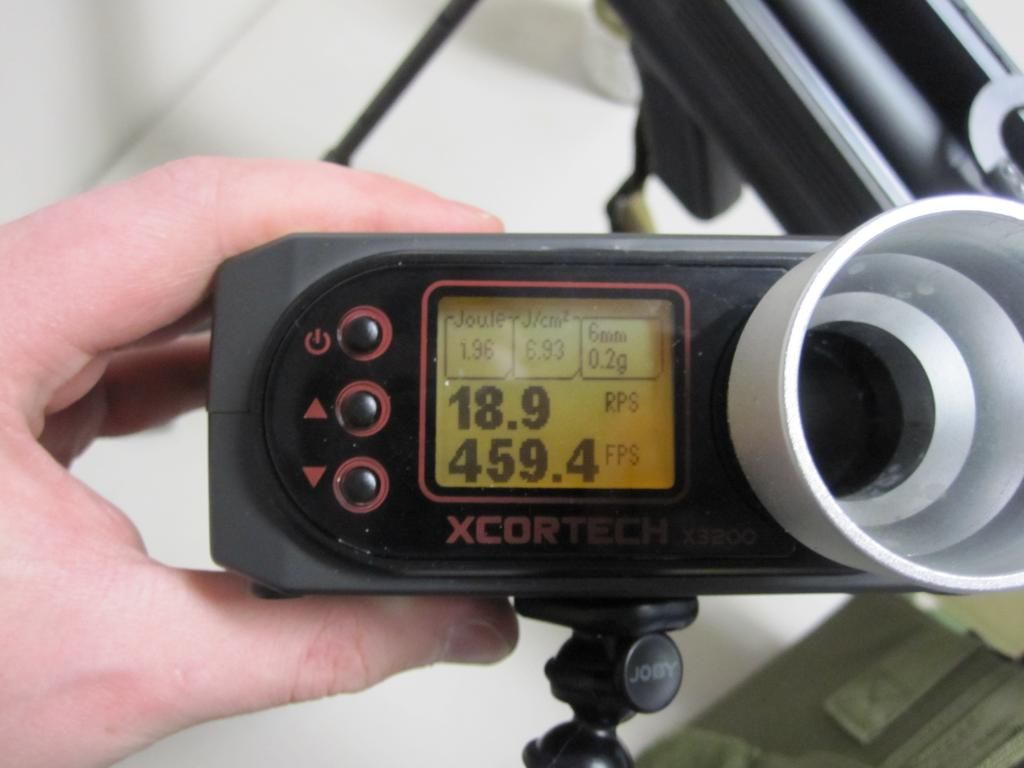 Next I used a Promethius M120 spring (known to behave more like an M130). It chronoed at 460 consistently, indicating that the factory A&K spring is likely an M130 spring. next I used a Modify M120, hitting 440 FPS, next a Lonex M110 spring, hitting 435 consistently. I did not have an M100 spring so I cut about an inch off the M110, and refinished the cut edge so it would stay secured to the spring guide and not slip off. It chronoed as below, 395 +/- 3 FPS. The reduced ROF could be due to the battery losing power, it's a 2100 MAH battery but I've yet to charge it and it's seen likely about 3-4 thousand rounds lol. Anyway 400 ish FPS is exactly where I want it. I don't want to max out the power (420 FPS is my local fields rules) and this gives me some flexibility if the field chrono is reading high, and also it's a support weapon - less stress on the gearbox and I'll likely be hosing people from time to time if I suppress an area aggressively. 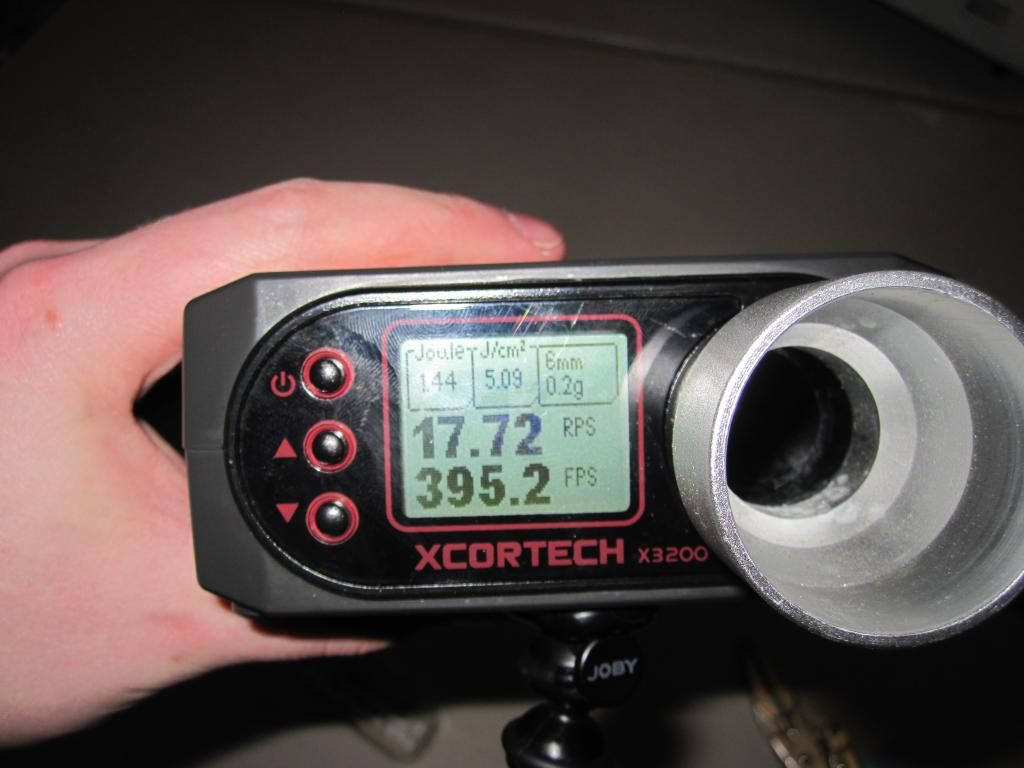
__________________
Last edited by Magwell; January 17th, 2015 at 19:23.. |
|
|
|
|
January 17th, 2015, 19:37
|
#6 |
|
|
As requested - short DIY on adding the rail...
  1. roughly line up your rail - note where the holes are in relation to the feed tray cover, place masking tape/painters tape in this area. 2. I used a laser level, but a straight edge could also work. Find center of the barrel, mark the centerline on your tape. 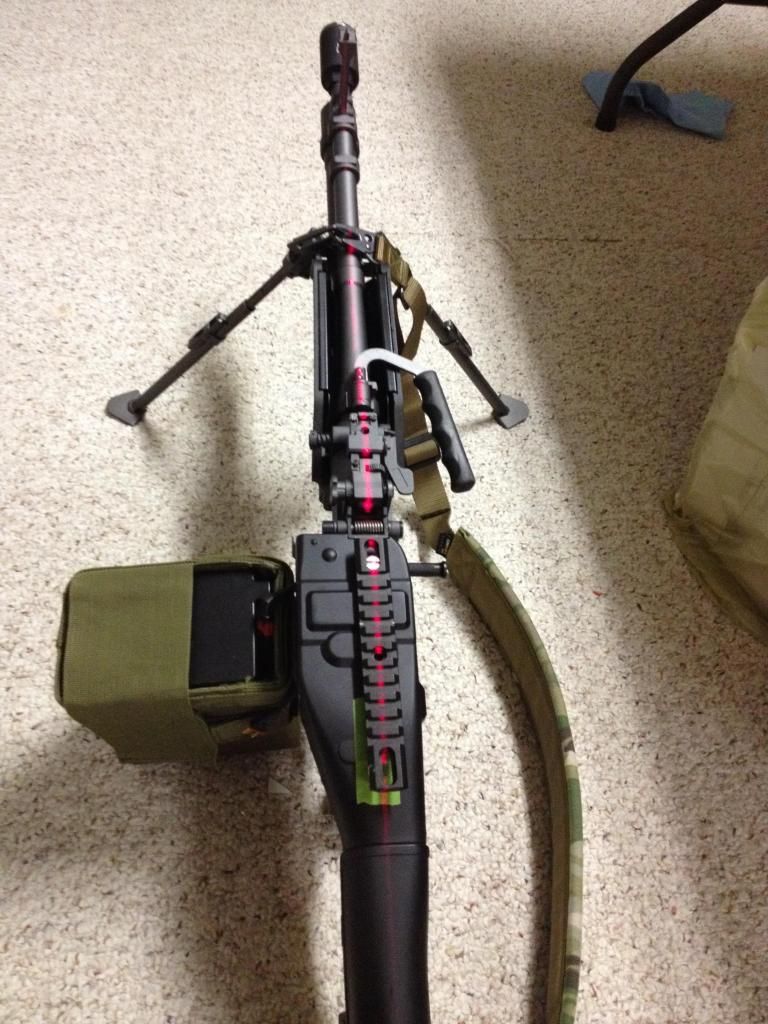 3. Remove the feed tray cover (2 screws on the inside of the cover just behind the hinge.) Inside is the mechanism that feeds the belt through (forgot the name) it is held in place via two allen screws - remove this. Either re-install after or leave it out. I left it out because the bolts for the rail interfered with it. 4. Place the rail on your feed tray cover, mark the center of the holes horizontally so you have an 'x' to drill into (one edge being the centerline, the other being the center of the rail hole) NOTE: Make sure your rail is far enough back so it doesn't contact the rear ladder sight when you open the feed tray cover. Failure to do this could mean you cannot re-attach your feed tray cover, and have to re-drill the holes. 5. Using a drill press preferably (or drill) drill the forward most hole. Feed a bolt through the rail and feed cover. Use washers to make up the height difference. Bolt in place. 6. Double check that your rail is still facing forward and on center, if needed re-mark the rear centerline. Slide the rail over and drill the rear hole. 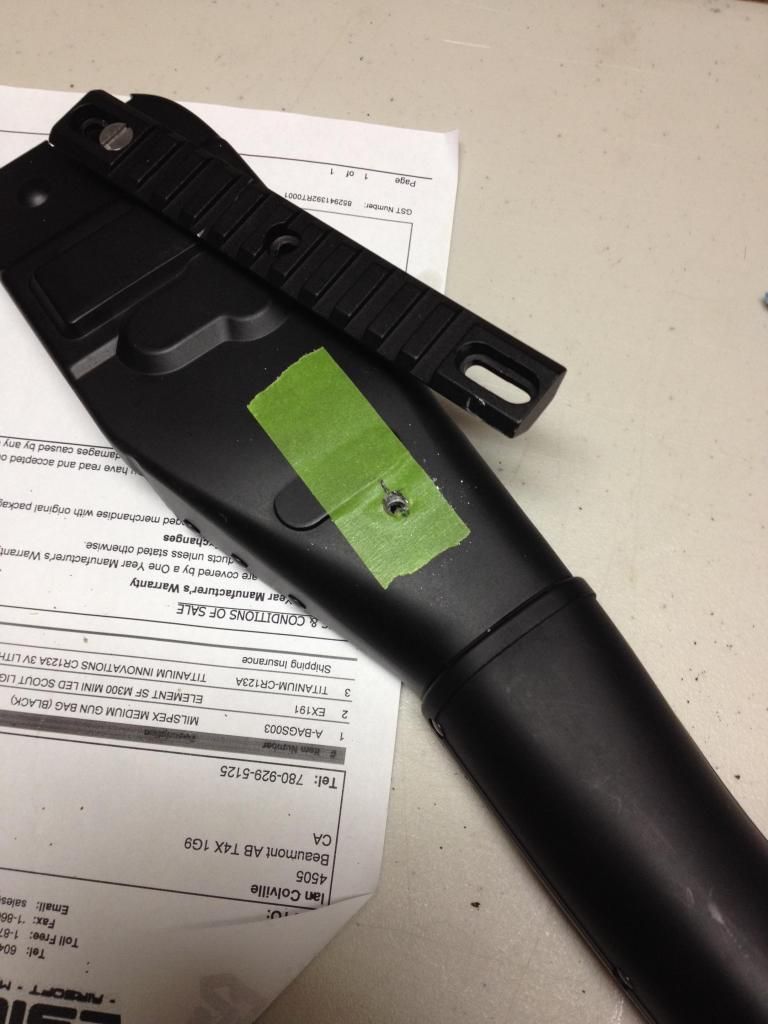 7. Use a file to clean up your holes, mask off if needed, spray the holes matt black (or primer or w/e) to prevent it from rusting/corroding. Keep in mind when unlike metal is in contact (ie steel/aluminum) a reaction occurs causing rapid corrosion (rust), known as Galvanic Corosion: http://en.wikipedia.org/wiki/Galvanic_corrosion the point here is to isolate the metal to make sure this doesn't happen and destroy your paint job. 8. Feed the bolts through your rail, then washers, then into the feed tray cover and bolt in place. I used lock washers on the inside + lock tight to prevent the bolt from coming loose. 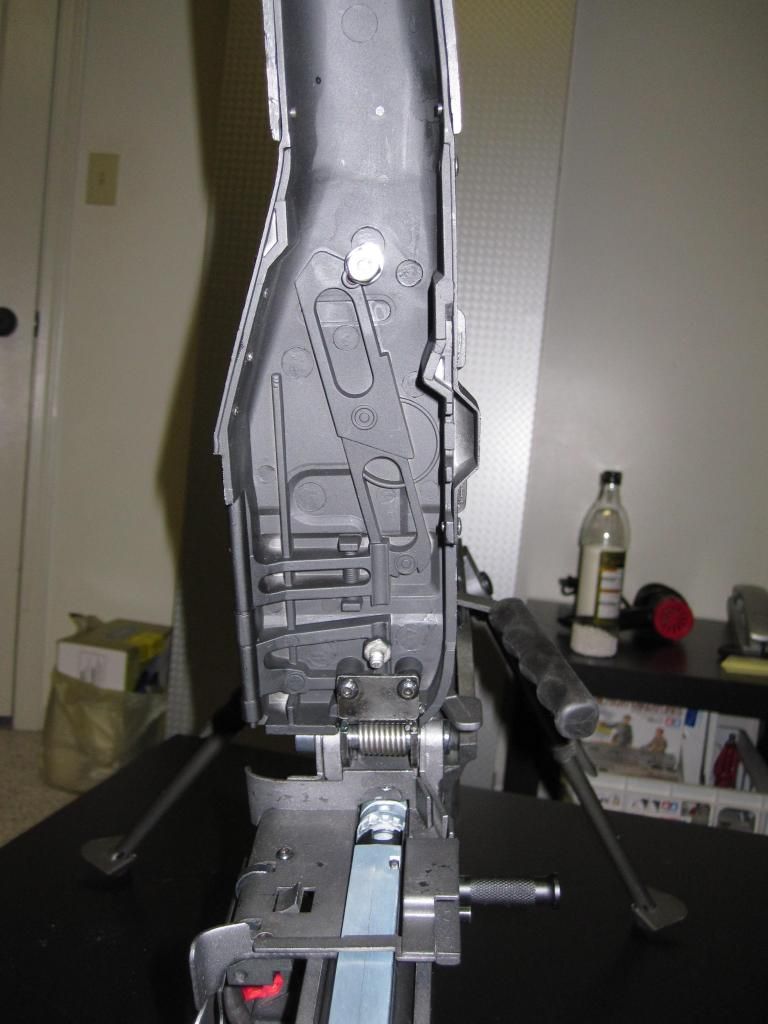 9. Re-install the dummy belt mechanism or at the very least install the washer/screw located at the latch. It is needed to place the latch in the correct position. 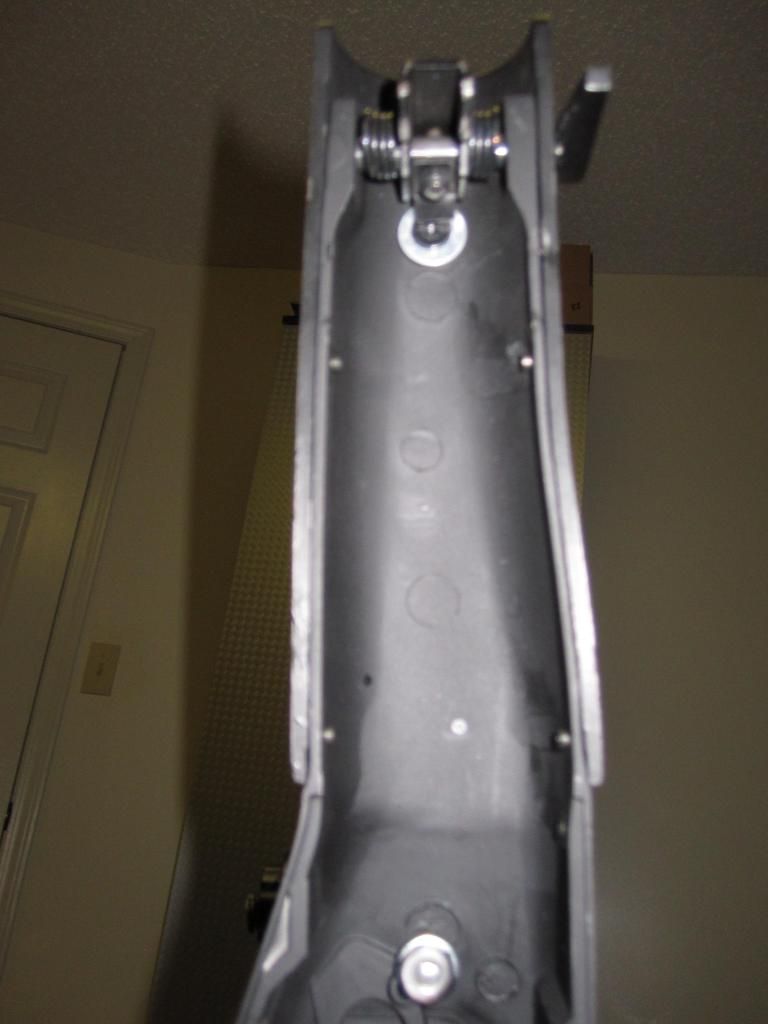 10. Attach an optic of your choice and dial it in! Also some info on using a dummy bullet belt with this M60: I have a belt of dead NATO 7.62 rounds (real bullets, no gunpowder). To fit them I had to remove about 1/4" from the tip because they are too long otherwise - and then hot glue them to some foam or they would just slide right out. The foam gets clamped in place and the pressure prevents the belt from falling out. If you are looking for a bullet belt, please search on your own. 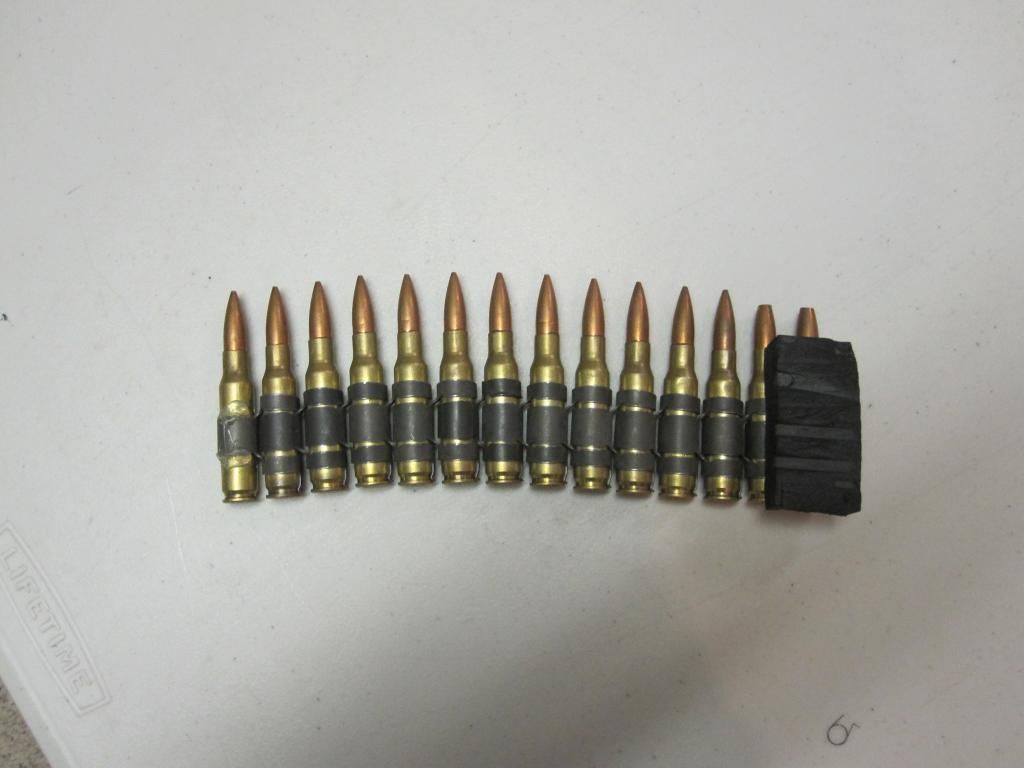 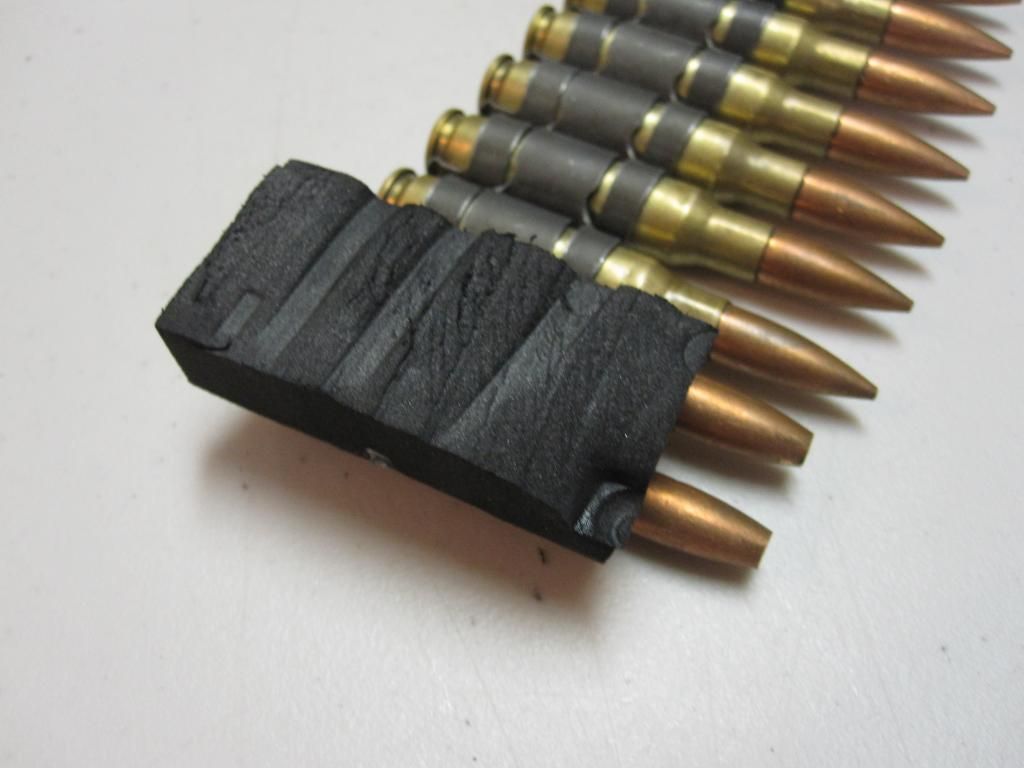
__________________
Last edited by Magwell; January 17th, 2015 at 20:23.. |
|
|
|
|
January 28th, 2015, 09:40
|
#7 |
|
Thanks for the guide! The idea with the foam is also a good idea, can't wait to try that out. Here's another idea idea too, since the bullets go into the box mag it creates an opening where potential bbs could fall out, maybe one can add foam on the other end of the belt as a sort of stopper to stop bbs from falling out, I'm going to check today to see if that is a feasible solution myself. Thanks for the guide!
|
|
|
|
|
|
February 2nd, 2015, 23:44
|
#8 |
|
Love the detail in this thread about the mk43 internals, I have the ares one and its internals are extremely similar. Should sticky this or have it moved to gun diagrams thread for safe keeping
__________________
current armament: mk43, ump.45, p90, barret, m14, g33, k98, m4 tac, m4 swat, mp5 navy, vsr10, p226, m9.
|
|
|
|
|
|
February 17th, 2015, 21:38
|
#9 |
|
Yeah, this thread is the most detailed guide on this model I've seen ever. Thanks Magwell!
|
|
|
|
|
|
February 19th, 2015, 02:26
|
#10 |
|
I'm actually working on milling out my hop unit to be able to use a regular nub rather than a vertical nub there now
__________________
current armament: mk43, ump.45, p90, barret, m14, g33, k98, m4 tac, m4 swat, mp5 navy, vsr10, p226, m9.
|
|
|
|
|
|
February 19th, 2015, 03:33
|
#11 |
|
I am using a promy bridge nub had to cut the wings off it to fit length wise in the inner and had to make it thinner width wise, used an exacto knife to achieve this, am using a Dremel with diamond bit to mill the hop unit, taking a while to get even a millimetre gone hahaha. Will post updates as I go
__________________
current armament: mk43, ump.45, p90, barret, m14, g33, k98, m4 tac, m4 swat, mp5 navy, vsr10, p226, m9.
Last edited by Zfurlong; February 19th, 2015 at 03:34.. Reason: Adjusted wording |
|
|
|
|
|
February 19th, 2015, 06:24
|
#12 |
|
I have finished with modding the hop unit for a bridge nub. All that's left to do now is wait till I can test it. I had to mill out the hop unit towards the rear of the hop unit, meaning I was able to leave at least 50% of the tread on the front part of the unit to still use the same screw to adjust the hop. The milling took the longest, where I had to let the unit and my Dremel cool down due to it heating up while using the diamond bit.
__________________
current armament: mk43, ump.45, p90, barret, m14, g33, k98, m4 tac, m4 swat, mp5 navy, vsr10, p226, m9.
|
|
|
|
|
|
February 19th, 2015, 06:25
|
#13 |
|
I will post results when I'm able to test it
__________________
current armament: mk43, ump.45, p90, barret, m14, g33, k98, m4 tac, m4 swat, mp5 navy, vsr10, p226, m9.
|
|
|
|
|
|
March 7th, 2015, 23:20
|
#14 | |||
|
|
Quote:
Good idea, but I just run my bullet belt over top of the box, and then down beside it, between the box and fabric rather than opening the cover. Hides all the battery wires this way too. Quote:
I took apart the hop up unit completely, replaced the bucking with a Madbull blue bucking (My ICS M4 loves these so I have a handful of spares, seems to work well). I also did the dental floss mod to it. Barrel was extremely dirty, and it occurred to me I had never cleaned it, so I did. The reason I mention this is that my BBs were curving down, regardless of how much hop I applied. After taking apart the hop up, I'm really disappointed in how they designed it. The new bucking should help though, but I need to do further testing in warmer weather. Quote:
__________________
Last edited by Magwell; March 7th, 2015 at 23:34.. |
|||
|
|
|
|
March 15th, 2015, 18:30
|
#15 |
|
|
Update...
I destroyed my piston. How? Well my ROF was too high (for the spring in the conditions), it was cold out and the aluminium cylinder shrunk. The motor turned the gears faster than the piston could cycle. This resulted in the end of the piston being ripped off. 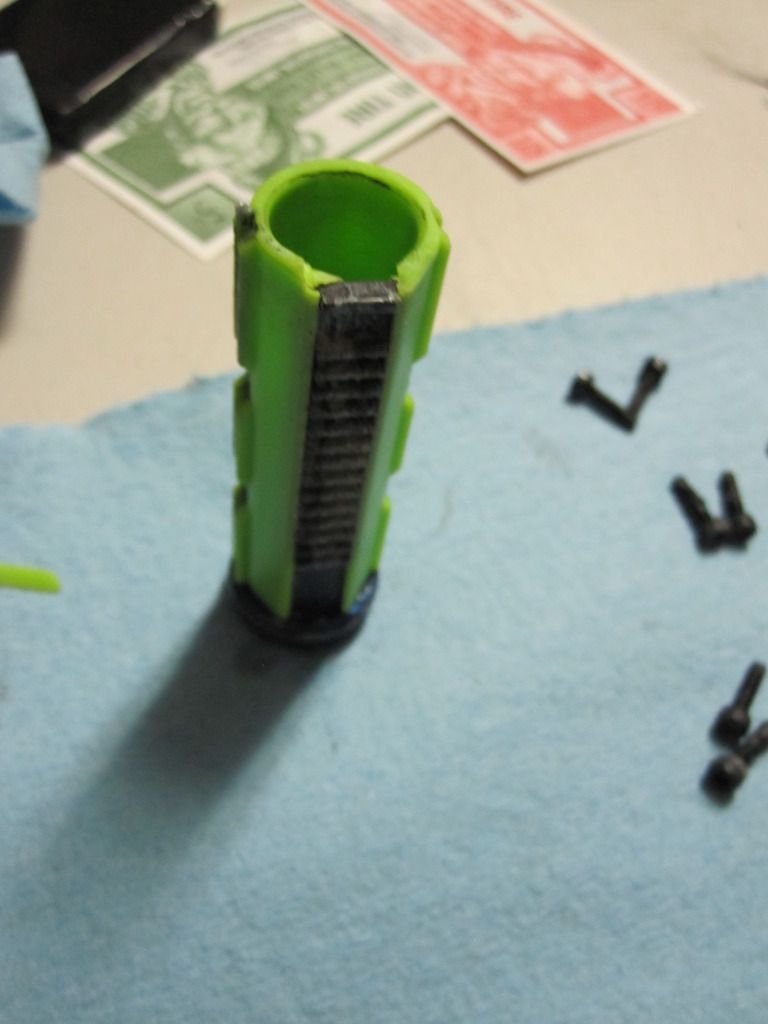 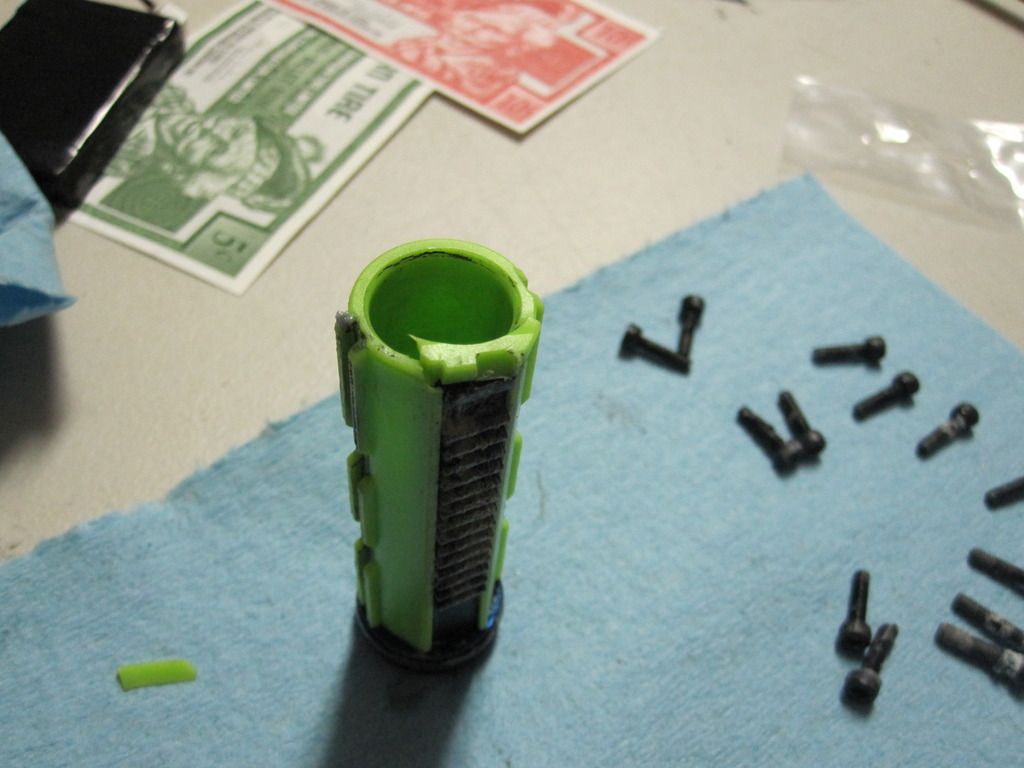 So I replaced it with a Lonex half rack blue piston (had it for a while, works well). Problem solved. Replaced my piston head (the double O Ring one was heavy, aka more moving mass) with a red Modify Aluminum piston head. I use this one on most of my AEG's. I've run it in my ICS M4 with over 200,000 rounds through it, works great. 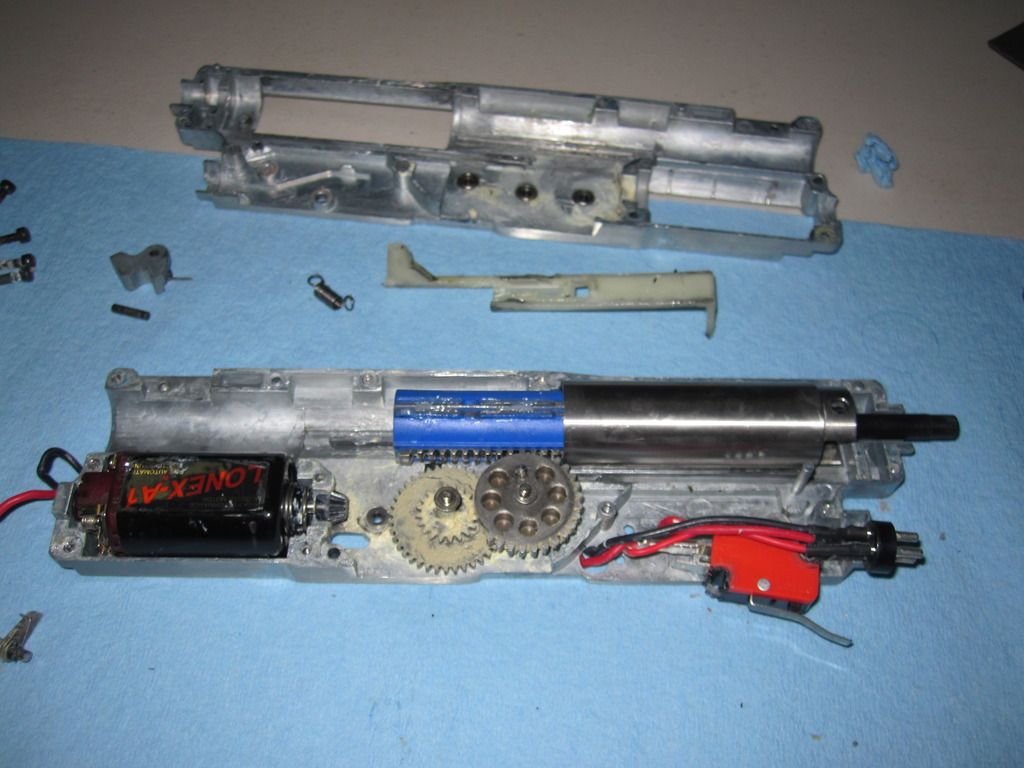 I then began fine tuning the FPS with springs. I ordered a Madbull M100, M110, and M120. The one I had previously settled a bit and was shooting 380FPS, too low for my taste and evidently too weak for the motor in +8 C. 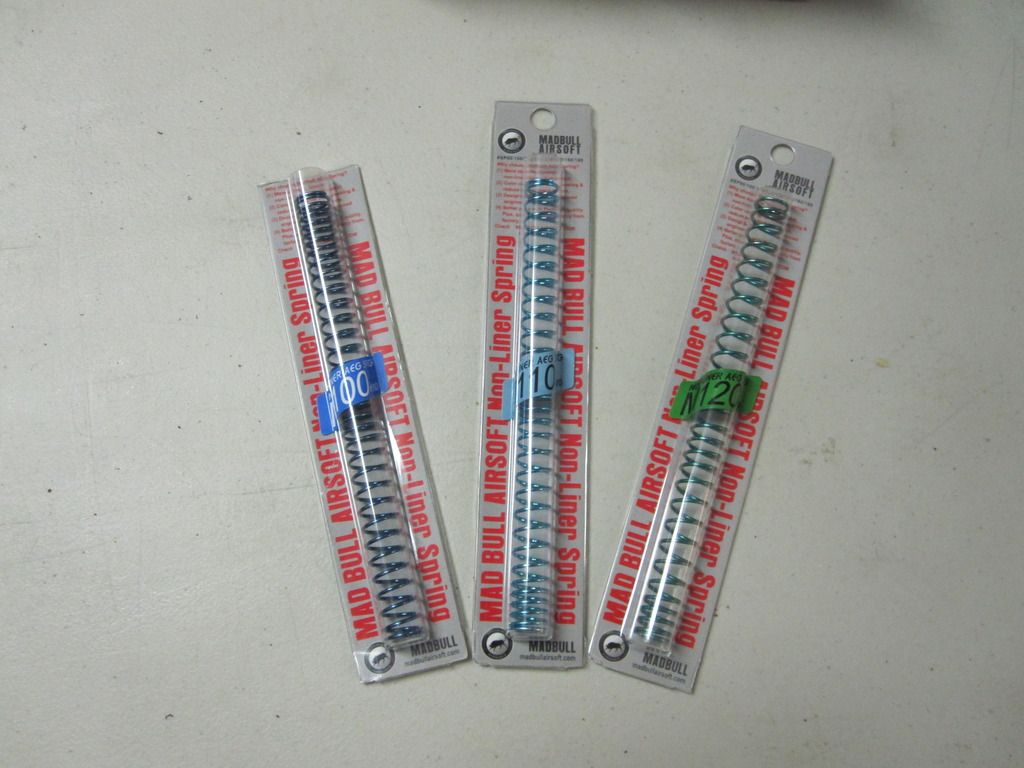 So after this piston mishap - I programmed my mosfet to only shoot at 90% ROF, one of the great features about the GATE mosfet. The Madbull 100 spring shot ~385 @ 19.3 RPS with 0.2g BB's and no hop. (ROF limited to 90%) The Madbull 110 spring shot ~410 @ 18.4 RPS with 0.2g BB's and no hop. (ROF limited to 90%) So at 100% ROF it should be shooting around 20-21 RPS. 18.5ish is good for now though, no piston issues and it will save a little bit of ammo, useful for milsims. 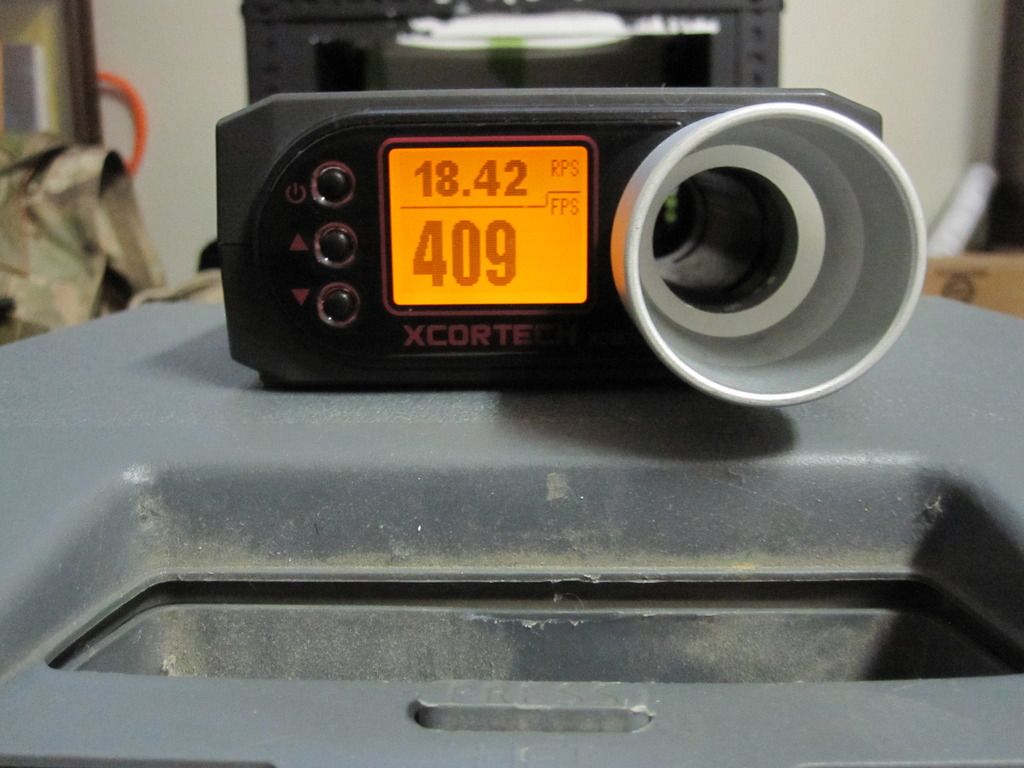 Then I got into the hop up. I'm annoyed with A&K for such a stupid design. I changed the bucking out with a Madbull blue bucking and did the dental floss mod. Shoots more consistently now and I noticed an increase in FPS (this was before spring testing with the Madbull springs). Hopefully I can get 200 feet with this hop up, more testing will be done later. 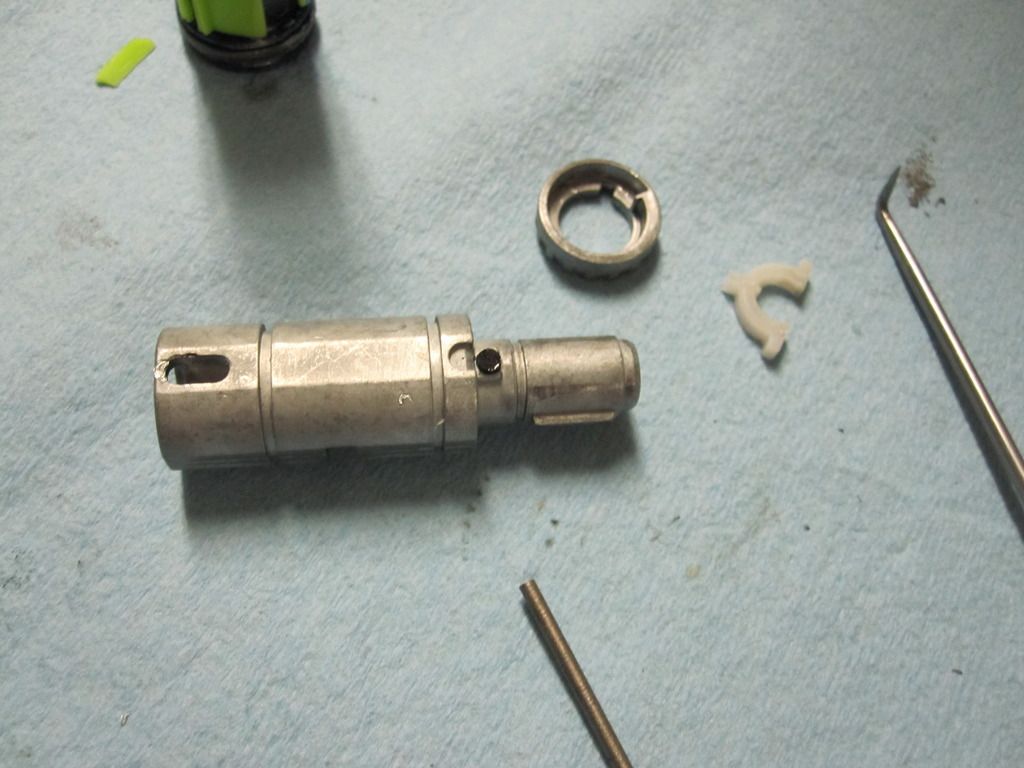 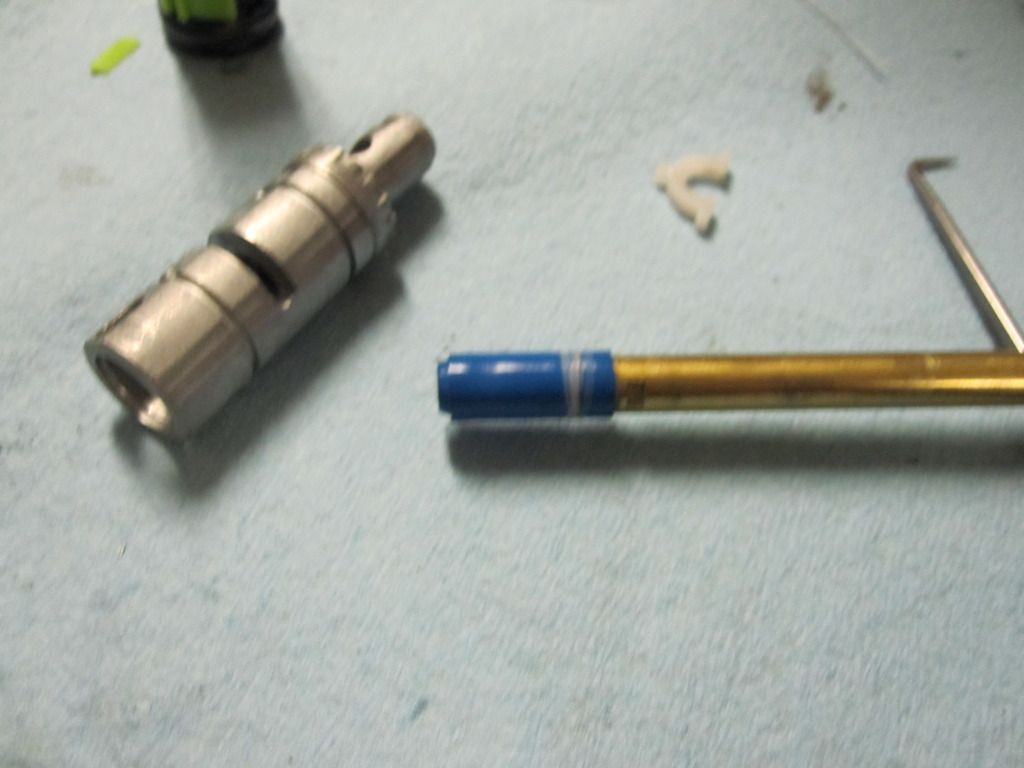 I then decided to modify the Promethius spring guide to fit - it's 'wings' are too wide to work, so they got cut down with a grinder, then filed down for a final fit. It also didn't fit the retaining screw so it was glued in place with a strong adhesive. 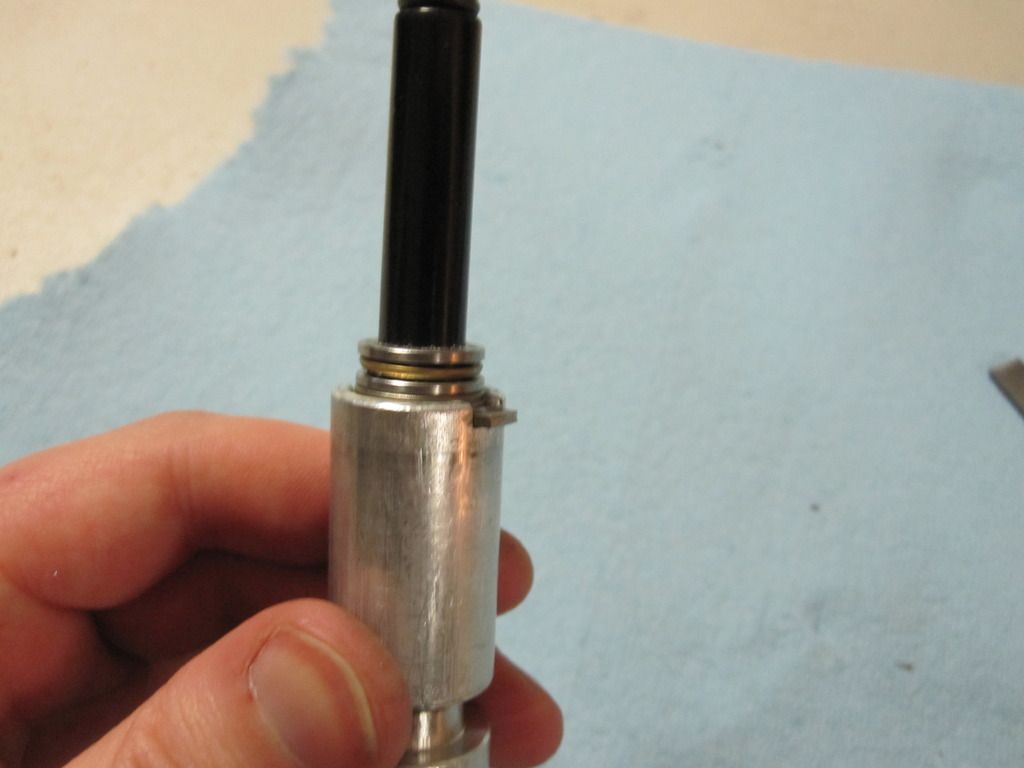 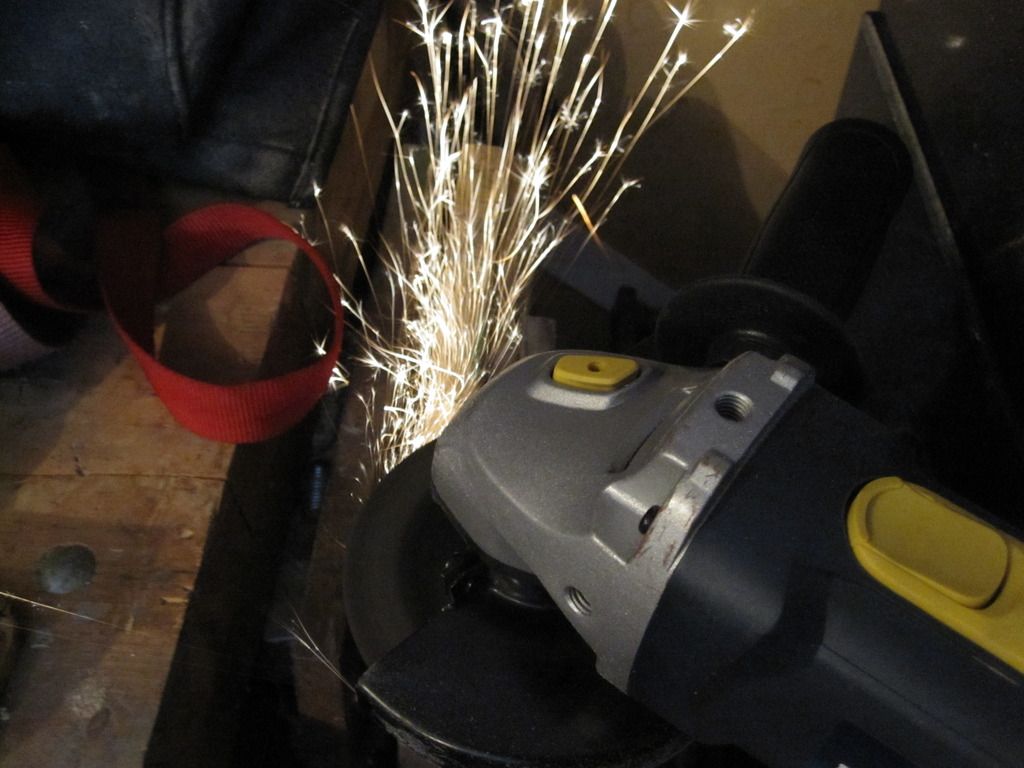 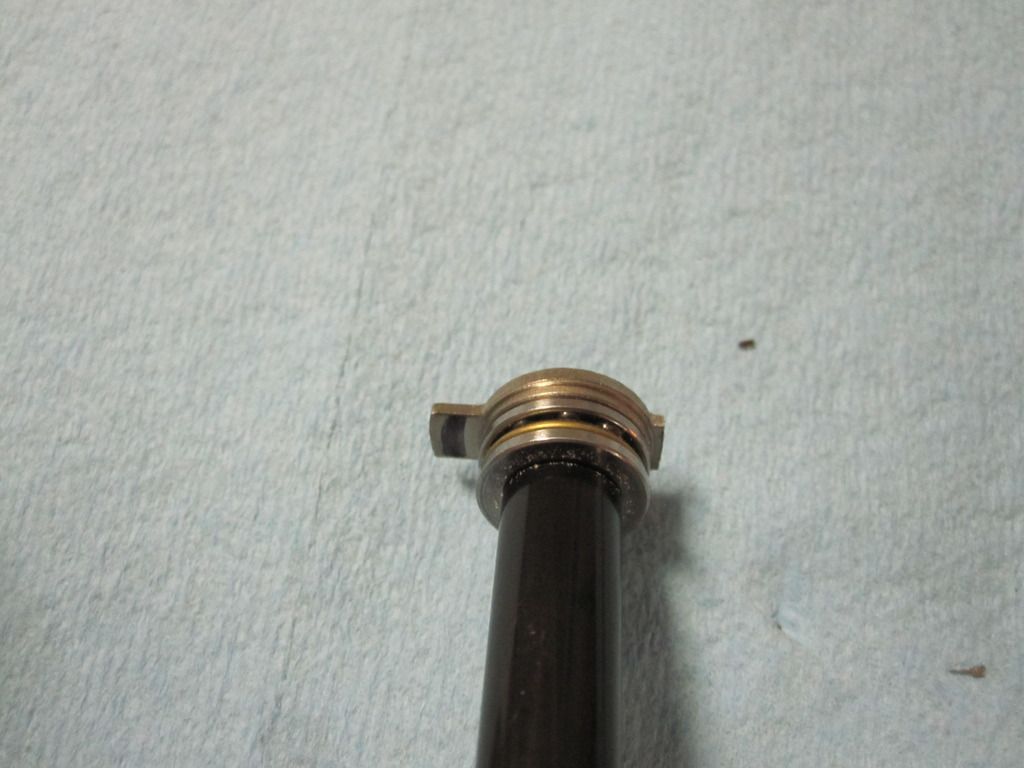 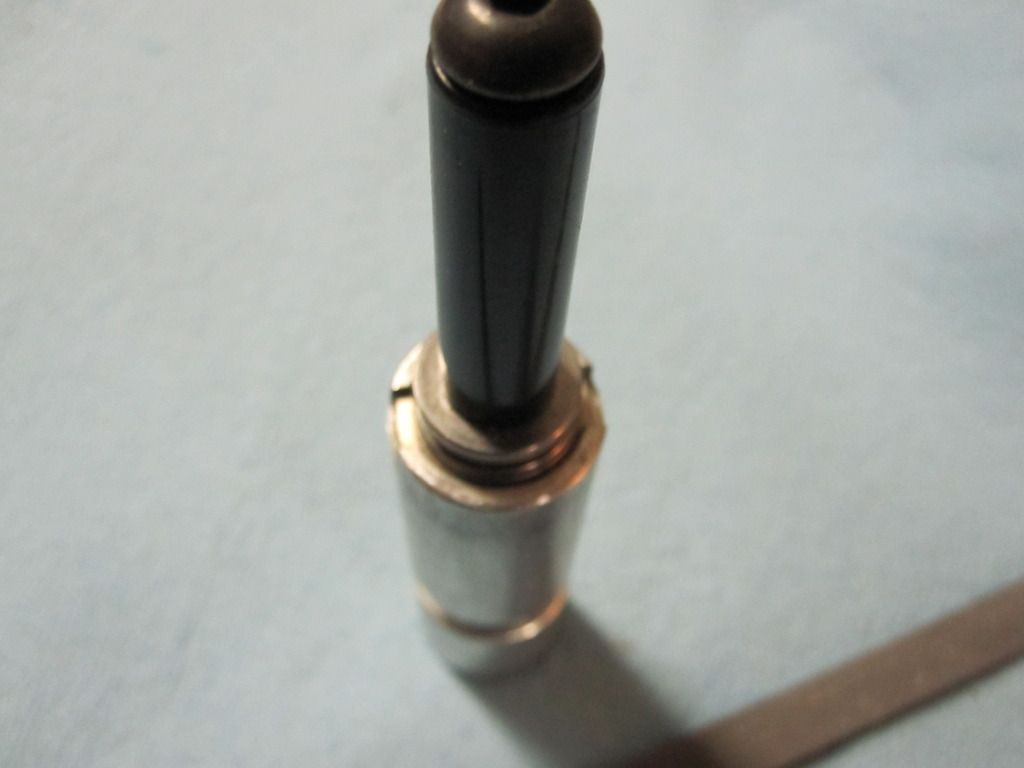
__________________
Last edited by Magwell; March 15th, 2015 at 18:57.. |
|
|
|
  |
|
||||||
| Bookmarks |
|
|
 |
|


