

|
|
|
 March 18th, 2015, 02:48
|
#16 | |
|
It actually turned out really well, milled it out, did a bridge hop mod, other than that and a promy inner the rest of the internals are stock, I have significantly greater range using the same batch of g&g .28's than I did with the stock inner and stock hop. The difference is unbelievable. I can't even see how far the guns accurate beaten zone has been extended, even using a 4x sight. Anyone seeking pics on how the hop unit looks to see what I did, pm me.
Quote:
__________________
current armament: mk43, ump.45, p90, barret, m14, g33, k98, m4 tac, m4 swat, mp5 navy, vsr10, p226, m9.
|
||

|

|
|
March 21st, 2015, 11:57
|
#17 | |
|
|
Quote:
And what ID is the barrel? 6.03? Also - what FPS is yours shooting with 0.2g on stock internals? It should be slightly up over what is was before with a smaller diameter barrel.
__________________
 Last edited by Magwell; March 21st, 2015 at 12:00.. |
|
|
|
|
|
March 23rd, 2015, 20:32
|
#18 | |
|
Yeah it's 6.03mm promy from airsoftparts.ca, I milled out the rear part of the screw hole in the hop unit using a Dremel and a diamond drill bit, being careful to not damage the remainder of the threads for the screw. Then I placed a bridge nub on the inside of the hop unit (where the barrel goes through). It took a bit of work to get the inner with the rubber over it, to slide in under the bridge nub, but once it was in there it fit well.and once it was all in the hop unit, I placed the screw back in to the threads. Then put it all back together. She doesn't chrono much more than between 380 and 400 in position 1. Position 2 yields approx 420-430 on 0.2's
Quote:
__________________
current armament: mk43, ump.45, p90, barret, m14, g33, k98, m4 tac, m4 swat, mp5 navy, vsr10, p226, m9.
Last edited by Zfurlong; March 23rd, 2015 at 20:41.. Reason: Adding photos |
||
|
|
|
|
March 30th, 2015, 04:01
|
#19 |
|
I just realized that I forgot to add one thing to my last post lol, I am using an m100 or m110 spring (can't remember offhand haha)
__________________
current armament: mk43, ump.45, p90, barret, m14, g33, k98, m4 tac, m4 swat, mp5 navy, vsr10, p226, m9.
|
|
|
|
|
|
April 6th, 2015, 13:36
|
#20 |
|
|
Update:
Gamed the M60 for the first time on Saturday - fired about 9000-10,000 bbs and it worked beautifully until I sheared 4 teeth off the spur gear! 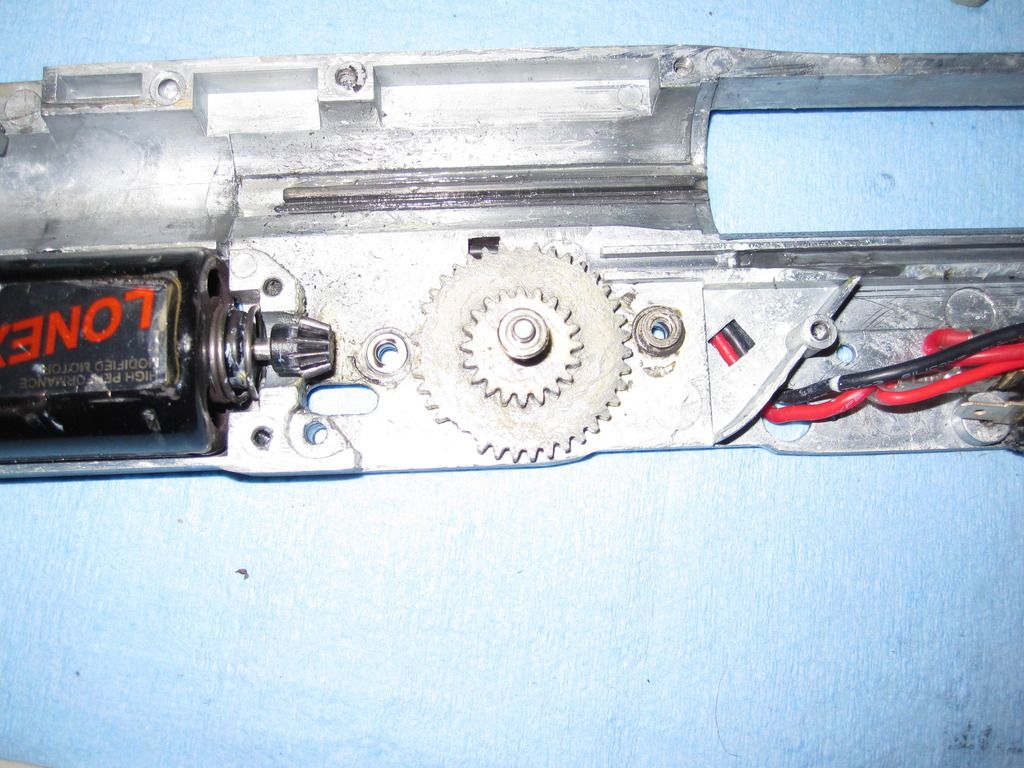 Upon closer examination it looks like the grease I used on my piston, piston rails, tappet plate, and nozzle either froze or got very thick (think dried wax). I ran out of my usual grease and used some stuff I had lying around... Guess I'll toss that stuff lol. I also burned through 4200 MAH of batteries, and only had an 11.1v Lipo for a back up that day, which brought the ROF to around 150% of what is was on my 9.9V LiFe batteries, I believe this also contributed to the failure. However, this would have just been a matter of time, and would have likely happened later this year anyway. Solution? Ordered new grease and Lonex Enhanced Super Gear Set - High Speed Ratio (16:1). I'll just replace them all to prevent any future issues. The gears are also 16:1 over what I assume is 18:1 for the A&K gears. I'll fine tune the ROF with my Gate Mosfet but this will give me more flexibility to get an optimal ROF with reliability.  Other than this, the gun worked beautifully once the hop up was dialled in. Range was lacking but I'm estimating 160ft before the bb dropped. I would like to see 200ft consistently but range is secondary to reliability. On this note, the gun worked well, but the box mag began showing it's flaws: 1. Jamming. I had it jam on me twice. I think I have a solution - more to come. 2. The box retention system is crap, utter crap, when running with any weight in the box. Because of the mass in the box it will dislodge and hang on the spring feed tube and lower retention strap when I run. On this note, it also sags under weight and kinks the spring feed tube. Half the time I had to plant the bipod and hold the box in place for it to feed. Solution: Bolt the box mag in place via 3 bolts and metal plate to clamp it in place. This combined with the straps (which won't end up doing much of anything) should eliminate this problem. The hole in the fabric box and plastic box also do not line up properly and this contributes to kinking the feed tube. The hole in the box will be enlarged and a grommet added, this should lower the tube and provide more efficient feeding. On this note, I also bought a Condor Flashbang Pouch for externally mounting my battery on the front of the box mag. I much prefer this over mounting it on or in the box itself. More to come on that. But pics from the game! On the defensive, falling back to our objective:  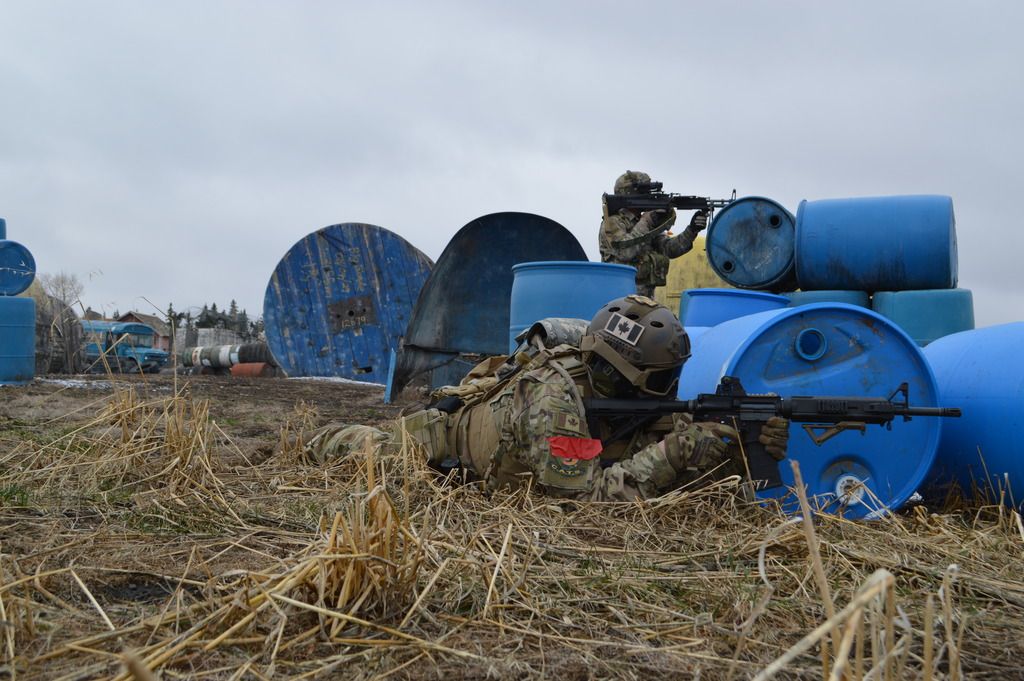 On the offensive, M60's clearing a path! 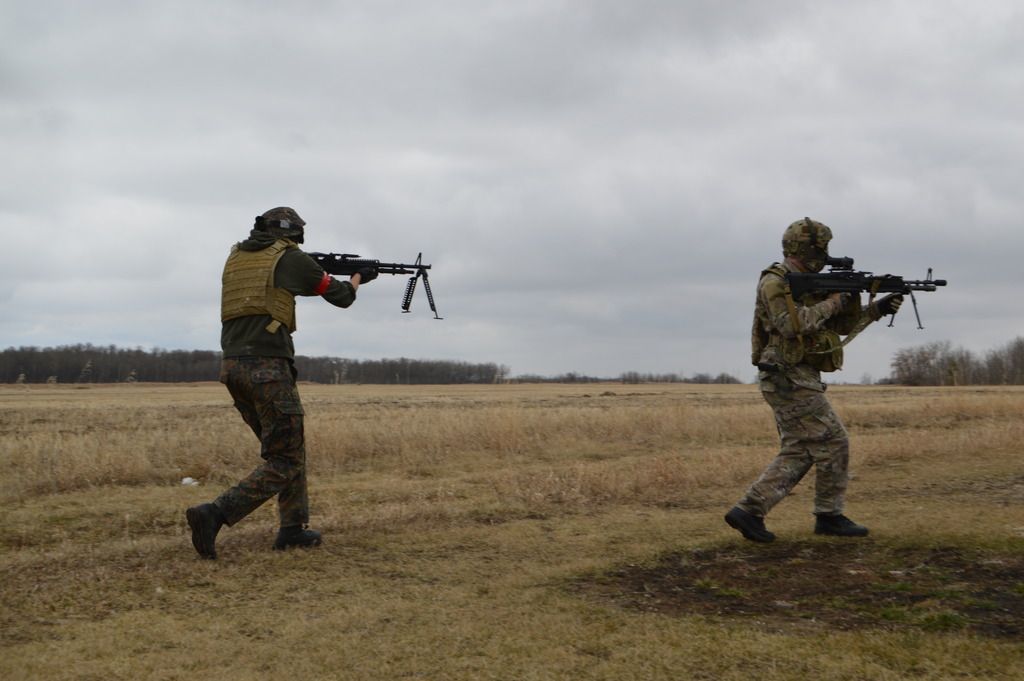 After the gun went down, trying to hold an area with my pistol while our squad pushed back, got taken out by a great grenade toss. Buddy filled a Thunder B with bb's and had it perfectly timed for an airburst right over my head haha. 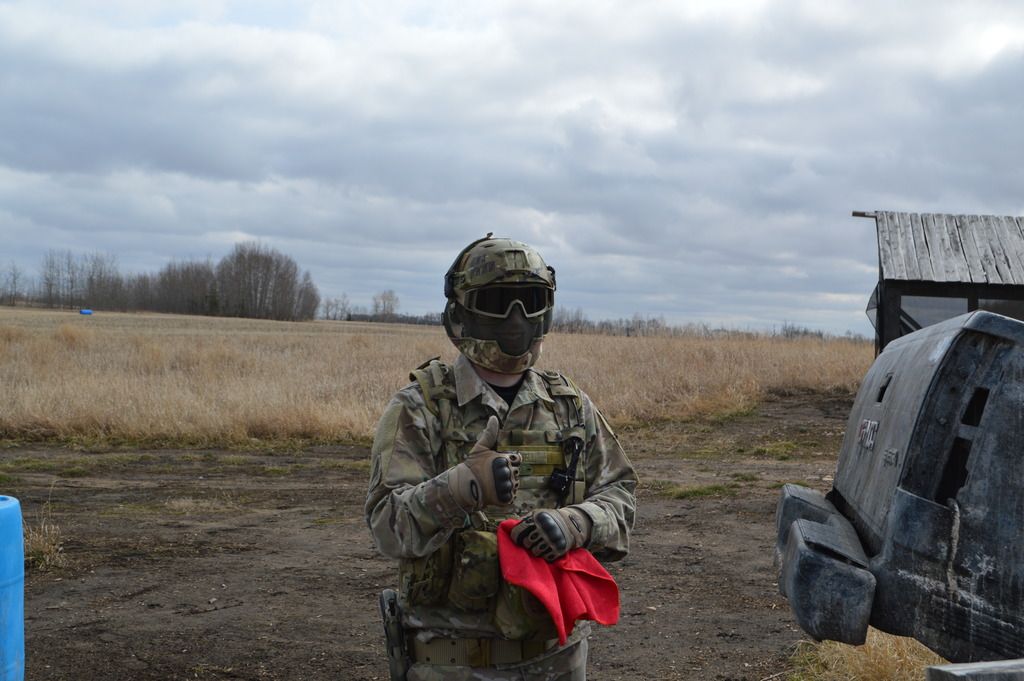
__________________
Last edited by Magwell; April 11th, 2015 at 14:42.. |
|
|
|
|
April 7th, 2015, 01:02
|
#21 |
|
|
Strange , I got my 7.62 link to fit into my A&K VN M-60 without modding it ? Is this because its a different type of M-60 ? You would think the feed trays would be the same size !
__________________
Weapons : 39 airsoft weapons. Daf YA 314, 3 ton Dutch Army Truck. Retired Reg.Force 1 Brigade RECCE. nmvac.org |
|
|
|
|
April 9th, 2015, 02:02
|
#22 | |
|
|
Quote:
__________________
|
|
|
|
|
|
April 10th, 2015, 00:41
|
#23 | |
|
I would be willing to bet it's the rounds lol.
Quote:
__________________
current armament: mk43, ump.45, p90, barret, m14, g33, k98, m4 tac, m4 swat, mp5 navy, vsr10, p226, m9.
|
||
|
|
|
|
April 11th, 2015, 14:48
|
#24 |
|
|
Agreed on the 7.62 rounds.
Update: Box Mag Modification Before we can do anything to the box, we need to find the flaws in the feeding system. After investigating, the box mag 'fabic' is the main source of the misfeeding. It is poorly designed in that it is too short. In order to fit the metal grommet, it needed to be placed below the re-enforced webbing. This means that the entire box and fabric need to be raised to prevent the entire weight of the box from resting on the feed tube itself and kinking the spring, jamming the box and putting extreme excess strain on the box motor. This image shows how the box mag needs to sit to prevent misfeeding and allowing the feed tube flexibility. Notice how the top straps of the box mag are barely touching the rail, and realistically doing nothing. This means there is about a 3/4" travel between where the box SHOULD sit, and where it does sit per A&K's design. 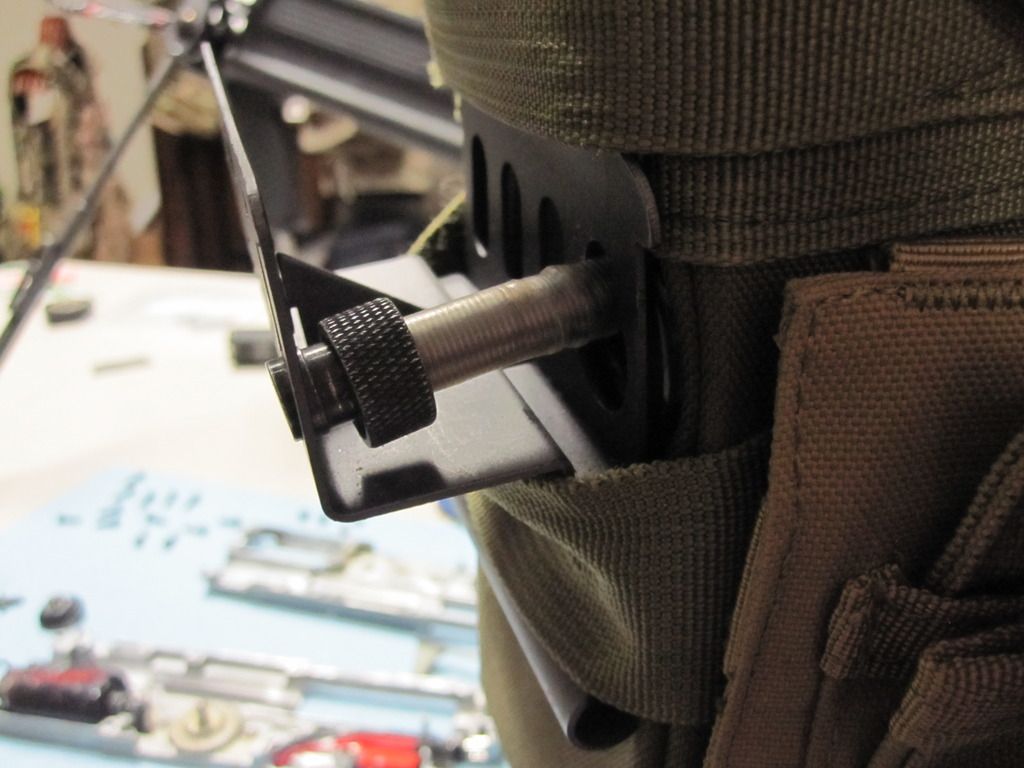 So, how do we fix this? I chose to modify both the box mag it'self and the fabric box. I started with a ~1mm thick aluminium cover plate I had laying around that turned out to be the perfect size. 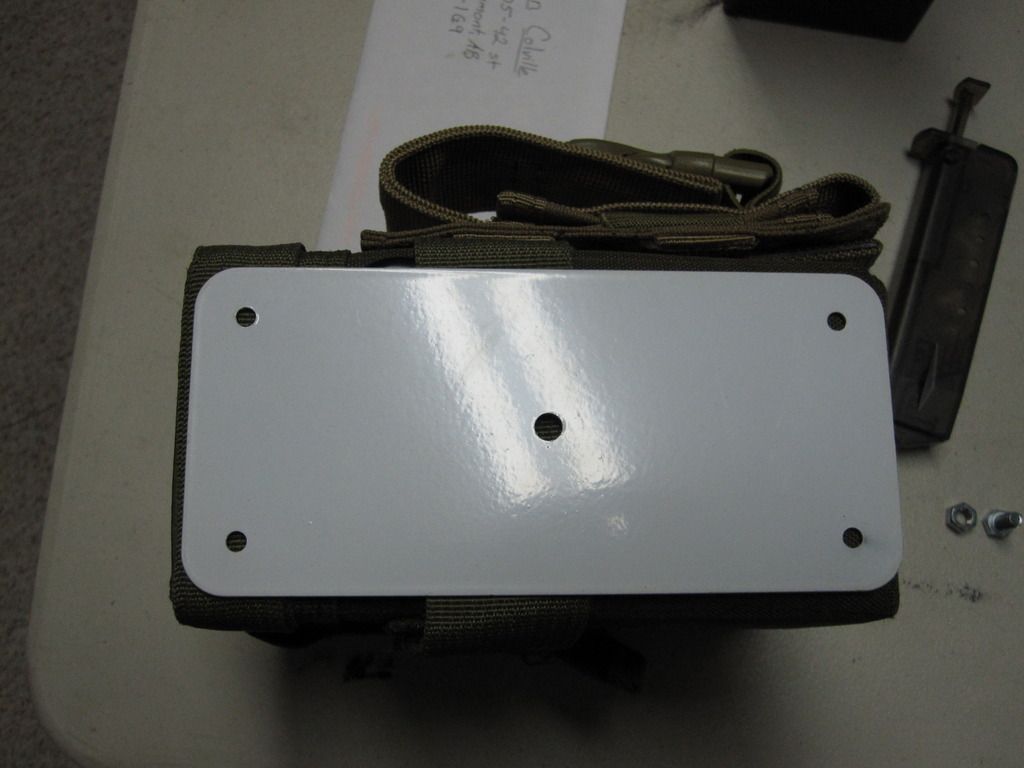 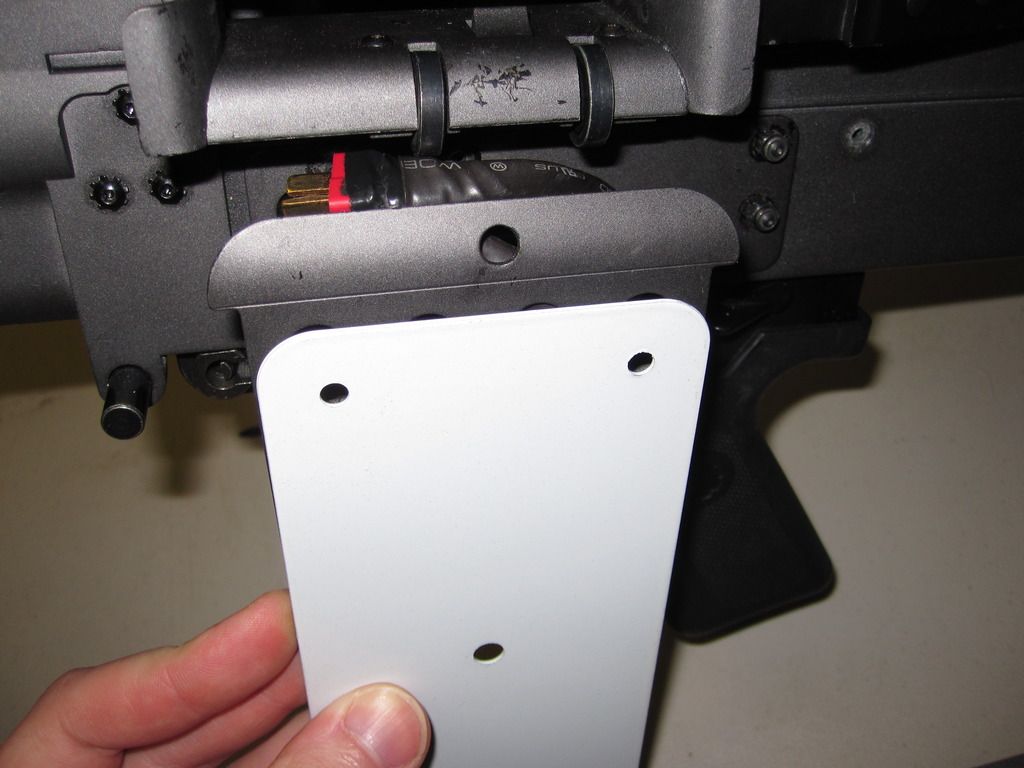  After lining it up, I marked and drilled two 9mm (3/8") holes to fit two 8mm (5/16") bolts. This was followed by two 12mm (1/2") holes to align with the oval openings in the rail. Finally I used a stepped bit to drill a hole to match the large opening for the feed tube. 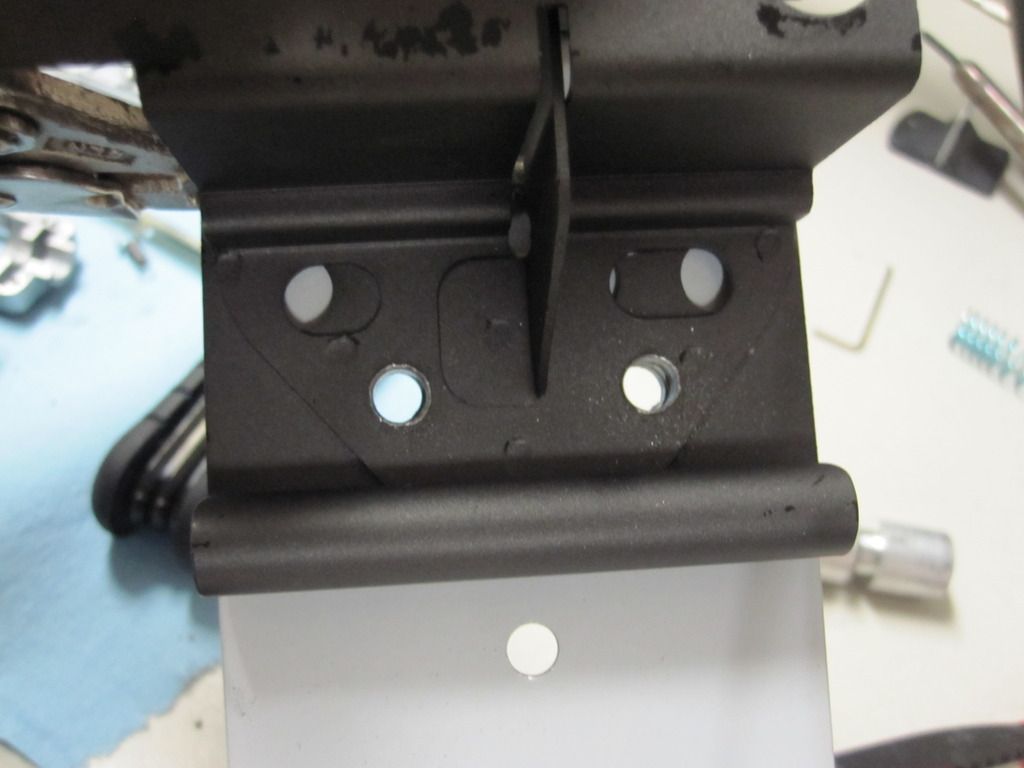 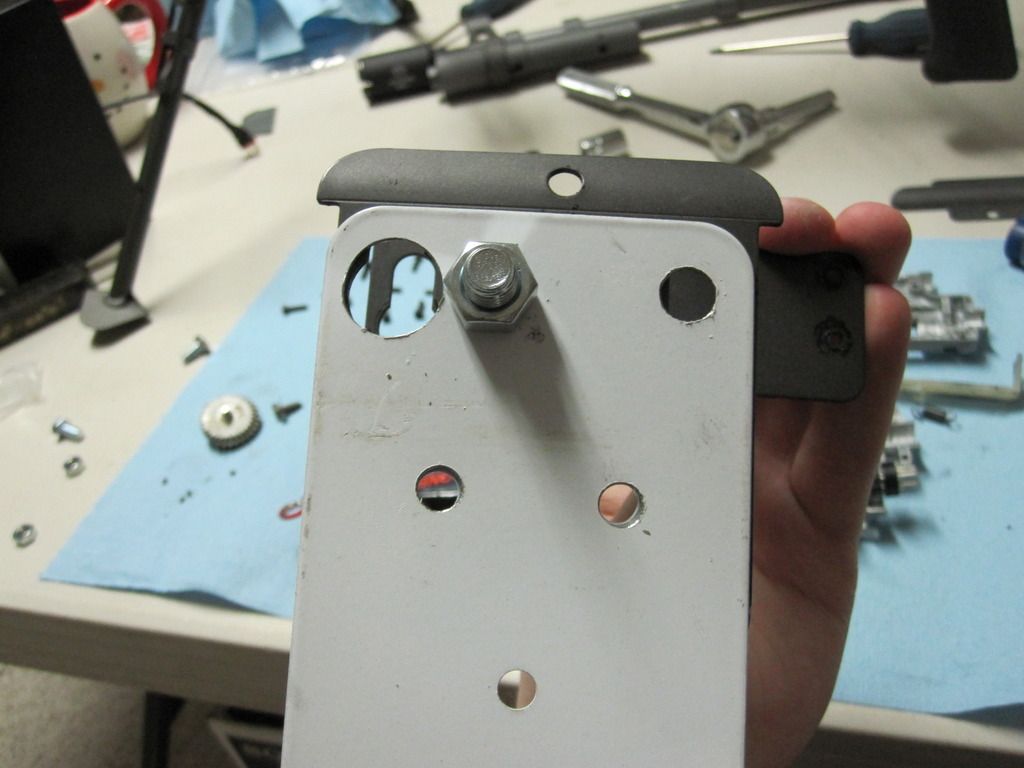 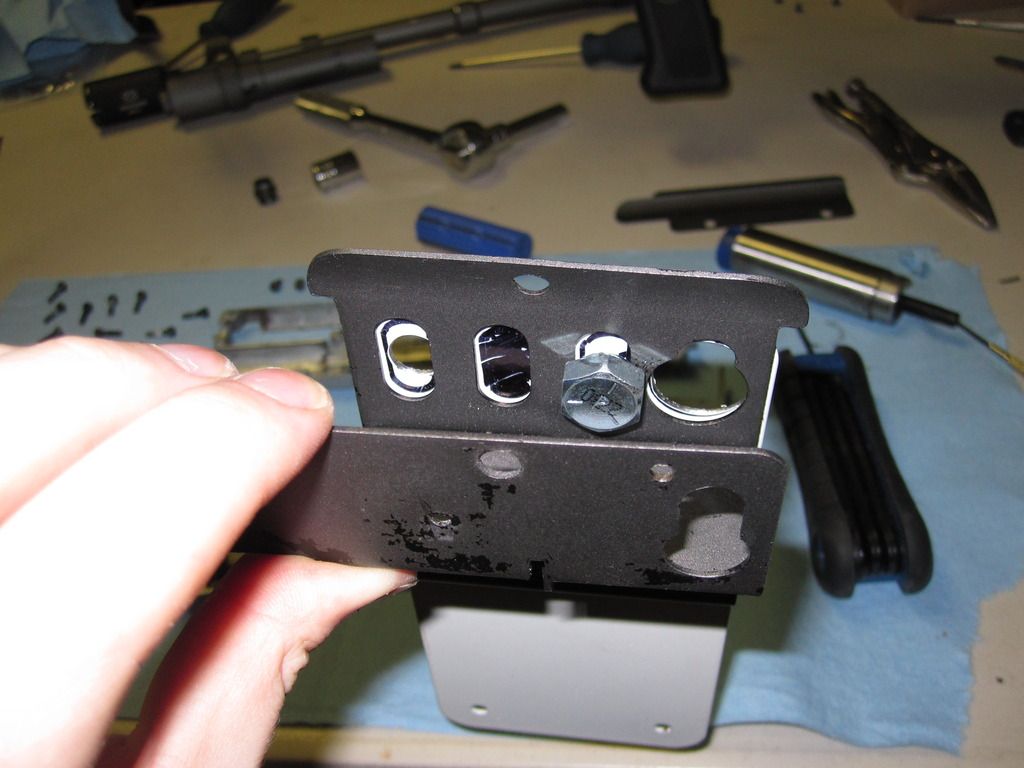 Then I put it in my vice, and used a hammer to bend the bottom 90 degrees after lining it up as it was too tall overall. This also provides a nice ledge for the plastic box to rest on. After this I marked and cut two holes in the fabric box for the bolts to pass through and a third hole to bolt the metal bracket to the fabric through an existing 9mm hole in the middle of the bracket. 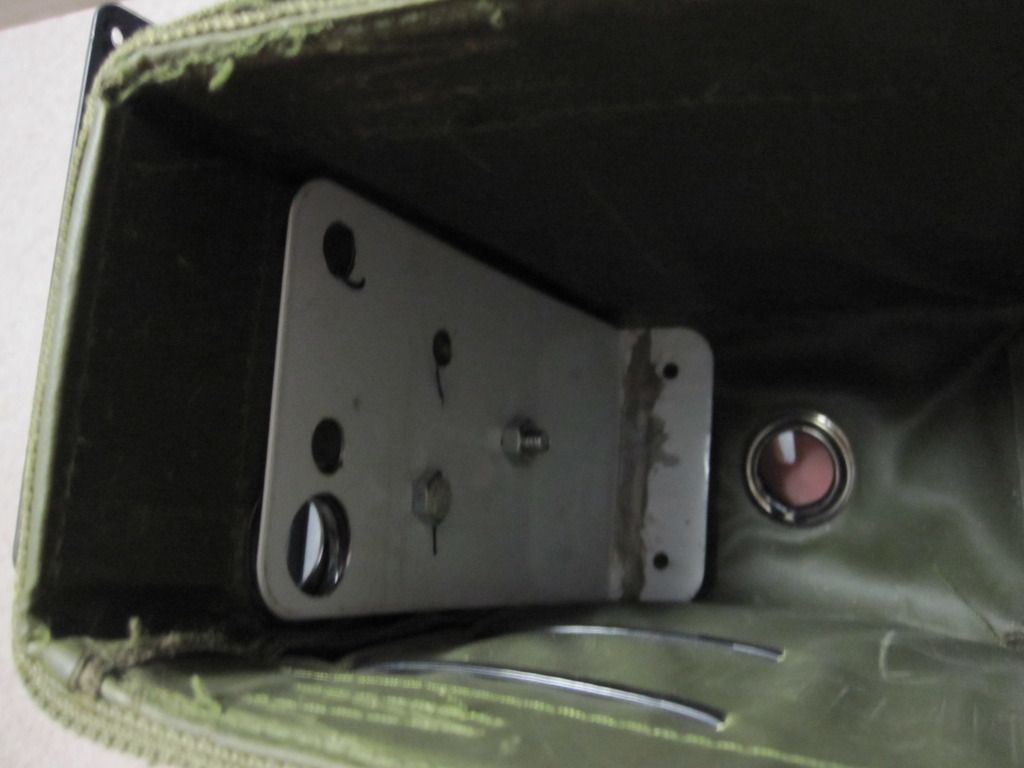 After this I removed it all and hit it with some Krylon Olive Drab paint. The final step was to fix the nuts to the box rail on the gun. I first filed all the paint off and left a crosshatch pattern in both the nuts and rail to promote adhesion, then used an industrial adhesive to glue the nuts in place and bolted it down. After I used JB Weld to encase the bolts and allow them to be fixed permanently for easy installation and removal of the fabric box. 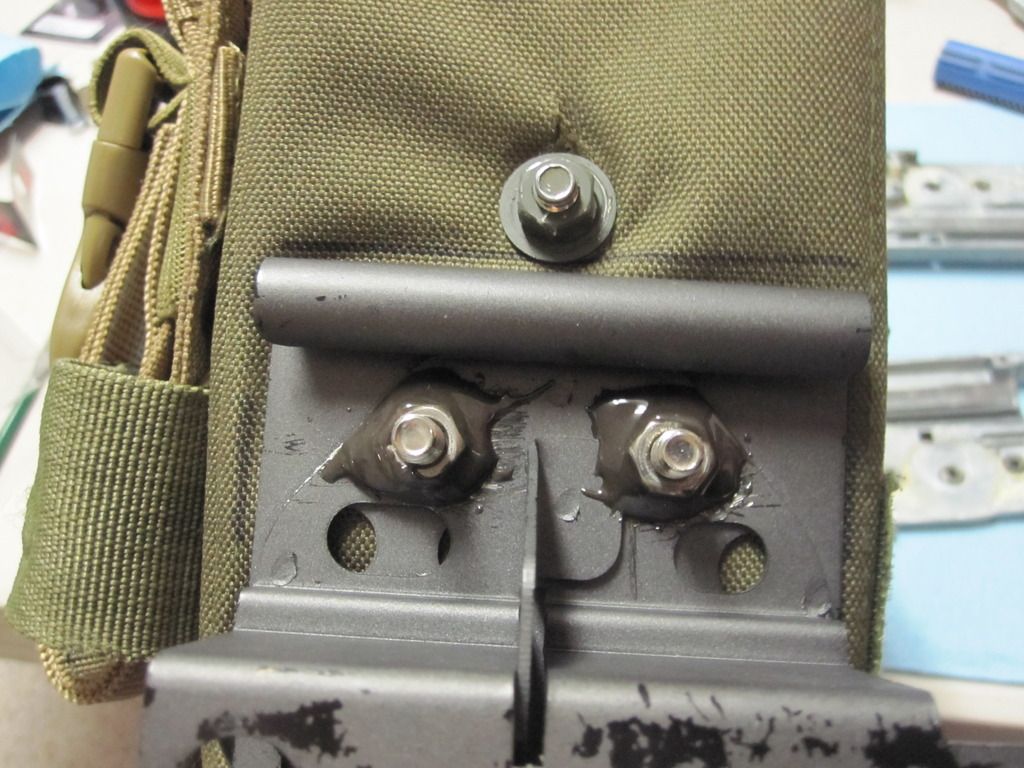 After this it was time to modify the box mag to lower the spot where the feed tube exits - the original location is a little too high, hence the weird notch in the box retention rail on the gun. With the box repositioned, it negates this. Using a stepped bit I oversized the hole slightly. Then using some 1/8" Lexan I had laying around I cut a small piece and drilled a 3/8" hole to fit the tube. It was then glued in place with super glue, and painted flat black. I apologise as I did not take a picture with the new hole drilled, but it was about 1/4" farther down. Maybe a little more, 5/16" possibly. 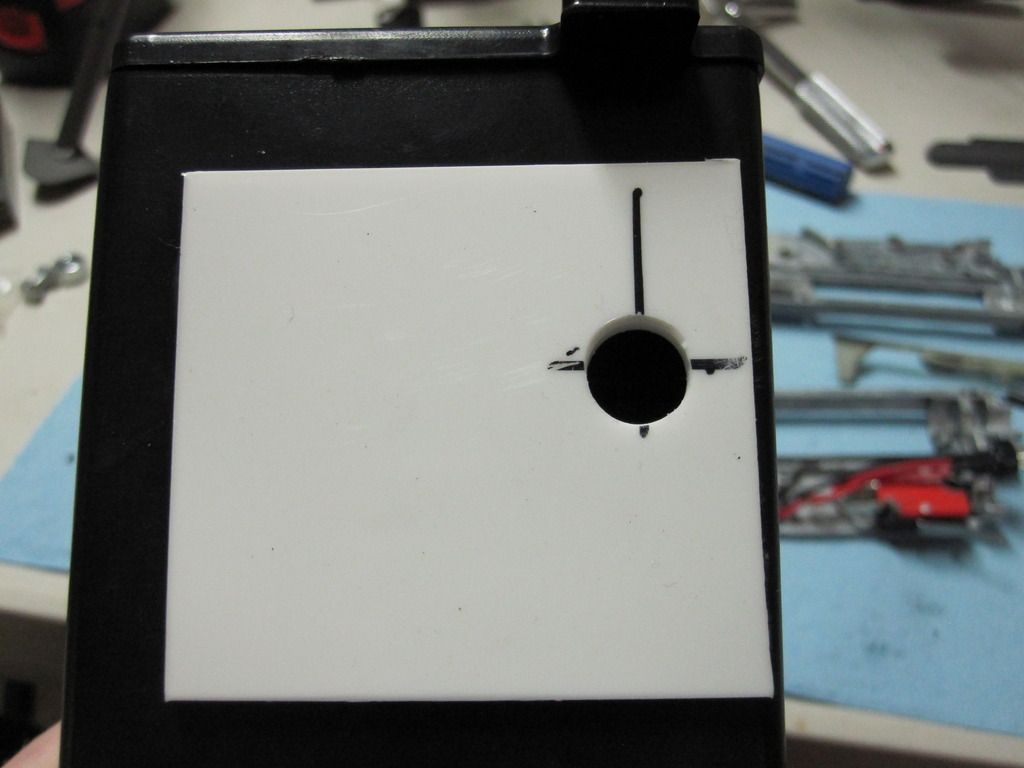 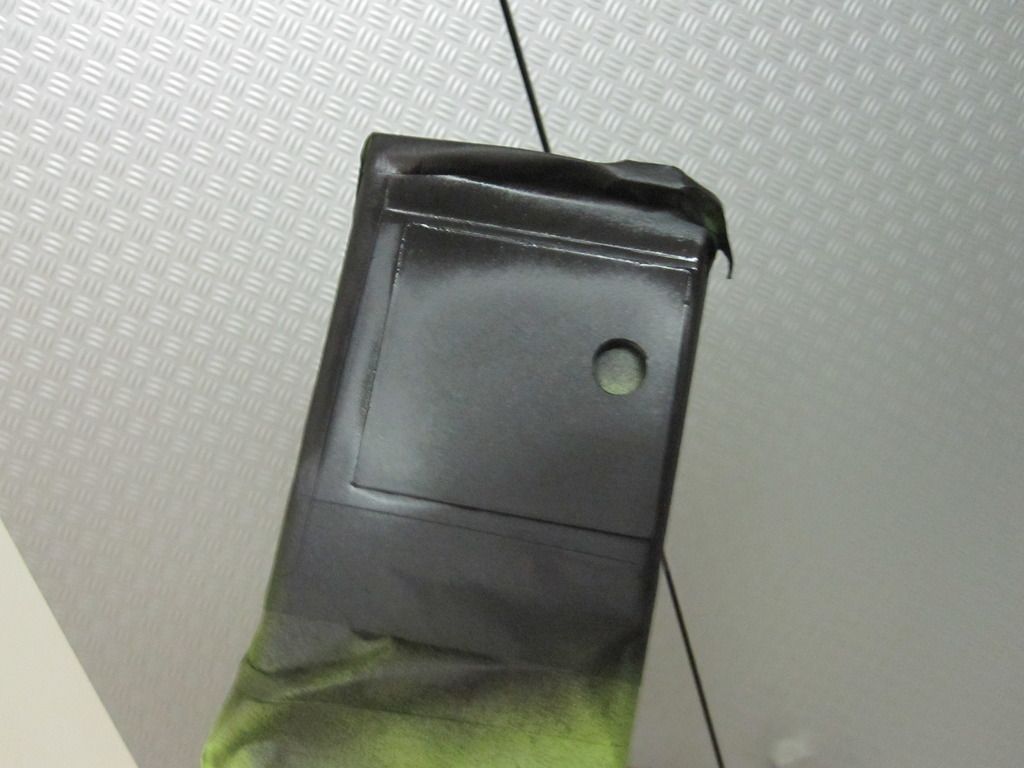 The feed tube now has a nice gentle curve to it while not flexing between the box mag and gun. 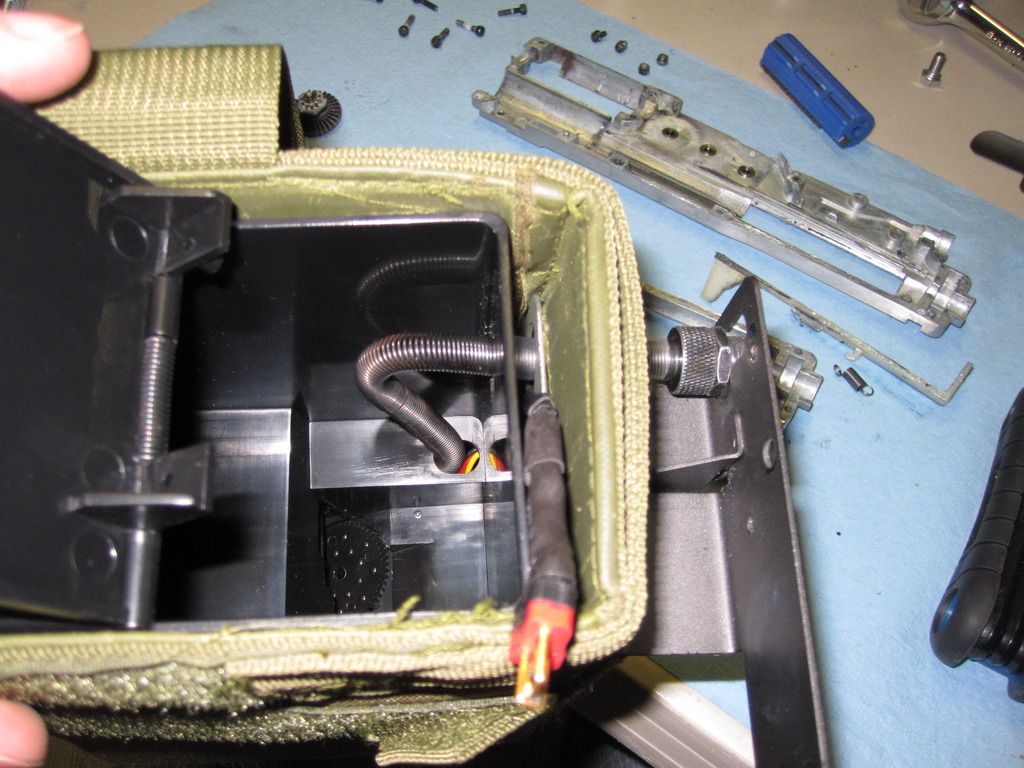 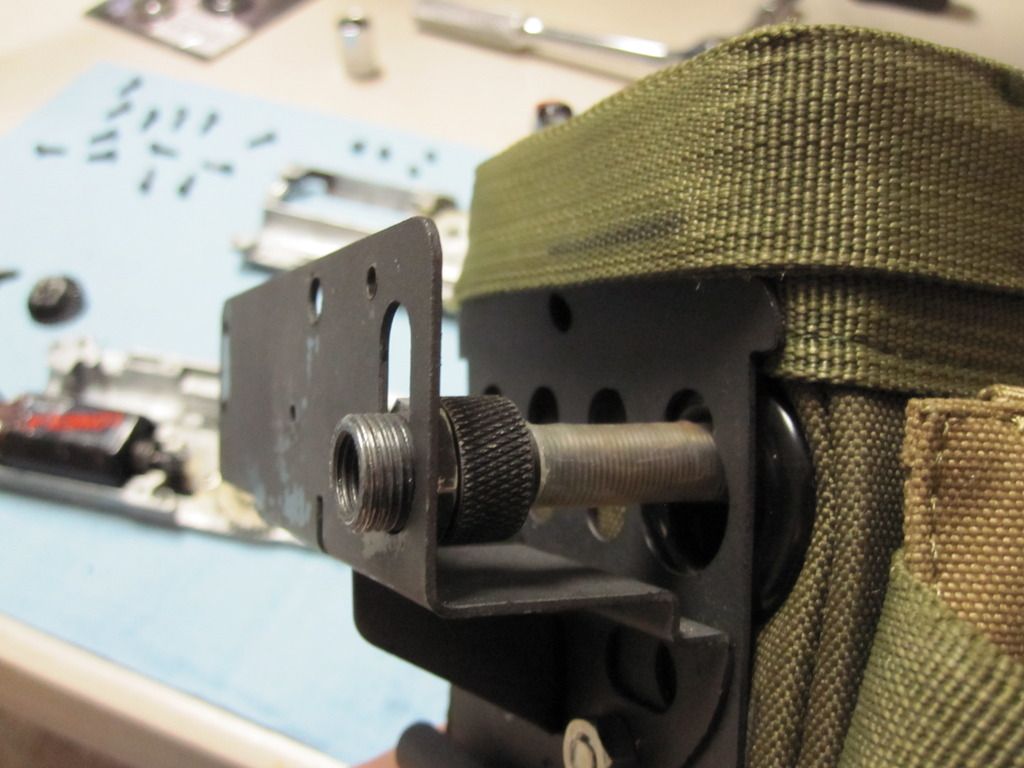
__________________
Last edited by Magwell; April 11th, 2015 at 15:17.. |
|
|
|
|
April 11th, 2015, 15:40
|
#25 |
|
|
Update:
New gears! New parts arrived. Based on some maths, these gears will be 12.5% faster than the 18:1 stock gears. This means that with my settings at 90% ROF previously, I should take it down to 80%, and will then have a 2.5% higher ROF. EDIT: After field testing it appears the stock gears are 16:1  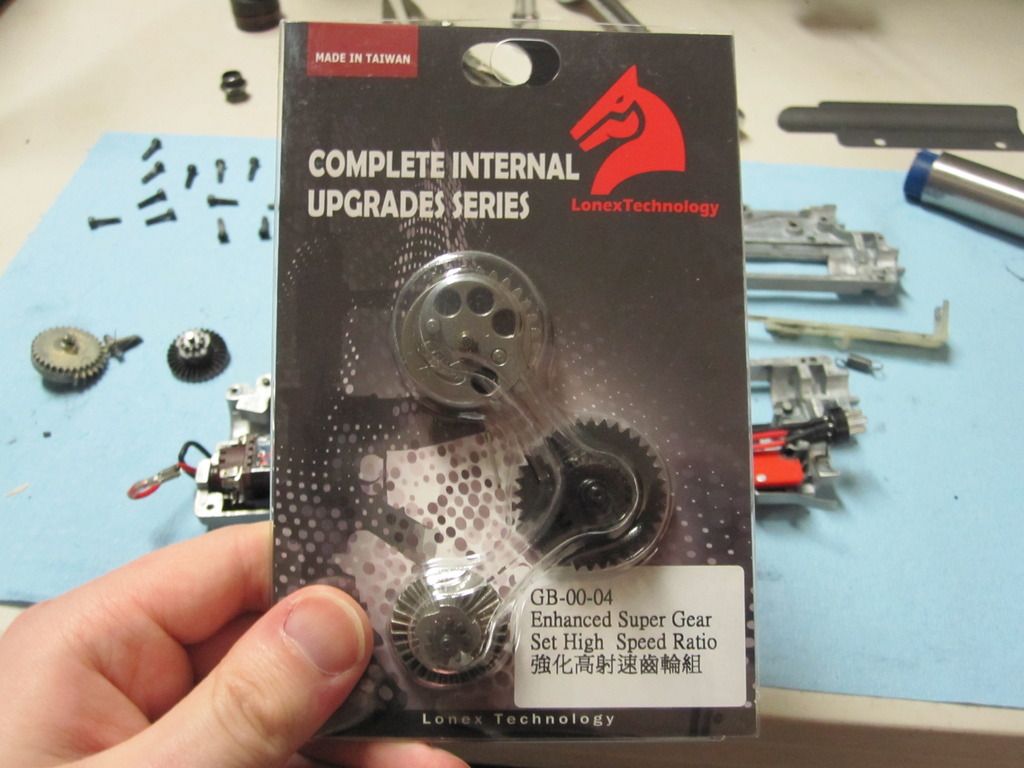 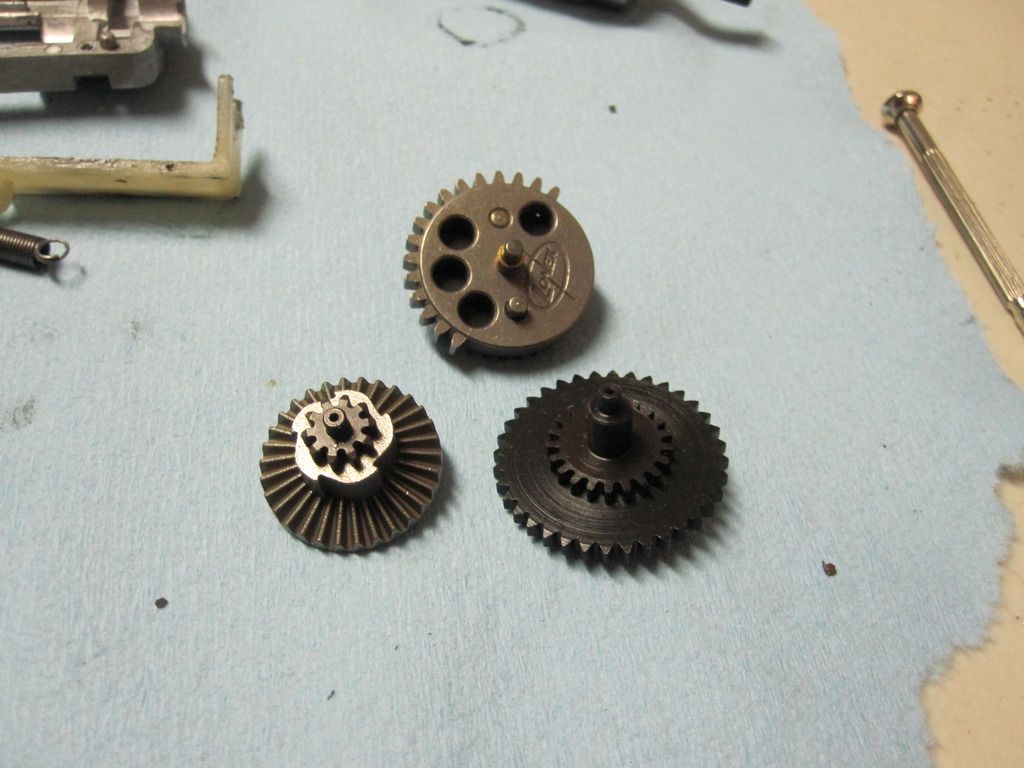 Ready to re-shim. During the process I discovered that I had never actually set my motor height correctly. The reason being is that the Lonex motor is a little longer (like 1/8") than the A&K motor. Even with the adjustment screw backed off fully, the alignment was out. So I removed it, and found a small washer (0.8mm ish) and it aligned it perfectly. The gearbox is of course much quieter now, and this may have contributed to the sheared teeth on the spur gear. In addition I glued down all the bearings to prevent them from working loose and interfering with the gears, which also could be a possible cause of the sheared teeth. 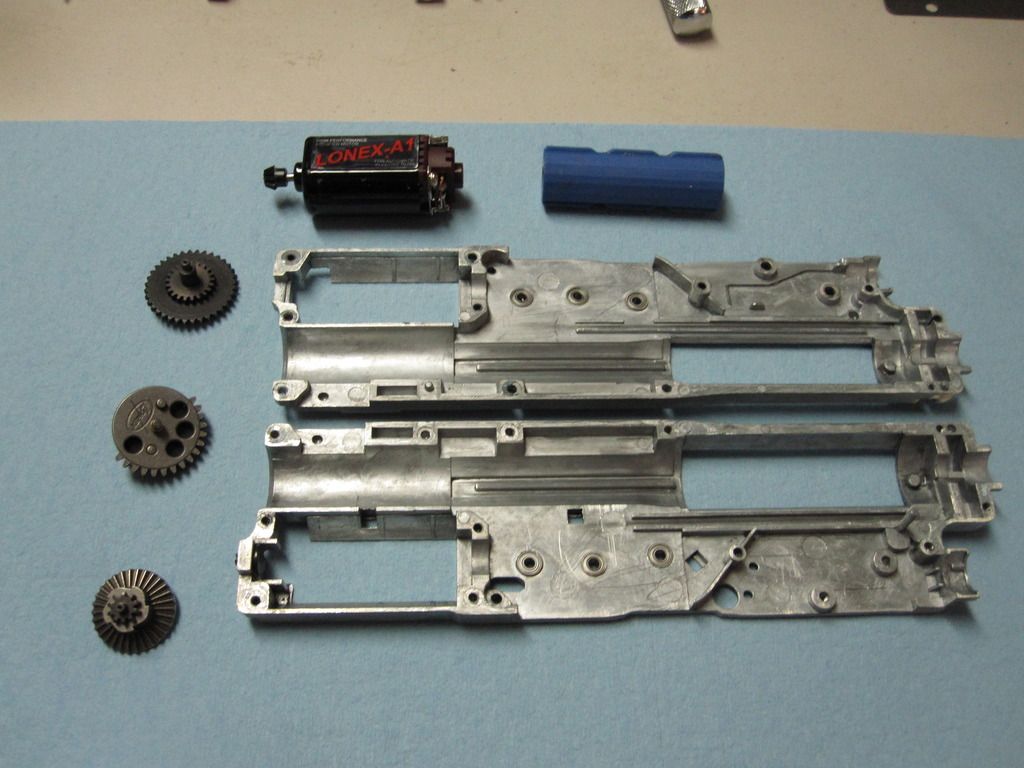
__________________
Last edited by Magwell; June 25th, 2015 at 13:19.. |
|
|
|
|
April 12th, 2015, 21:54
|
#26 |
|
|
So while I had the gun apart for the gearbox and just some maintenance on other items, I though, hey why not paint it... lol. Krylon Khaki, Olive Drab, and Brown - all from the camo series of paint.
Quite happy with the results... 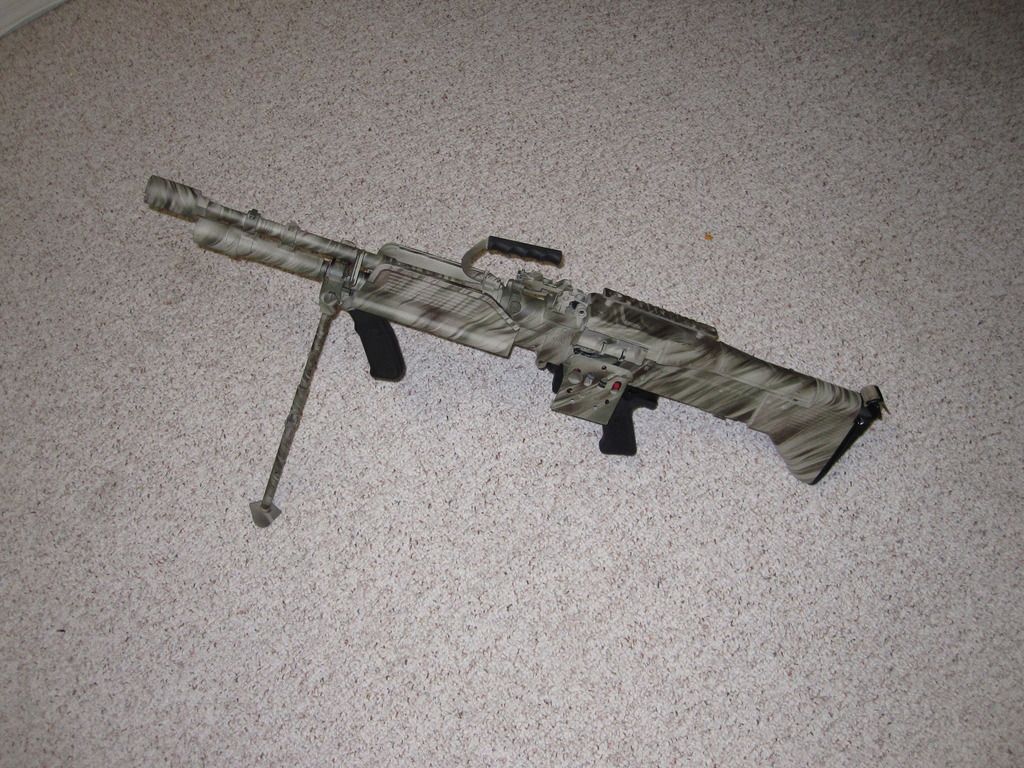 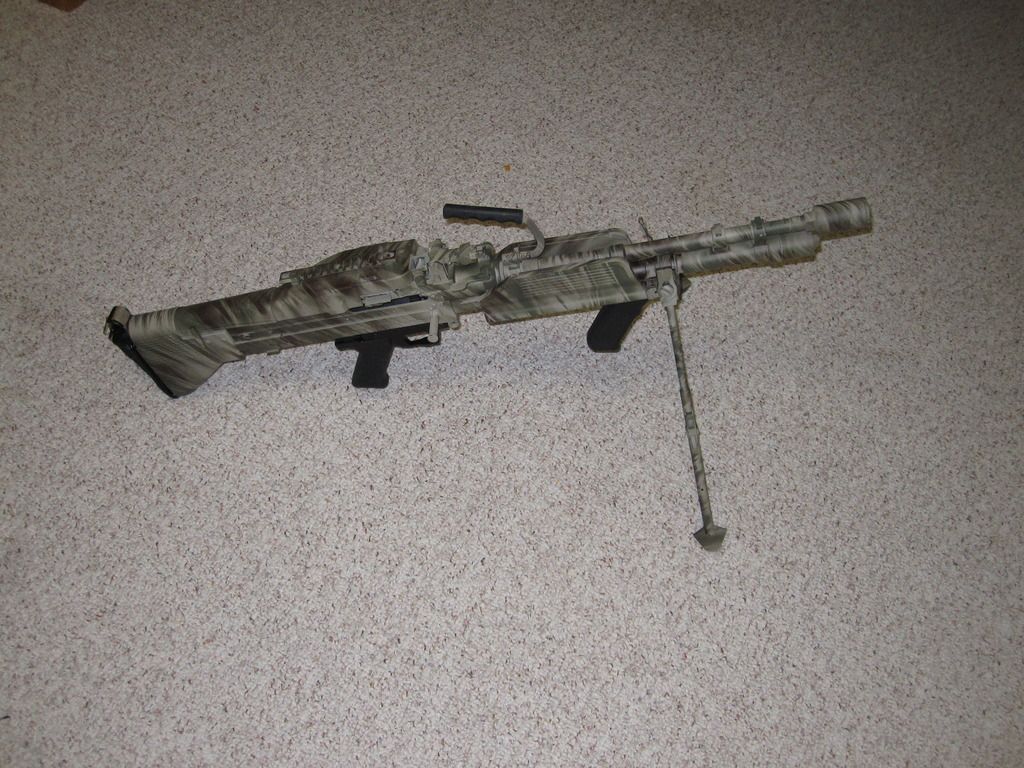
__________________
|
|
|
|
|
April 13th, 2015, 00:10
|
#27 |
|
Hey guys. Sometime this year I will be starting hydrographics. Makes for sick good quality camo, if your interested when I start it, msg me and I can paint your guns. Although you will need to completely disassemble your gun and take out anything and everything you don't want to risk water damage on (gearbox, battery, inner, etc)
__________________
current armament: mk43, ump.45, p90, barret, m14, g33, k98, m4 tac, m4 swat, mp5 navy, vsr10, p226, m9.
|
|
|
|
|
|
June 25th, 2015, 12:52
|
#28 |
|
|
Ok, time for an update.
Brought my beast out to a season opener in May with 100+ players. It performed beautifully. I'm very happy to say that the firepig scared the living sh*t out of Op-For on many occasions, and on a few my own team as I fired over their heads lol. 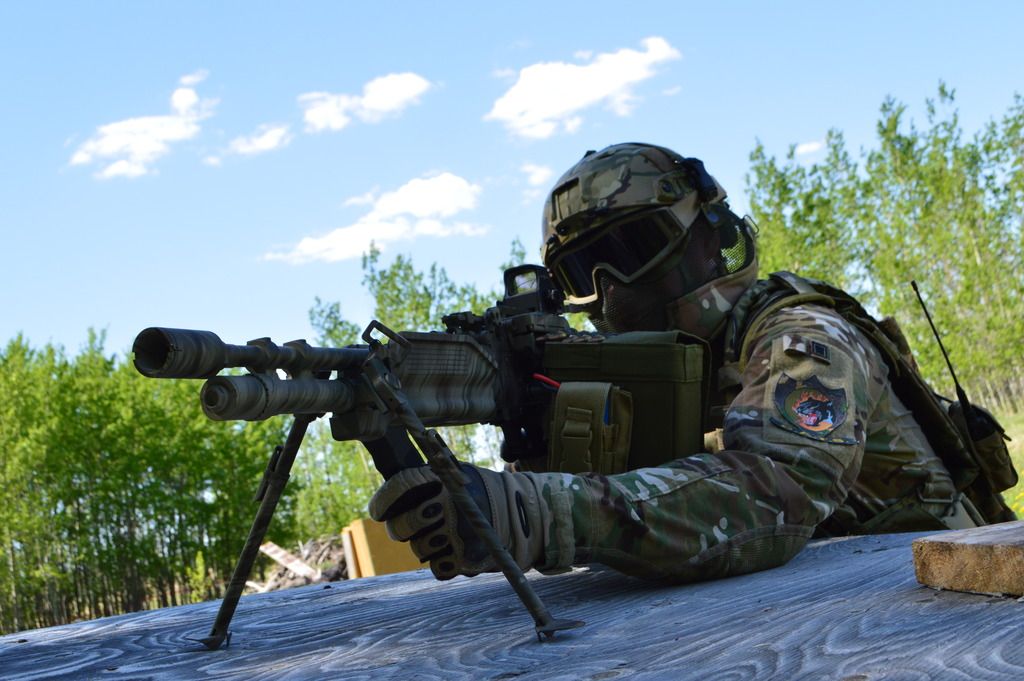 The morning went very well, it was heavy per usual to lug around but worked flawlessly... however in the afternoon I kept killing batteries and having it jam on the anti-reversal latch meaning the gearbox had to be pulled in the spawn point to release it. At least that's what I though. As it turns out there was just more resistance so the motor would lock up, or catch on the anti-reversal latch, without a full battery charge. Why? Well I blew the two bearings on the Spur gear. From the looks of things, it still worked for a while after this happened haha. Oddly enough, the gun made no weird noises except making the same sounds you hear when batteries I was using were drained, (RPM dropping and then a locked up motor) which seemed logical at the time since I didn't get a chance to charge up some new batteries and figured they were not full. Anyway pics... The spur gear actually chewed up the side of the gearbox (minimal wear on the spur, props to Lonex!) Also the one piece cylinder I used (V1 Matrix one piece) had some slop, or the gearbox did, where the pins hold the cylinder head in place. This means that over 50,000 - 100,000 rounds that cylinder is being sucked back via the vacuum the piston makes and then hammered forward as the piston releases. So... it sheared off one of those posts, and this is what killed the gearbox unless I can fix that. The trigger switch also basically disintegrated... On a positive note, despite everything that happened here, the only thing that made me purchase a new gear box is the peg that holds the cylinder head in place shearing off. The bearings, trigger, etc can all be replaced, and the gearbox would still work fine. So I will attempt to fix the gearbox and build a back up gearbox with it. More on that later... 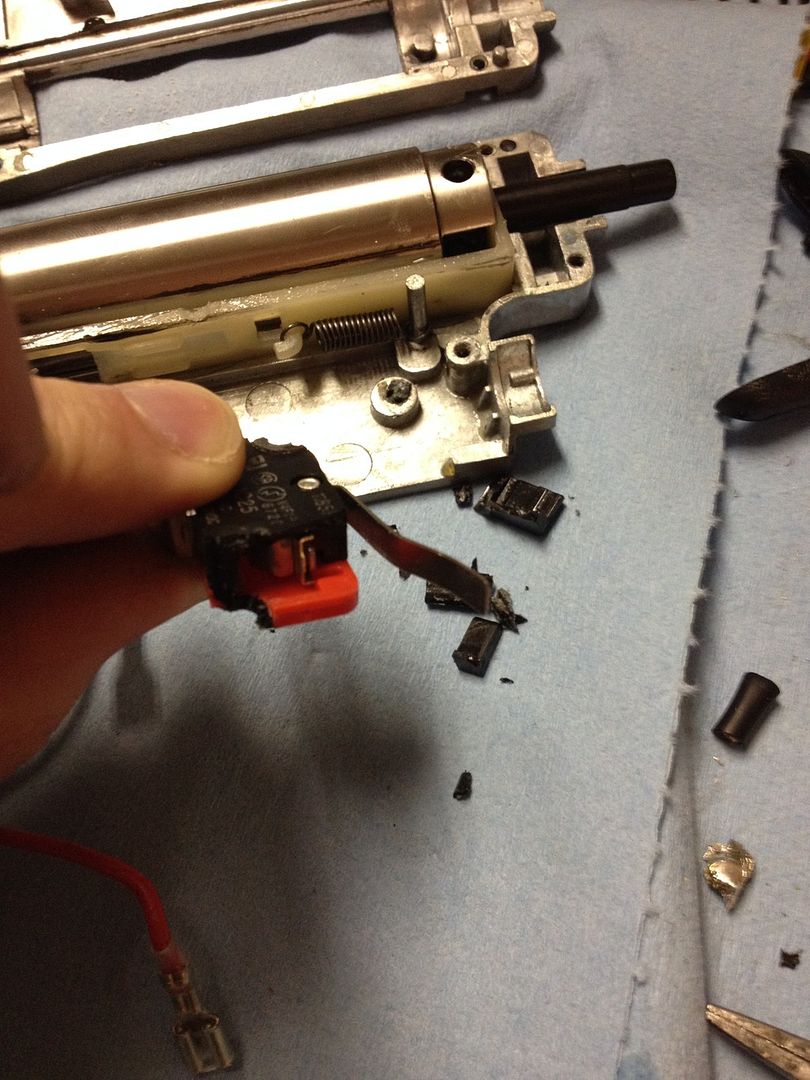 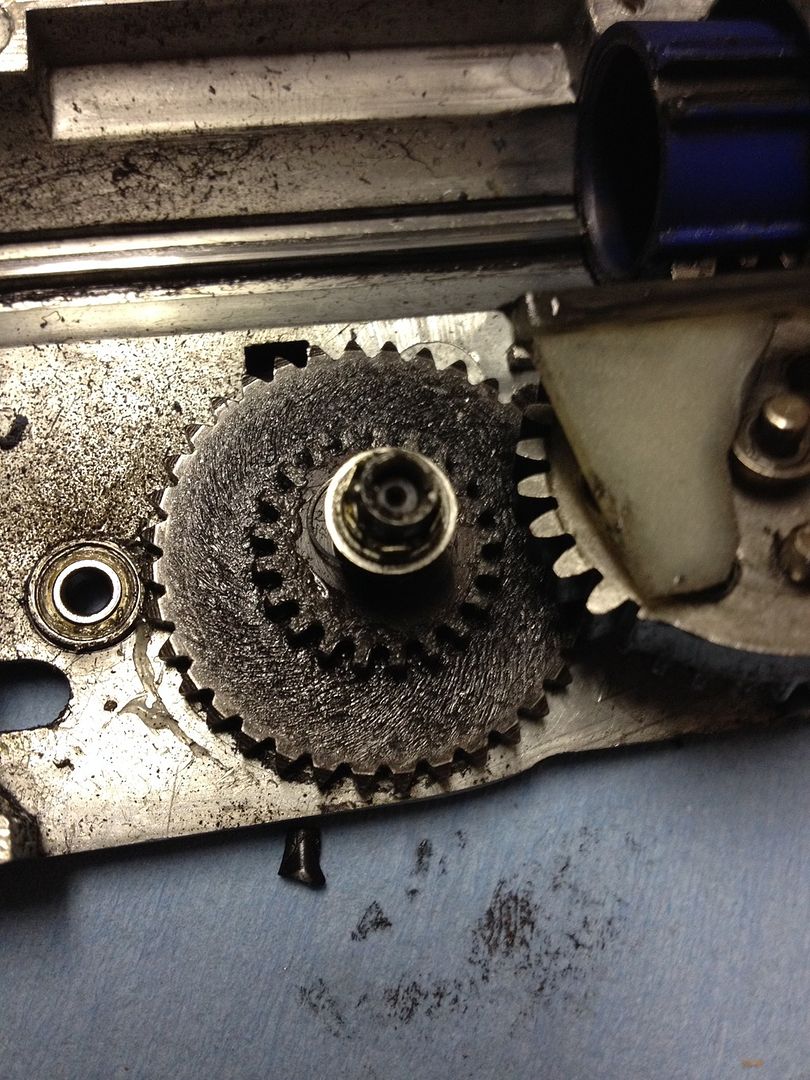 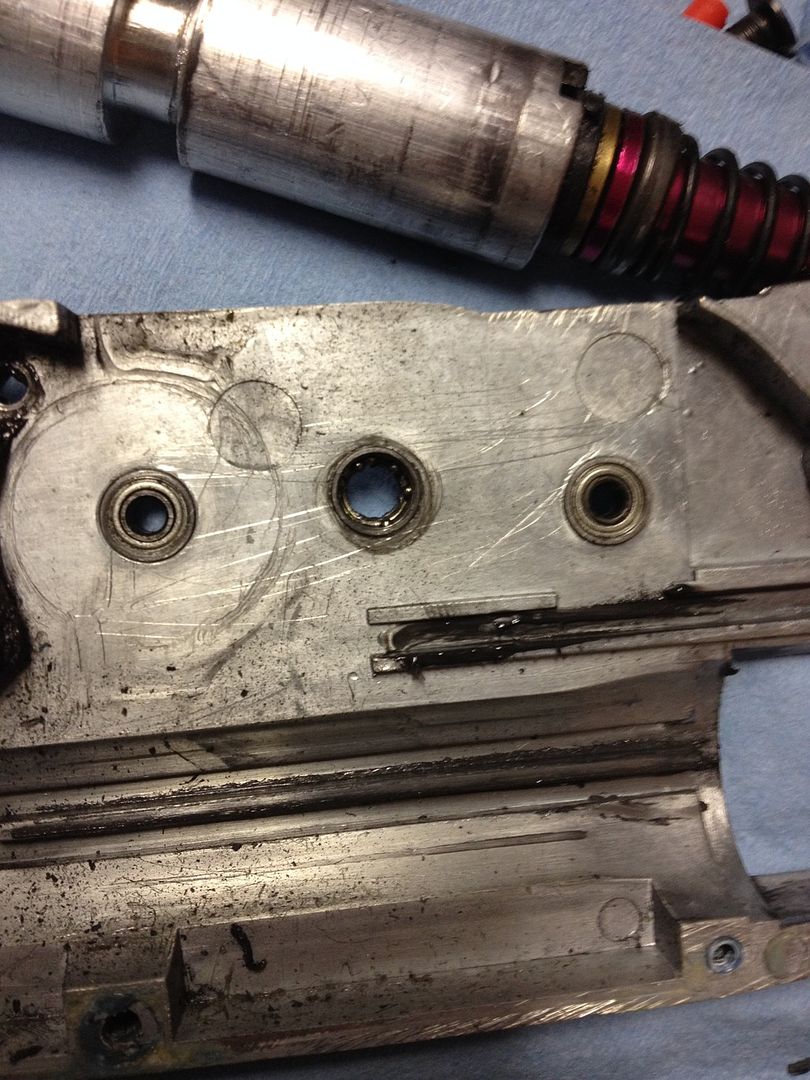 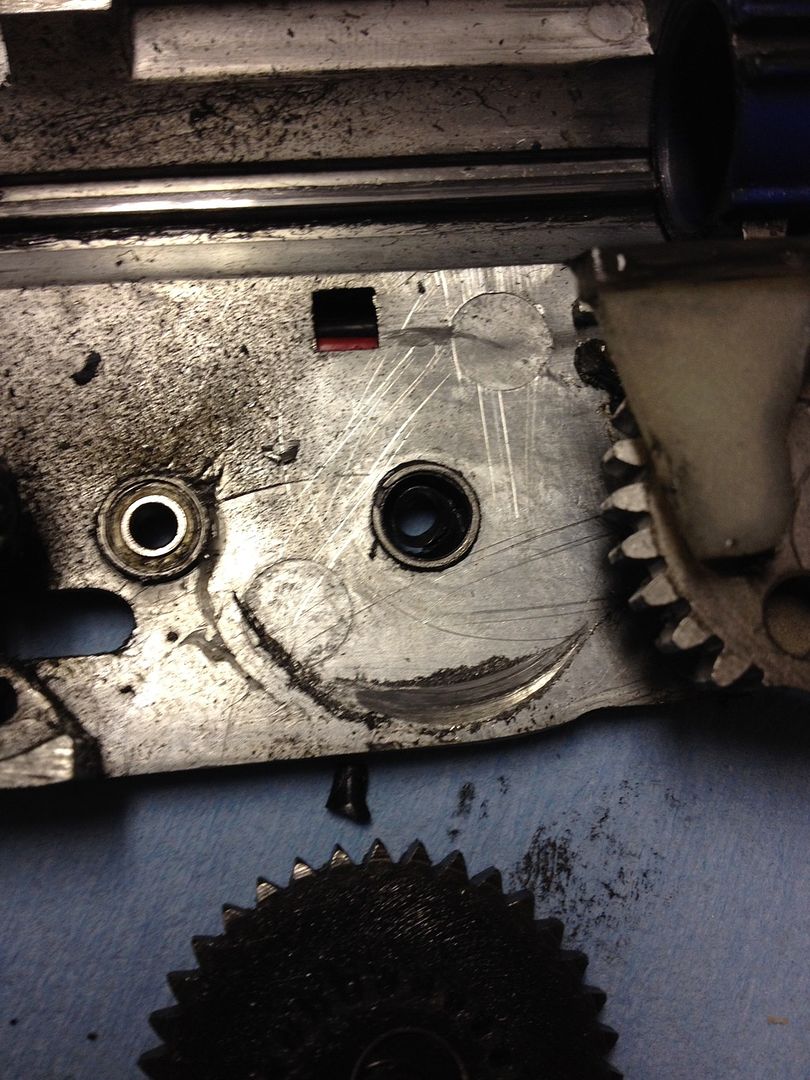 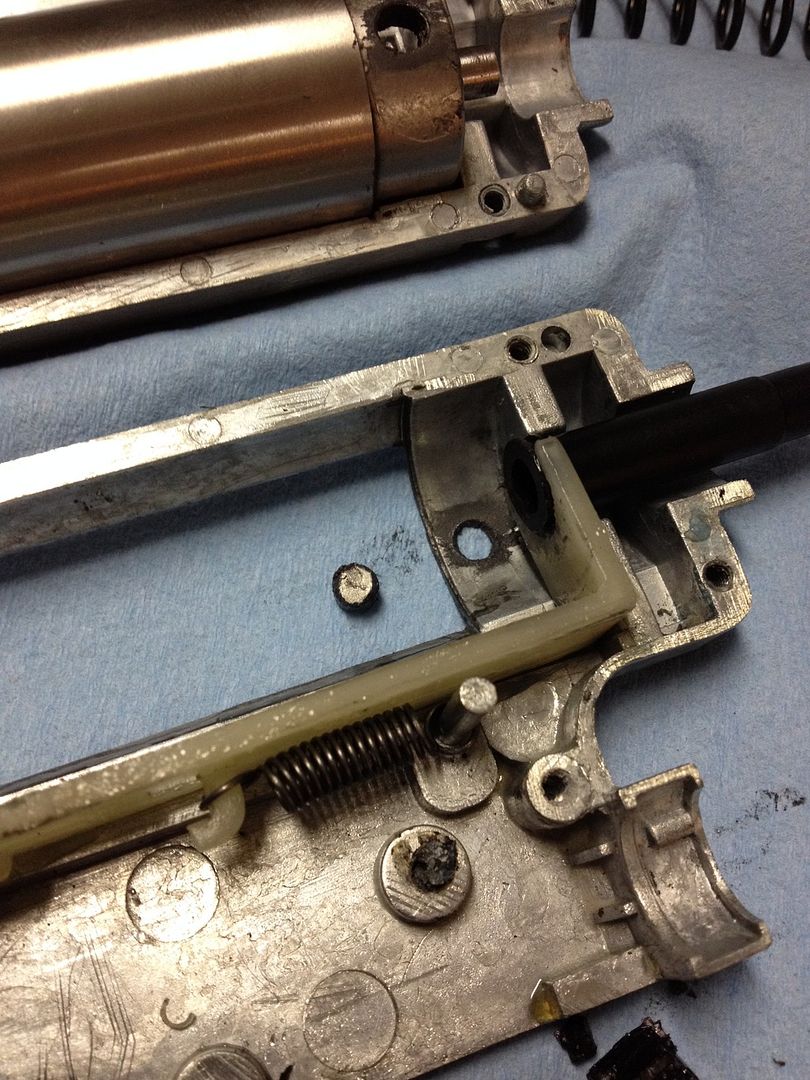 So, solutions... 1. Purchase a replacement gearbox. Unfortunately the Asian retailers were sold out, so I got gouged by Evike, even with the gearbox on sale lol. Cost over $100... 2. Matrix has a V2 one peice cylinder which looks like a better design. So I purchased that. 3. Replace bearings, at least on the Spur and Sector gears with bushings (not done yet) 4. Gut the gearbox and replace the internals with my upgraded ones. 5. Provide access to the anti-reversal latch for release prior to gun storage and in field if needed. The anti-reversal latch has caused me problems before and I'm sick of pulling the 4 screws to remove the gearbox. Especially when the box mag is attached and must be removed... Pics... On the plus side shimming it went much faster the 4th or 5th time round lol. 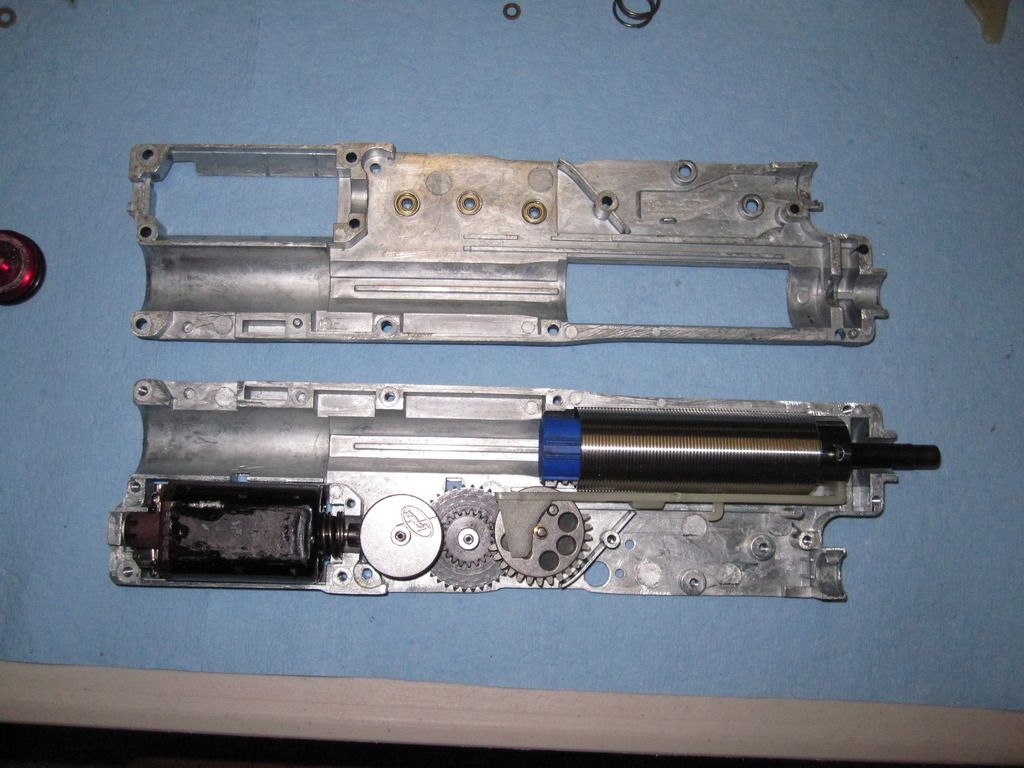 To solve the issue of the cylinder sliding back/forth I used a rubber 0-ring (not the one pictured as it was too big, but you get the idea) to take up the slack. There is zero movement in the cylinder now by hand. Any force will be cushioned by the o-ring and distributed to the front of the gearbox instead of the pins. 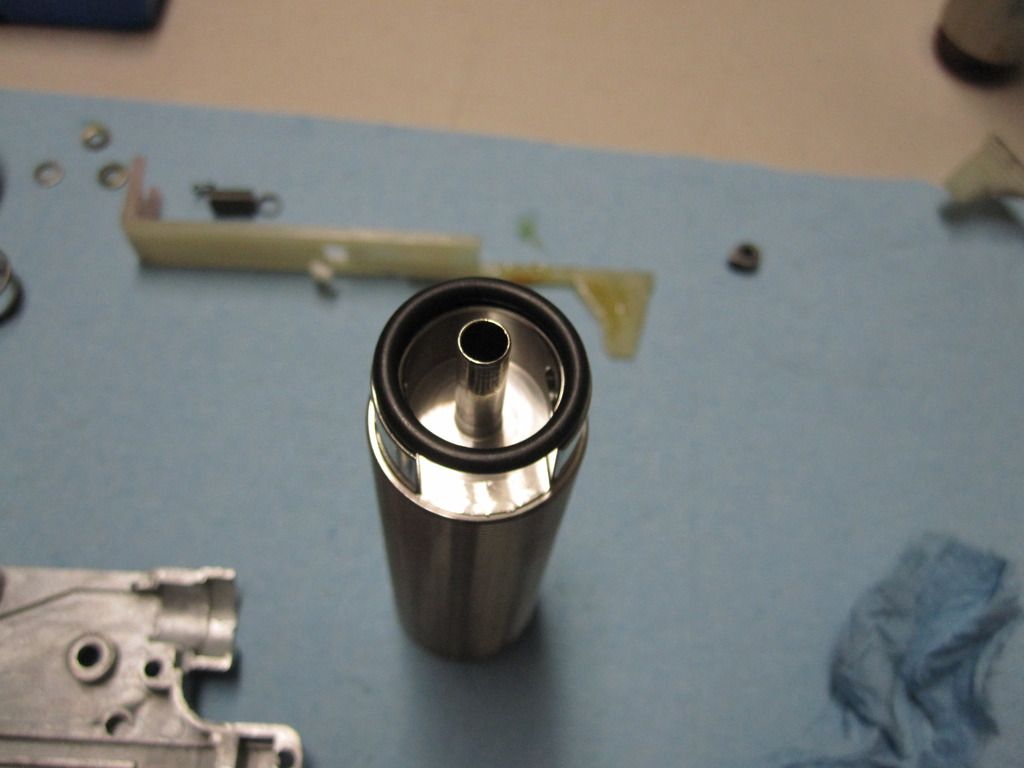 To access the anti-reversal latch I measured/marked it then drilled a 1/4" hole in the side of the gun body. This was then filled with a long Phillips head screw with the shaft of the screw cut down to length to suit, then painted. Hardly noticeable and easily removed/reinstalled. 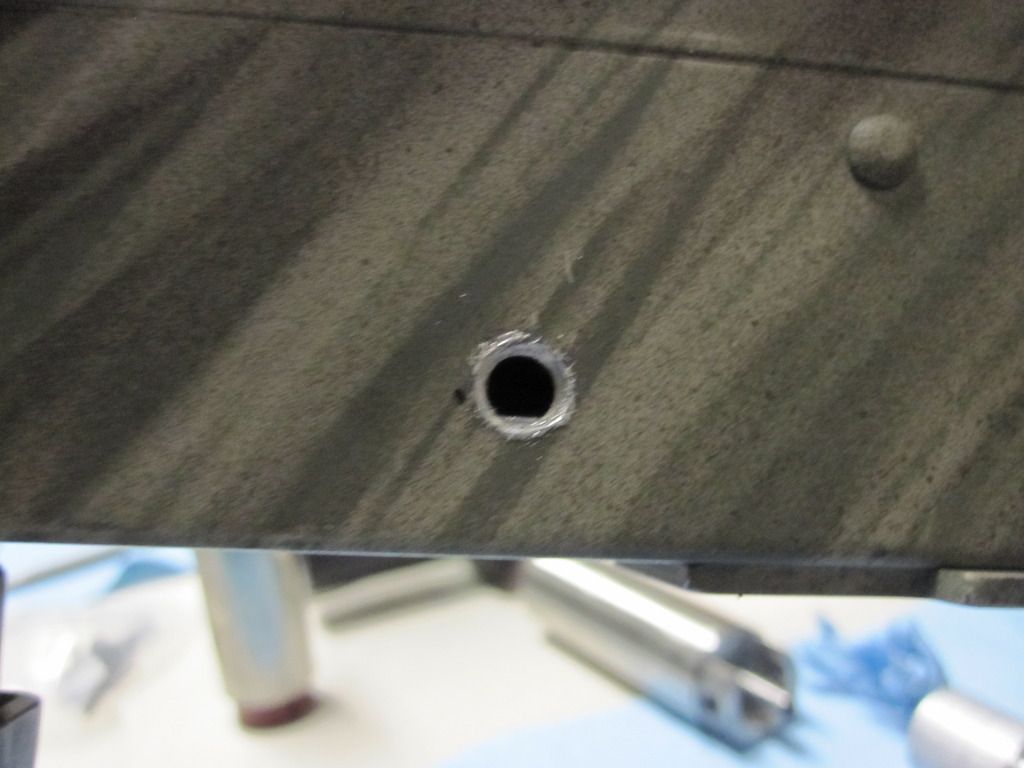 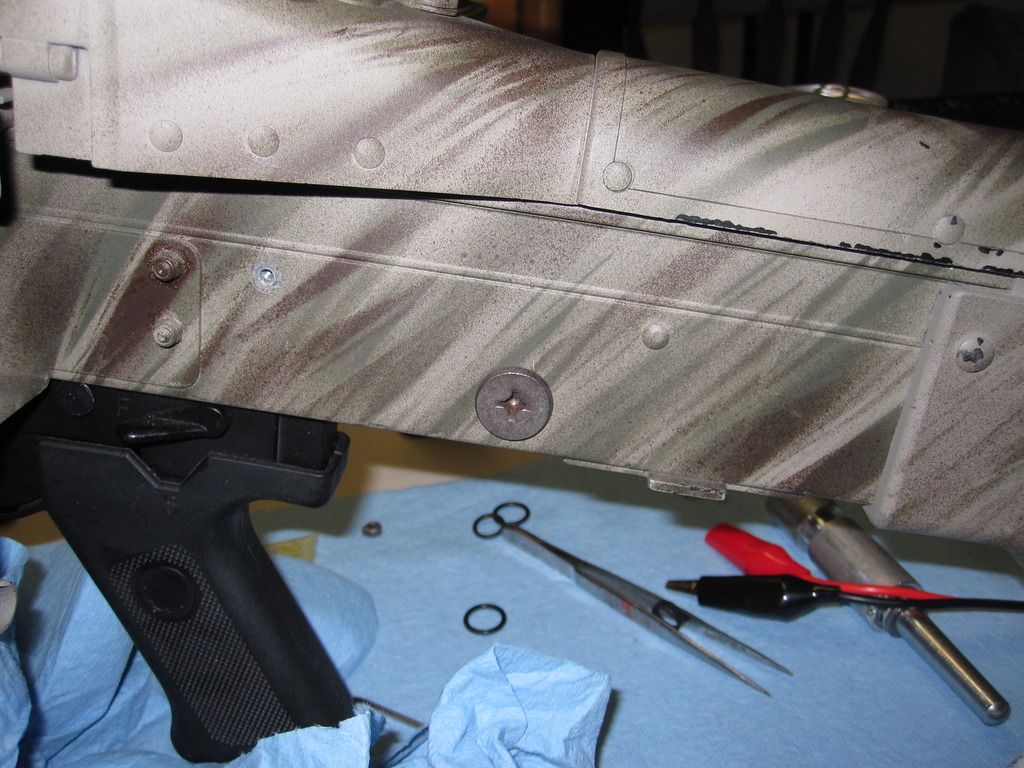 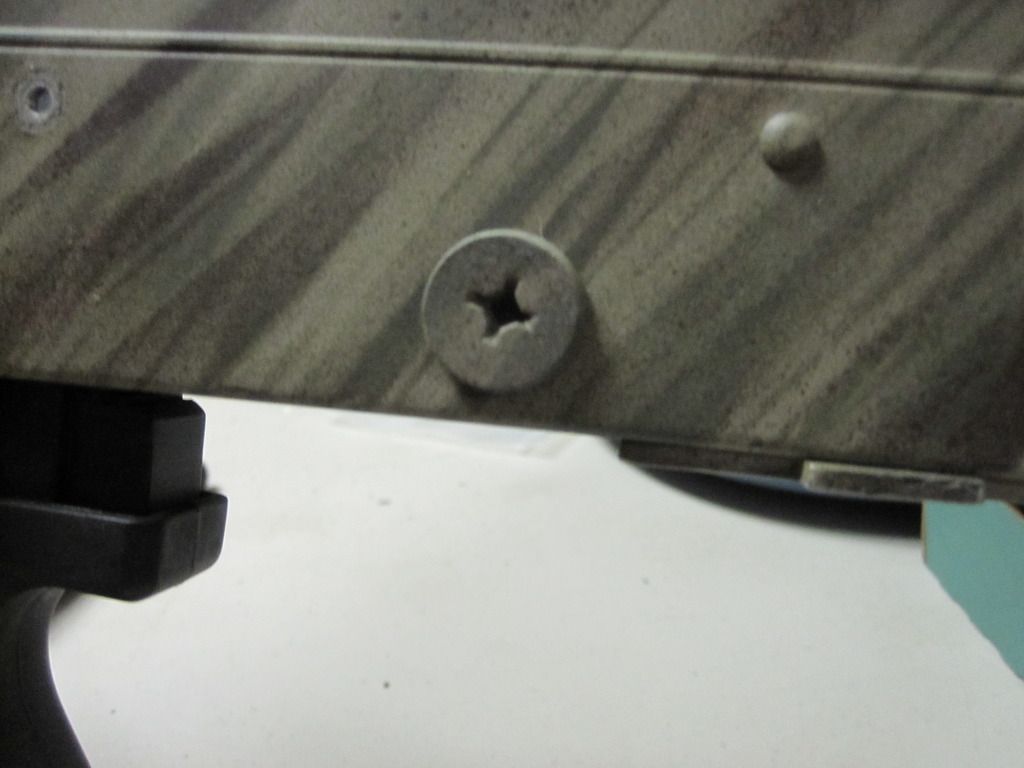
__________________
Last edited by Magwell; June 26th, 2015 at 03:20.. |
|
|
|
|
June 25th, 2015, 13:40
|
#29 |
|
|
This is a good write-up thread for anybody who is not only interested in the MK43 platform but some of the fixes/issues can be easily applied to A&K's other LMG lineup.
I would counsel you to just go full bushings on a setup like this since ROF/efficiency is not paramount.
__________________
The Steve has spoken. Last edited by EOD Steve; June 25th, 2015 at 13:52.. |
|
|
|
|
June 26th, 2015, 03:19
|
#30 | |
|
|
Quote:
And yes I think that is what I will ultimately end up doing. Bushings throughout for reliability and simplicity.
__________________
|
|
|
|
|
  |
|
||||||
| Bookmarks |
| Thread Tools | |
|
|
 |
|


