

|
|
|
|
|
||||||||
|
|
|||||||||
| Home | Forums | Register | Gallery | FAQ | Calendar |
| Retailers | Community | News/Info | International Retailers | IRC | Today's Posts |
 |
|
|
Thread Tools |
 December 19th, 2013, 22:45
|
#1 |
|
G&G MP5 Silencer Thread Adapter HOWTO!
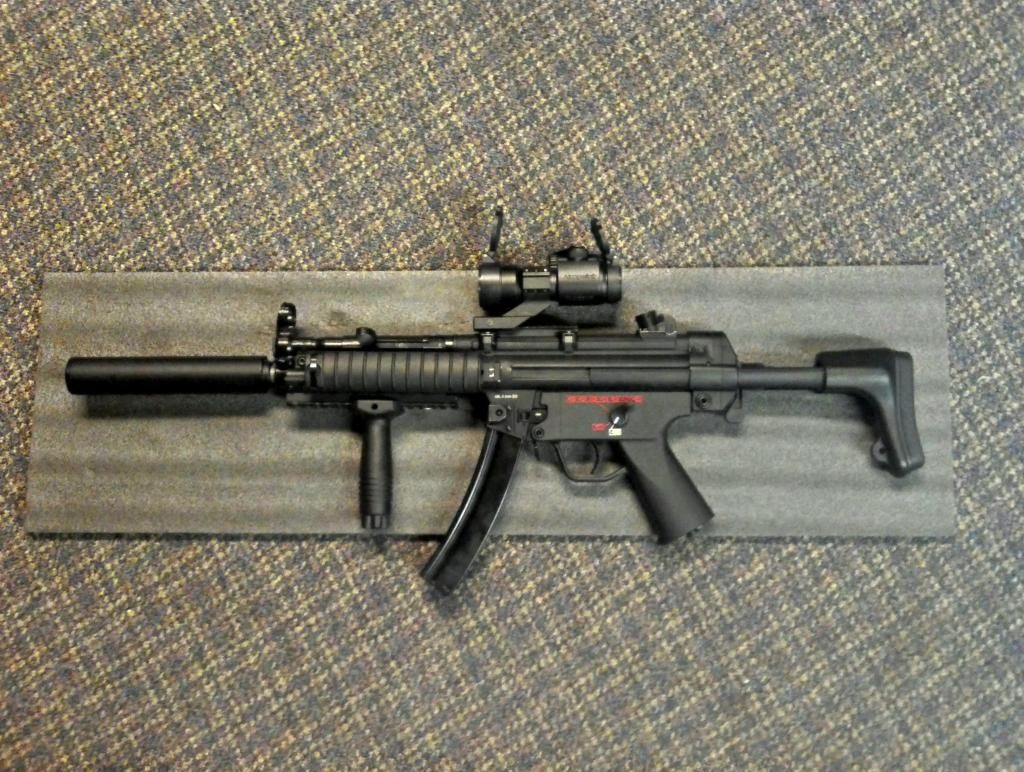
Are you sick and tired of the tri lug adapter on your mp5? Do you own a g&g mp5 and cant find a threaded adapter for a silencer? Do you want your gun to look like this?
 Well you can! Before you begin, there are a couple of things i want to clarify first. 1-  This adapter will not work, it does not have threads on the end that goes onto the outer barrel, and you cannot make your own in it because the hole is too big. 2- This is not an easy job, it requires quite a bit of work and skill to make it work. Be warned, you can brake your adapter, or the threads on the outer barrel if you mess it up, so do this at your own risk. You can do it yourself if you follow what i did and do your research before starting the task (Learn about thread pitches, learn about tapping your own threads, learn how to drill, etc). 3- I chose to change the thread pitch on the outerbarrel because i couldnt find the proper tap which is (M12x1.00mm) for the adapter, locally. 4- Instead of doing this yourself, you can find a local machine shop to do it for you. Just get the adapter, give him your outer barrel and adapter. Tell him to make the outer barrel's thread pitch to M12x1.25mm and tap a M12x1.25mm thread into the +14mm side of the adapter (The side that doesnt have the two notches on it). Items Required (Can all be bought at your local canadian tire/princess auto, with the exception of the adapter): King Arms Silencer Adapter-Marui MP5K PDW (14mm L, its the 14mm+ to 14mm-)  M12x1.25mm Tap  M12x1.25mm Die Tap Holder (The Black thing that looks like a socket in picture, it also requires a 3/8 ratchet to turn it. Or the handle version which is more common) 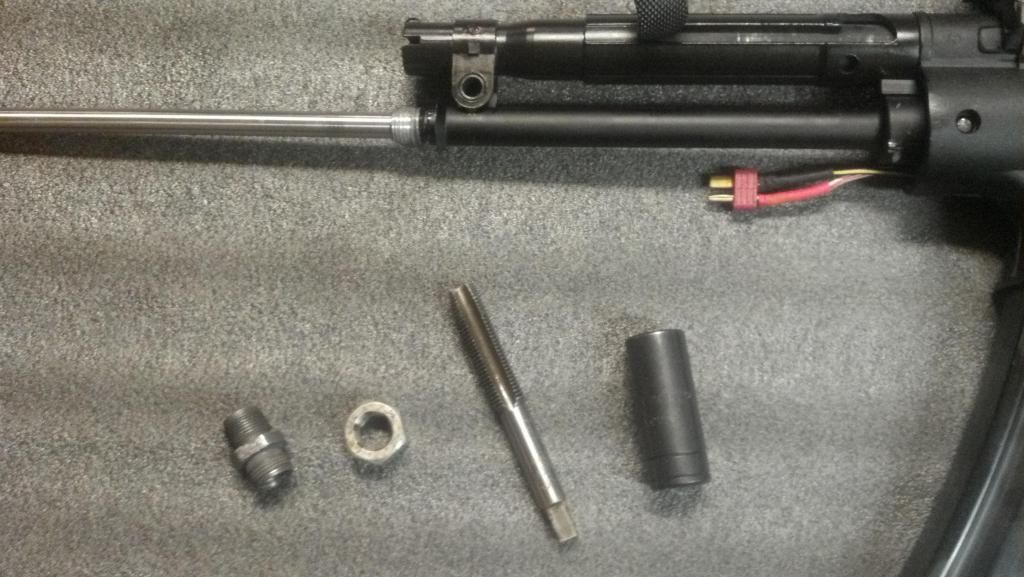 Die Holder (You have two choices at this point. Either take off the outer barrel and use a traditional holder, or find a wrench that fits your die so you can turn it in.)  My die (the silver nut looking thing in the picture) used a 19mm wrench. I also gripped the outer barrel and upper receiver together with my left hand together, while i was turning the die to prevent twisting of the barrel Table Top Vice  25/64" Drill Bit  Drill (I used a drill press i have at home, but it can be done with a hand drill and steady hands)  Oil for drilling (could be cooking oil, engine oil, silicone oil, w.e u have around) Dremel Or Grinder  Steps: 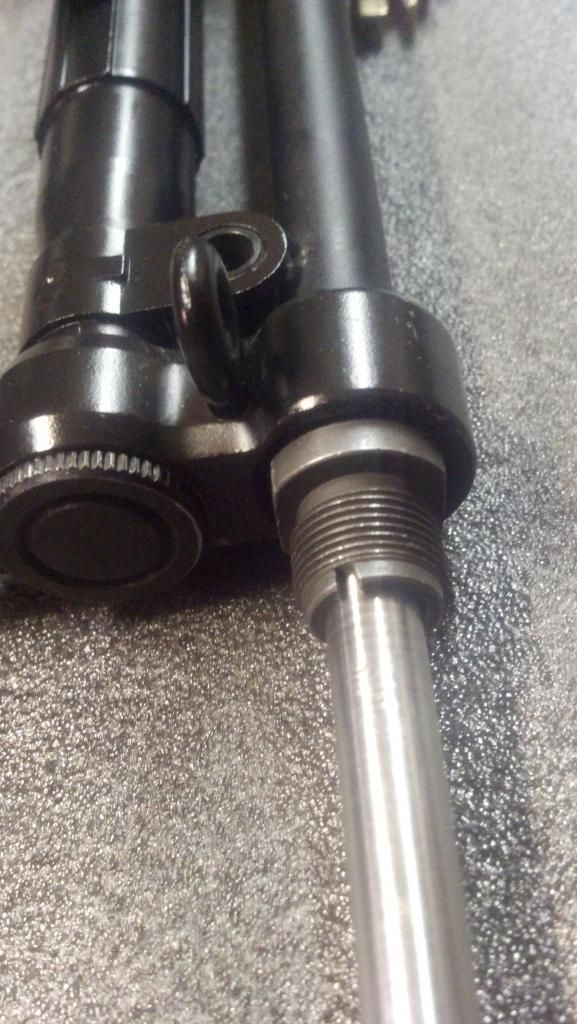 1) Notice how the adapter has a circular machined area between the two threaded parts, almost like a washer? You need to grind two flat surfaces parallel to each other so that the table vice can properly grip onto it. (If you see my picture, you notice that there is a flat part on it where its shiny and the paint has been grinded off, so therefore on the opposite side of the adapter it will have the exact same thing.) 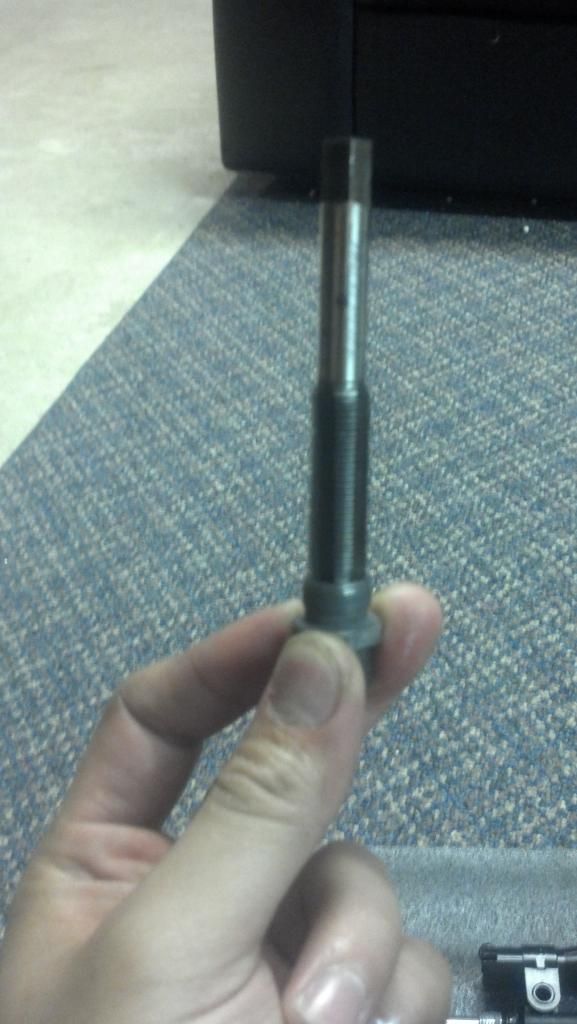 2) Now that you've grinded two flat surfaces on the adapter, hold it in place with the vice (Just imagine that tap is a drill bit, i didnt have pictures of it being drilled) and slowly enlarge the hole on the +14mm threaded side with the drill bit. Make sure to add oil as you are drilling and take it slowly. You should drill deep enough so that it just goes past the circular machined surface on the adapter. This ensures enough room for the tap to create the new threads. 3) Now with the hole enlarged, you can wash out the metal filings created from the drilling, and start to tap the threads in. Same as with drilling, you want to oil the adapter and tap when creating the threads (Again same picture, but imagine it on a vice lol). Slowly insert the tap and turn clockwise. It will take some time, so make sure you take it a couple threads at a time, back it off, clear off the metal filings and start again. 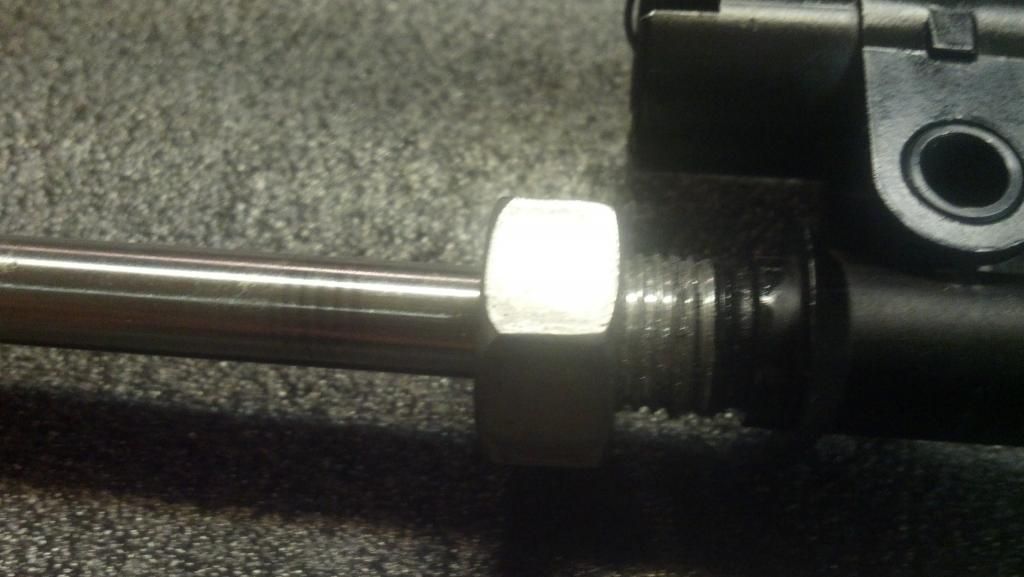 4) Now with the threads created in the adapter, you need to change the existing threads on the outer barrel with the m12x1.25 dye. To do this, take off the front sling pin, the tri lug adapter and the front sight. Then take your dye and slowly turn it onto the threads until you reach the bottom of the threads. It will be tough because you are physically changing the threads, but make sure to use oil and back it off every couple of turns just like the tap. And youre done! Test fit everything and adjust if needed. 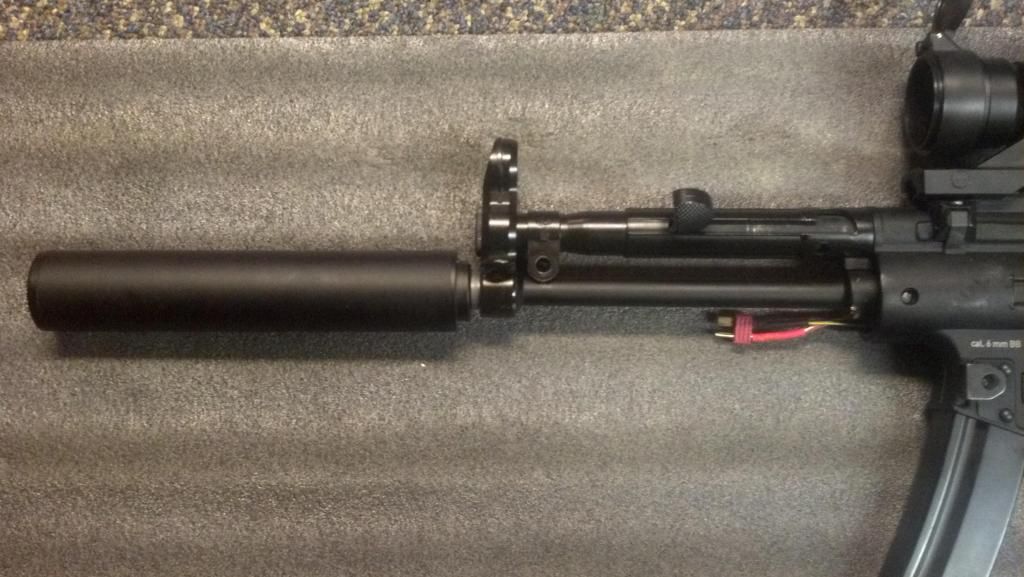 Tips: - You most likely wont get the correct drilling depth the first time around, so take your time and do it slowly. If you find that you dont have enough threads, drill the hole deeper into the adapter and chase the threads down again. - This job takes patience, so dont be surprised if it takes you a couple of attempts to get it right. Do it slowly, the last thing you want to do is drill the hole crooked, crack the adapter with the tap, or break your outerbarrel. Last edited by logitikes; December 19th, 2013 at 22:59.. |
|

|

|
|
August 15th, 2016, 21:19
|
#2 |
|
Cool tutorial. I'm just curious, how did you get the original 3-lug flash hider off? It seems to thread onto the outer barrel but I couldn't get it off. Which way does it twist/how did you get it off? Thanks
|
|
|
|
|
|
March 19th, 2017, 23:12
|
#3 |
|
Hey man nice post. I'm looking at putting that rail on my front wired MP5.. what do you use for batteries. Have you managed to find a battery that fits inside that rail?
Thanks Maverick |
|
|
|
|
 |
|
||||||
| Bookmarks |
|
|
 |
|


